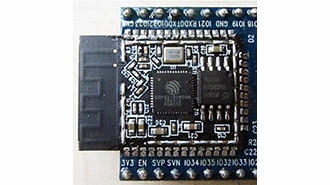
製造商零件編號 ESP32-S3-DEVKITC-1-N32R8V
ESP32-S3-WROOM-2-N32R8V DEV BRD
Espressif Systems
Zephyr officially supports a wide array of development boards. This is great if you are learning, tinkering, or prototyping. However, many embedded developers will ultimately want to build a custom PCB for their microcontroller to support their product/project. Because Zephyr builds applications for “boards” (instead of for a microcontroller or SoC, like other development packages), you will need to define a custom board for your project.
In this tutorial, we’ll explore how to create a custom board definition for the Zephyr RTOS and develop a simple application to demonstrate its functionality. We will define and configure a custom board, named "Nyan," based on the ESP32-S3 SoC. This process includes setting up board-specific files such as the device tree, configuration files, and metadata to ensure seamless integration with the Zephyr build system. Note that Zephyr has a great board porting guide that I recommend using as a reference.
To put our custom board definition into action, we’ll implement a simple LED-blinking application. This program initializes a GPIO pin connected to an LED, toggles its state on and off, and outputs the LED's state to the console at regular intervals. By the end of this guide, you’ll have a fully functional custom board definition and a working demo application, equipping you with the knowledge to adapt Zephyr for your own hardware projects.
All code for this Introduction to Zephyr series can be found here: https://github.com/ShawnHymel/introduction-to-zephyr
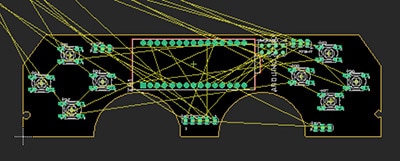
For this demonstration, we will be an LED connect to pin 13on the ESP32-S3-DevKitC. Here is a Fritzing diagram showing all of the connections we will use throughout this series:

To start, we will create a custom board definition package (collection of files) in the boards/ folder. Our custom board will be called “nyan,” and it will be built on the ESP32-S3 SoC. We need to define any custom Kconfig symbol and DeviceTree nodes as well as configure the defaults for both.
We will pretend that the DevKitC is a “custom” board for this example. In practice, you would need to change the configurations to support your board (e.g., custom PCB).
Create a new boards/custom/nyan folder in the workspace with the following files. By convention, Zephyr uses <vendor>
Note that the naming of these files is very important! Zephyr looks for specific filenames when defining a board and connecting to the appropriate board and System-on-a-Chip (SoC) drivers. Where you see “nyan” below, that should be the name of your board (and match everywhere it’s used in variables and filenames).
When we build our demo project, we’ll tell Zephyr where to find this out-of-tree board definition package.
/workspace/boards/custom/nyan/
├── Kconfig
├── Kconfig.nyan
├── board.cmake
├── board.yml
├── nyan-pinctrl.dtsi
├── nyan_procpu.dts
└── nyan_procpu_defconfig
Optional. This file defines configuration options specific to the board. These options are made available in the menuconfig or guiconfig tools, enabling users to customize the behavior of the board, peripherals, or specific features during the build process.
config HEAP_MEM_POOL_ADD_SIZE_BOARD
    int
    default 4096
Required. This file complements the primary Kconfig by defining options or menus unique to the "nyan" board. It might include custom hardware configurations or features exclusive to your board that are not part of the standard Zephyr configuration options.
config BOARD_NYAN
    select SOC_ESP32S3_WROOM_N8
    select SOC_ESP32S3_PROCPU if BOARD_NYAN_ESP32S3_PROCPU
Optional. This file is needed for specifying build system configurations specific to the board. It ensures that the correct compiler flags, linker scripts, and other build-related settings are applied when building Zephyr for the custom board. It serves as the glue between the board definition and Zephyr’s CMake-based build system.
include(${ZEPHYR_BASE}/boards/common/esp32.board.cmake)
Required. This YAML file provides metadata about the custom board, such as its name, vendor, and associated system-on-chip (SoC). In your case, it specifies that the board is named "nyan," is a custom board, and uses the ESP32-S3 SoC. This file is used by Zephyr to manage board definitions and provides essential details for documentation and tooling.
board:
  name: nyan
  full_name: Nyan
  vendor: custom
  socs:
  - name: esp32s3
Optional. The Device Tree Include (DTSI) file defines the pin control settings for the board. It specifies how pins are allocated and configured, such as GPIO settings, alternate functions, or specific hardware peripheral mappings. This file ensures the correct initialization and functionality of the board's pins. We borrowed these settings from the ESP32-S3-DevKitC DTSI file, but we’re assigning the bare minimum pins to get the LED and UART working for our demo.
#include <zephyr/dt-bindings/pinctrl/esp-pinctrl-common.h>
#include <dt-bindings/pinctrl/esp32-pinctrl.h>
#include <zephyr/dt-bindings/pinctrl/esp32s3-gpio-sigmap.h>
&pinctrl {
uart0_default: uart0_default {
group1 {
pinmux = <UART0_TX_GPIO43>;
output-high;
};
group2 {
pinmux = <UART0_RX_GPIO44>;
bias-pull-up;
};
};
};
Required. The Device Tree Source (DTS) file defines the hardware layout and configuration for the board. It describes the processors, memory, peripherals, buses, and their connections. This file is central to ensuring the Zephyr kernel understands how to interact with the board's hardware. We are assigning the bare minimum property values to get the LED and UART working on our board. If you wish to enable other peripherals, you will need to modify the DeviceTree (here or in your overlay file).
We include the nyan-pinctrl.dtsi file here to demonstrate how includes work, but you could have just configured the pinctrl node in this file instead.
/dts-v1/;
#include "espressif/esp32s3/esp32s3_wroom_n8.dtsi"
#include "nyan-pinctrl.dtsi"
#include <zephyr/dt-bindings/input/input-event-codes.h>
#include <espressif/partitions_0x0_amp.dtsi>
/ {
model = "Nyan PROCPU";
compatible = "espressif,esp32s3";
aliases {
watchdog0 = &wdt0;
led-0 = &led0;
uart-0 = &uart0;
sw0 = &button0;
};
chosen {
zephyr,sram = &sram0;
zephyr,console = &uart0;
zephyr,shell-uart = &uart0;
zephyr,flash = &flash0;
zephyr,code-partition = &slot0_partition;
};
buttons {
compatible = "gpio-keys";
button0: button_0 {
gpios = <&gpio0 0 (GPIO_PULL_UP | GPIO_ACTIVE_LOW)>;
label = "Boot Button";
zephyr,code = <INPUT_KEY_0>;
};
};
led {
compatible = "gpio-leds";
led0: d13 {
gpios = <&gpio0 13 GPIO_ACTIVE_HIGH>;
};
};
};
&uart0 {
status = "okay";
current-speed = <115200>;
pinctrl-0 = <&uart0_default>;
pinctrl-names = "default";
};
&gpio0 {
status = "okay";
};
&wdt0 {
status = "okay";
};
Optional. This file contains default Kconfig settings for the "nyan" board. It serves as a starting point, pre-selecting options and parameters needed to build and run Zephyr successfully on the board. These default values can be overridden during the build process as needed (e.g., in a .conf file unique to your project).
CONFIG_MAIN_STACK_SIZE=2048
CONFIG_CONSOLE=y
CONFIG_SERIAL=y
CONFIG_UART_CONSOLE=y
CONFIG_GPIO=y
CONFIG_CLOCK_CONTROL=y
We will return to our roots to create a simple blinking LED application to test our custom board definition.
Create a new project directory structure. Note the lack of .overlay file here: we are assuming that the LED is part of our custom board (as we defined it in nyan_procpu.dts).
/workspace/apps/11_demo_wifi/
├─ src/
│  └─ main.c
├─ CMakeLists.txt
└─ prj.conf
We will use the same boilerplate CMakeLists.txt file that we’ve been using for most of the series:
cmake_minimum_required(VERSION 3.22.0)

find_package(Zephyr REQUIRED HINTS $ENV{ZEPHYR_BASE})
project(button_demo)

target_sources(app PRIVATE src/main.c)
Leave this file empty. We already defined and configured the necessary Kconfig symbols in our board definition files.
Here, our application code is the same as the first blinky demo we made! The only difference is that we use the node alias “led_0” (as defined in nyan_procpu.dts) instead of “my_led.”
#include <stdio.h>
#include <zephyr/kernel.h>
#include <zephyr/drivers/gpio.h>

// Settings
static const int32_t sleep_time_ms = 1000;
static const struct gpio_dt_spec led = GPIO_DT_SPEC_GET(DT_ALIAS(led_0), gpios);

int main(void)
{
    int ret;
    int state = 0;

    // Make sure that the GPIO was initialized
    if (!gpio_is_ready_dt(&led)) {
        return 0;
    }

    // Set the GPIO as output
    ret = gpio_pin_configure_dt(&led, GPIO_OUTPUT);
    if (ret < 0) {
        return 0;
    }

    // Do forever
    while (1) {

        // Change the state of the pin and print
        state = !state;
        printk("LED state: %d\r\n", state);

        // Set pin state
        ret = gpio_pin_set_dt(&led, state);
        if (ret < 0) {
            return 0;
        }

        // Sleep
        k_msleep(sleep_time_ms);
    }

    return 0;
}
In the Docker container, build the demo application. Note that we do not need to include an overlay or conf file, as we (in theory) setup the necessary items in our custom board definition!
cd /workspace/apps/10_demo_display/
west build -p always -b esp32s3_devkitc/esp32s3/procpu
On your host computer, flash the application (replace <PORT>
python -m esptool --port "<PORT>" --chip auto --baud 921600 --before default_reset --after hard_reset write_flash -u --flash_size detect 0x0 workspace/apps/09_solution_workqueue/build/zephyr/zephyr.bin
After flashing completes, open a serial port:
python -m serial.tools.miniterm "<PORT> " 115200
You should see the LED blinking on your board:

You should also see the LED state being printed to the terminal:

Let’s pretend that your new, shiny, custom board has a built-in LCD, and that LCD happens to use an ST7735R driver chip. Your challenge is to create a new custom board package that enables the LCD driver and any required LVGL subsystems to animate the board, just like you did in part 10. Any Kconfig and Devicetree options should be placed in the custom board definition files (and NOT in any .conf or .overlay files!).

You can find my solution here:
Creating a custom board definition is a crucial step when working with Zephyr RTOS because it allows you to tailor the system to your specific hardware. Zephyr uses board definitions to understand the unique configuration of a device, including its peripherals, pin mappings, and system-on-chip (SoC) features. Without this definition, Zephyr cannot effectively communicate with the hardware, making it impossible to take full advantage of its capabilities.
The following material can be used if you want to dive deeper into board porting:
If a microcontroller (or microprocessor) is not supported in Zephyr, I recommend checking out the following guides. Adding support for an MCU or MPU can be a difficult undertaking, so it’s often recommended to use one of the officially supported SoCs when you are getting started with Zephyr.