製造商零件編號 ESP32-S3-DEVKITC-1-N32R8V
ESP32-S3-WROOM-2-N32R8V DEV BRD
Espressif Systems
Using a graphical user interface (GUI) on embedded devices has historically been challenging due to hardware constraints. However, libraries like LVGL (Light and Versatile Graphics Library) have revolutionized the way developers can build sleek, interactive, and highly functional GUIs even on resource-limited systems. By integrating LVGL with Zephyr RTOS, we can leverage Zephyr’s robust real-time capabilities alongside LVGL’s graphics processing to create applications for a wide range of embedded platforms.
LVGL is a lightweight, open-source graphics library designed specifically for microcontrollers. It is highly customizable and modular, making it suitable for devices with minimal memory and processing power. Its rich feature set includes support for multiple screen resolutions, anti-aliased drawing, custom themes, animations, and input devices like touchscreens or buttons. LVGL also provides widgets like labels, buttons, sliders, and graphs, which streamline the process of designing complex GUIs. These features, combined with its minimal resource usage, make LVGL a powerful tool for embedded applications.
For this tutorial, we’ll use the ST7735R driver that comes bundled with Zephyr RTOS to create a GUI application. The ST7735R is a small, low-cost SPI display controller commonly found in color LCD modules. It supports resolutions up to 160x128 and provides features like programmable gamma curves and hardware inversion. Zephyr’s display API provides a common interface for such drivers, which can make your application code portable (to work across a variety of displays).
While you can write your own driver, I highly recommend using one of Zephyr’s officially supported display drivers to make this process easier. I’ll show you how to configure the ST7335R driver using the Devicetree below.
Code for this Zephyr series can be found here: https://github.com/ShawnHymel/introduction-to-zephyr
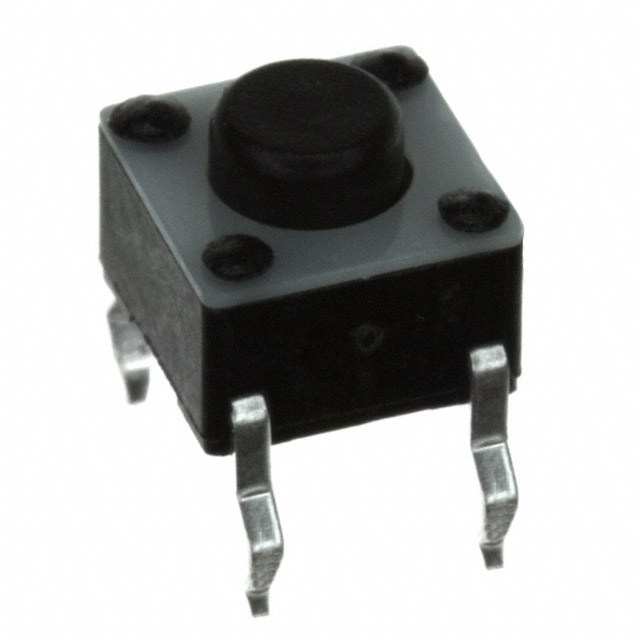
For this demonstration, we will use a button connected to pin 5 on the ESP32-S3-DevKitC. Here is a Fritzing diagram showing all of the connections we will use throughout this series:

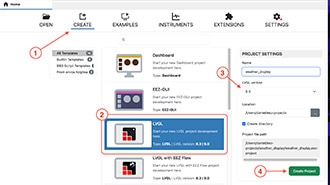
Create a new project directory structure:
/workspace/apps/10_demo_display/
├─ boards/
│ └─ esp32s3_devkitc.overlay
├─ src/
│ └─ main.c
├─ CMakeLists.txt
└─ prj.conf
We will use the same boilerplate CMakeLists.txt file that we’ve been using for most of the series:
cmake_minimum_required(VERSION 3.22.0)
find_package(Zephyr REQUIRED HINTS $ENV{ZEPHYR_BASE})
project(button_demo)
target_sources(app PRIVATE src/main.c)
prj.conf
We need to configure a number of software components to enable LVGL. Note that we enable LV_CONF_MINIMAL, which disables all LVGL widgets by default. We then enable only the widgets we want (which includes labels and lines for this demo).
# Needed for display and LVGL (prevent stack overflow and crash)
CONFIG_MAIN_STACK_SIZE=4096
# Enable display driver (ST7735R)
CONFIG_DISPLAY=y
# Configure LVGL
CONFIG_LVGL=y
CONFIG_LV_MEM_CUSTOM=y
CONFIG_LV_Z_BITS_PER_PIXEL=16
CONFIG_LV_COLOR_16_SWAP=y
CONFIG_LV_Z_MEM_POOL_SIZE=8192
# Enable LVGL widgets
CONFIG_LV_CONF_MINIMAL=y
CONFIG_LV_USE_LABEL=y
CONFIG_LV_LABEL_TEXT_SELECTION=y
CONFIG_LV_LABEL_LONG_TXT_HINT=y
CONFIG_LV_USE_LINE=y
We need to enable and configure the ST7735R in the Devicetree:
#include <zephyr/dt-bindings/mipi_dbi/mipi_dbi.h>

/ {
    chosen {
        zephyr,display = &st7735r_160x80;
    };

    mipi_dbi {
        compatible = "zephyr,mipi-dbi-spi";
        spi-dev = <&spi2>;
        dc-gpios = <&gpio0 18 GPIO_ACTIVE_HIGH>;
        reset-gpios = <&gpio0 8 GPIO_ACTIVE_LOW>;
        #address-cells = <1>;
        #size-cells = <0>;

        st7735r_160x80: st7735r@0 {
            compatible = "sitronix,st7735r";
            reg = <0>;
            mipi-max-frequency = <20000000>;
			mipi-mode = <MIPI_DBI_MODE_SPI_4WIRE>;
			reg = <0>;
			width = <160>;
			height = <80>;
			inversion-on;
			rgb-is-inverted;
			x-offset = <1>;
			y-offset = <26>;
			pwctr1 = [A2 02 84];
			pwctr2 = [C5];
			pwctr3 = [0A 00];
			pwctr4 = [8A 2A];
			pwctr5 = [8A EE];
			invctr = <7>;
			frmctr1 = [01 2C 2D];
			frmctr2 = [01 2C 2D];
			frmctr3 = [01 2C 2D 01 2C 2D];
			vmctr1 = <14>;
			gamctrp1 = [02 1C 07 12 37 32 29 2D 29 25 2B 39 00 01 03 10];
			gamctrn1 = [03 1D 07 06 2E 2C 29 2D 2E 2E 37 3F 00 00 02 10];
			colmod = <5>;
			/* Set D3 (RGB) bit to 1. LV_COLOR_16_SWAP is enabled by default */
			madctl = <184>; /* Set to <120> to rotate the image 180 degrees. */
			caset = [00 01 00 a0];
			raset = [00 1a 00 69];
        };
    };
};

&spi2 {
    pinctrl-0 = <&spi2_custom_pins>;
    status = "okay";
};

&pinctrl {
    spi2_custom_pins: spi2_custom_pins {
		group1 {
			pinmux = <SPIM2_MISO_GPIO11>,
				 <SPIM2_SCLK_GPIO12>,
				 <SPIM2_CSEL_GPIO9>;
		};
		group2 {
			pinmux = <SPIM2_MOSI_GPIO10>;
			output-low;
		};
	};
};
Here is the complete application code for our display demonstration:
#include <zephyr/kernel.h>
#include <zephyr/drivers/display.h>
#include <lvgl.h>
#include <string.h>

// Settings
static const int32_t sleep_time_ms = 50;        // Target 20 FPS

int main(void)
{
    uint32_t count = 0;
    char buf[11] = {0};
    const struct device *display;
    lv_obj_t *hello_label;
    lv_obj_t *counter_label;
    lv_obj_t *rect;
    lv_obj_t *circle;
    lv_style_t rect_style;
    lv_style_t circle_style;
    lv_point_t rect_points[5] = { {0, 0}, {120, 0}, {120, 20}, {0, 20}, {0, 0} };
    const uint32_t circle_radius = 15;

    // Initialize the display
    display = DEVICE_DT_GET(DT_CHOSEN(zephyr_display));
    if (!device_is_ready(display)) {
        printk("Error: display not ready\r\n");
        return 0;
    }

    // Create a static label widget
    hello_label = lv_label_create(lv_scr_act());
    lv_label_set_text(hello_label, "Hello, World!");
    lv_obj_align(hello_label, LV_ALIGN_TOP_MID, 0, 5);

    // Create a dynamic label widget
    counter_label = lv_label_create(lv_scr_act());
    lv_obj_align(counter_label, LV_ALIGN_BOTTOM_MID, 0, 0);

    // Set line style
    lv_style_init(&rect_style);
    lv_style_set_line_color(&rect_style, lv_color_hex(0x0000FF));
    lv_style_set_line_width(&rect_style, 3);

    // Create a rectangle out of lines
    rect = lv_line_create(lv_scr_act());
    lv_obj_add_style(rect, &rect_style, 0);
    lv_line_set_points(rect,
                       rect_points,
                       sizeof(rect_points) / sizeof(rect_points[0]));
    lv_obj_align(rect, LV_ALIGN_TOP_MID, 0, 0);

    // Set circle style
    lv_style_init(&circle_style);
    lv_style_set_radius(&circle_style, circle_radius);
    lv_style_set_bg_opa(&circle_style, LV_OPA_100);
    lv_style_set_bg_color(&circle_style, lv_color_hex(0xFF0000));

    // Create an object with the new style
    circle = lv_obj_create(lv_scr_act());
    lv_obj_set_size(circle, circle_radius * 2, circle_radius * 2);
    lv_obj_add_style(circle, &circle_style, 0);
    lv_obj_align(circle, LV_ALIGN_CENTER, 0, 5);

    // Disable display blanking
    display_blanking_off(display);

    // Do forever
    while (1) {

        // Update counter label every second
        count++;
        if ((count % (1000 / sleep_time_ms)) == 0) {
            sprintf(buf, "%d", count / (1000 / sleep_time_ms));
            lv_label_set_text(counter_label, buf);
        }

        // Must be called periodically
        lv_task_handler();

        // Sleep
        k_msleep(sleep_time_ms);
    }
}
In the Docker container, build the demo application:
cd /workspace/apps/10_demo_display/
west build -p always -b esp32s3_devkitc/esp32s3/procpu -- -DDTC_OVERLAY_FILE=boards/esp32s3_devkitc.overlay
On your host computer, flash the application (replace < PORT>
python -m esptool --port "<PORT>" --chip auto --baud 921600 --before default_reset --after hard_reset write_flash -u --flash_size detect 0x0 workspace/apps/09_solution_workqueue/build/zephyr/zephyr.bin
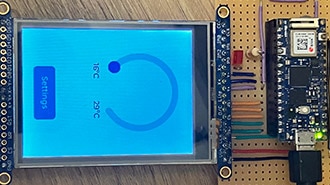
You should see text, a circle, and a counter appear on your connected LCD:

If you would like to take this demo further, try animating the red circle so that it moves horizontally across the screen once per second! You can find my solution here: https://github.com/ShawnHymel/introduction-to-zephyr/tree/main/workspace/apps/10_solution_animation
By combining the flexibility of LVGL's graphics rendering with Zephyr’s robust RTOS features, you can create highly responsive and visually appealing applications. This tutorial serves as a foundation for exploring more advanced features, enabling you to build dynamic and user-friendly interfaces for your embedded projects.
If you would like to learn more about displays in Zephyr, check out the following materials: