ESP32 WhatsApp Alerts Without a SIM Card
2026-05-11 | By Rinme Tom
License: General Public License Arduino
The Espressif Systems ESP32 is a favorite among makers because it combines processing power, Wi-Fi, and Bluetooth in a compact and affordable module. One of the most useful capabilities of an internet-connected microcontroller is sending notifications when something important happens.
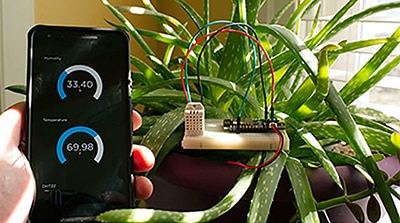
In this ESP32 WhatsApp Notification project, we’ll build a simple temperature monitor that sends a WhatsApp alert whenever the temperature exceeds a preset limit. The ESP32 reads data from a DHT11 sensor, connects to Wi-Fi, and sends an HTTPS request to the CircuitDigest Cloud WhatsApp API. The cloud service formats the message and delivers it to your phone using WhatsApp—no SIM card, GSM module, or paid WhatsApp Business account required.
This same technique can be used for motion alarms, water-level warnings, equipment monitoring, and countless other IoT projects.
Why Use WhatsApp for IoT Notifications?
Most people check WhatsApp more often than email or SMS. That makes it a practical notification channel for projects that need to get your attention quickly.
Some examples include:
Temperature alerts for server rooms or greenhouses
Motion detection and security systems
Water tank overflow warnings
Battery or power-failure notifications
Equipment maintenance reminders
Because the ESP32 sends data over Wi-Fi, the system works anywhere with internet access.
How the System Works
The workflow is straightforward:
The ESP32 connects to your Wi-Fi network.
It reads temperature and humidity from the DHT11 sensor.
If the temperature exceeds a threshold (for example, 30°C), the ESP32 builds a JSON message.
The board sends the message securely over HTTPS to CircuitDigest Cloud.
The cloud service verifies your API key and sends the WhatsApp message to your registered number.
The free tier currently supports up to five linked phone numbers and approximately 100 messages per month, which is enough for most personal projects.
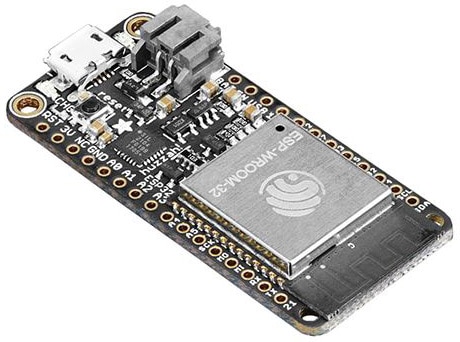
Parts Required
ESP32 DevKit V1 or any Wi-Fi-enabled ESP32 board
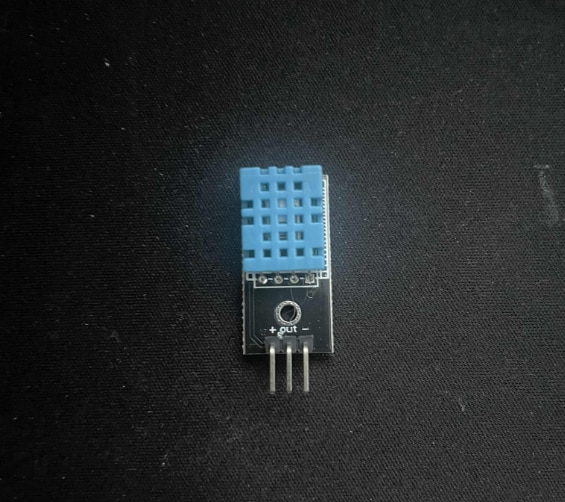
Wiring the DHT11 to the ESP32
Connect the DHT11 as follows:
VCC → 5V
GND → GND
DATA → GPIO 23
If your sensor module includes a pull-up resistor, no additional components are required.
Create Your Free API Key
To send WhatsApp messages, you’ll need an API key from CircuitDigest Cloud.
Open CircuitDigest Cloud and create a free account.
Navigate to Account → API Key.
Generate a new API key.
Open the WhatsApp Notification API section.
Add and verify the phone numbers that should receive alerts.
Only verified numbers can receive notifications.
Understanding Message Templates
WhatsApp requires pre-approved message templates. Instead of sending raw text, you select a template and provide the variable values.
For example, the threshold_violation_alert template might produce a message like:
Alert from Living Room Temp Node
Parameter: Temperature
Measured Value: 31.5°C
Configured Limit: 30°C
Location: Lab
Your ESP32 only sends the values. The cloud platform assembles the final message.
Arduino Code
Install the following libraries from the Arduino IDE Library Manager:
DHT sensor library by Adafruit
Then upload this sketch.
#include <WiFi.h>
#include <WiFiClientSecure.h>
#include <DHT.h>

#define DHTPIN 23
#define DHTTYPE DHT11
#define TEMP_LIMIT 30.0
#define COOLDOWN_MS 15000

const char* ssid = "YOUR_WIFI_SSID";
const char* password = "YOUR_WIFI_PASSWORD";
const char* apiKey = "YOUR_API_KEY";

const char* host = "www.circuitdigest.cloud";
const int httpsPort = 443;

DHT dht(DHTPIN, DHTTYPE);
WiFiClientSecure client;

unsigned long lastSentTime = 0;

void connectWiFi() {
  WiFi.begin(ssid, password);
  Serial.print("Connecting to WiFi");

  while (WiFi.status() != WL_CONNECTED) {
    delay(500);
    Serial.print(".");
  }

  Serial.println("\nConnected!");
}

void sendWhatsApp(float temperature) {
  client.setInsecure(); // Skip certificate verification

  if (!client.connect(host, httpsPort)) {
    Serial.println("HTTPS connection failed");
    return;
  }

  String tempString = String(temperature, 1) + "°C";

  String payload =
    "{"
      "\"phone_number\":\"919876543210\","
      "\"template_id\":\"threshold_violation_alert\","
      "\"variables\":{"
        "\"device_name\":\"Living Room Temp Node\","
        "\"parameter\":\"Temperature\","
        "\"measured_value\":\"" + tempString + "\","
        "\"configured_limit\":\"30°C\","
        "\"location\":\"Maker Lab\""
      "}"
    "}";

  String request =
    String("POST /api/v1/whatsapp/send HTTP/1.1\r\n") +
    "Host: " + host + "\r\n" +
    "Content-Type: application/json\r\n" +
    "x-api-key: " + apiKey + "\r\n" +
    "Content-Length: " + payload.length() + "\r\n\r\n" +
    payload;

  client.print(request);

  Serial.println("WhatsApp alert sent.");

  while (client.connected()) {
    String line = client.readStringUntil('\n');
    if (line == "\r") break;
  }

  Serial.println(client.readString());
  client.stop();
}

void setup() {
  Serial.begin(115200);
  dht.begin();
  connectWiFi();
}

void loop() {
  float temperature = dht.readTemperature();

  if (isnan(temperature)) {
    Serial.println("Failed to read sensor.");
    delay(2000);
    return;
  }

  Serial.print("Temperature: ");
  Serial.println(temperature);

  if (temperature >= TEMP_LIMIT &&
      millis() - lastSentTime > COOLDOWN_MS) {
    sendWhatsApp(temperature);
    lastSentTime = millis();
  }

  delay(2000);
}
How the Code Works
The sketch starts by connecting the ESP32 to your Wi-Fi network. Every two seconds, it reads the temperature from the DHT11 sensor.
If the measured temperature exceeds TEMP_LIMIT, the sendWhatsApp() function is called.
That function:
Opens a secure HTTPS connection
Builds a JSON payload
Add your API key to the request header
Sends the payload to CircuitDigest Cloud
A cooldown timer prevents repeated alerts when the temperature remains above the threshold.
Upload and Test
Replace the Wi-Fi credentials, API key, and phone number.
Select your ESP32 board in the Arduino IDE.
Upload the sketch.
Open the Serial Monitor at 115200 baud.
Warm the DHT11 sensor with your hand or a heat source.
When the temperature crosses 30°C, a WhatsApp message should appear on your phone within a few seconds.
Real-World Applications
Once you understand this workflow, you can swap the DHT11 for nearly any sensor:
PIR sensor for intrusion detection
Ultrasonic sensor for tank-level monitoring
Soil moisture sensor for irrigation control
Voltage sensor for battery alerts
Current sensor for equipment diagnostics
The notification logic remains the same.
Troubleshooting Tips
If messages are not delivered:
Verify that your API key is valid.
Confirm the phone number has been linked and verified.
Ensure the ESP32 has internet access.
Check the serial monitor for HTTP responses.
Confirm the selected template ID is correct.
Expanding the Project
Here are a few ideas to build on this project:
Add multiple recipients
Include humidity in the message
Trigger alerts only during specific hours
Log readings to a cloud dashboard
Combine with email or SMS notifications
Final Thoughts
This project shows how easy it is to add professional-looking WhatsApp notifications to an ESP32 project. Instead of dealing with GSM hardware or paid APIs, you can send alerts over Wi-Fi using a simple HTTPS request.
Whether you are monitoring a greenhouse, protecting a workshop, or building a home automation system, WhatsApp notifications are an effective way to stay informed in real time.