製造商零件編號 SC0915
RASPBERRY PI PICO RP2040
Raspberry Pi
License: Attribution Raspberry Pi MCU
The continuous integration and continuous delivery (CI/CD) pipeline consists of automating the testing and deploying software and then making process changes to create fewer code changes more frequently. CI/CD helps software teams work together more effectively and mitigate bugs in their codebase.
In this tutorial, we will look at continuous deployment, which consists of automating the build process of a project and pushing it to the end device. Specifically, we will automatically build a simple Raspberry Pi Pico project using Docker and GitHub Actions that will be hosted on the GitHub repository page for users to download. You can watch this tutorial in video form here:
Before working through this guide, I recommend reading the following posts to get familiar with Docker and GitHub Actions:
Note that all code in this tutorial can be found in this repository: https://github.com/ShawnHymel/pico-deployment-demo
Continuous Deployment
The CI/CD pipeline often consists of testing the software, which can include simple compilation (“smoke test”), unit tests, and integration tests, followed by automated delivery of the final program to end users.
The continuous delivery portion usually involves building the entire program, performing any last-minute quality assurance checks (often by humans), and then deploying the software. In most software development contexts, such deployment is often automatic and seamless. This means uploading a new executable or library to servers (“push to production”) or to end-user devices (e.g. update to an operating system).
However, for embedded systems, this final step can be problematic, as the ability to automatically re-flash a microcontroller is difficult or impossible. That being said, we can get part of the way there by simply generating a binary and hosting it on the Internet.
For this example, we will use Docker and GitHub Actions to automatically build a simple Raspberry Pi Pico project and host the binary on a GitHub repository page for users to download. As such, we will be focusing on continuous deployment.
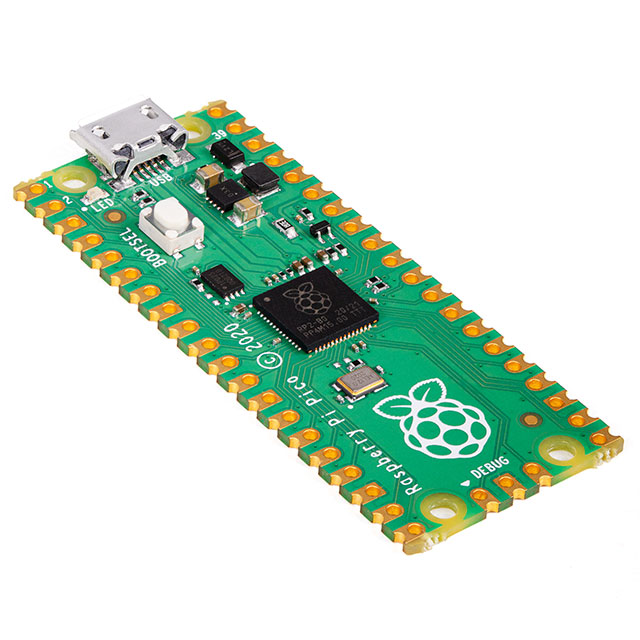
It is possible to use Docker to generate build processes for nearly any embedded system. However, we chose the Raspberry Pi Pico because setting up the toolchain for it on Linux is particularly easy. Thanks to this easy setup, we can focus on the automated deployment processes in this tutorial. Feel free to extrapolate to any build system you might need for your project.
As a side note, “continuous delivery” and “continuous deployment” can sometimes be used interchangeably. However, many schools of thought distinguish between the two. In this series, we refer to “continuous delivery” as the paradigm offered by the Agile Manifesto that automates verification and delivery to customers. As such, we can view “continuous deployment” as a part of or a “next step” within the framework of “continuous delivery.”
Create a Simple Application
You do not need a Raspberry Pi Pico to work through this demo, as we are mostly concerned with the automated build process. To demonstrate this process, we are going to build a simple “LED blinky” program. The code for this program comes from the Raspberry Pi Pico and RP2040 - C/C Part 1: Blink and VS Code tutorial. Feel free to read through that guide if you would like to learn more about developing for the Raspberry Pi Pico and RP2040.
Create a new repository in GitHub and clone it to your computer.
git clone https://github.com/<my-username>/<my-project-name>
Create a directory in the top level of the repository named “src.”
cd <my-project-name>
mkdir src
Create a file named “main.c” and copy in the following code:
#include <stdio.h>
#include "pico/stdlib.h"

int main() {

    const uint led_pin = 25;

    // Initialize LED pin
    gpio_init(led_pin);
    gpio_set_dir(led_pin, GPIO_OUT);

    // Initialize chosen serial port
    stdio_init_all();

    // Loop forever
    while (true) {

        // Blink LED
        printf("Blinking!\r\n");
        gpio_put(led_pin, true);
        sleep_ms(1000);
        gpio_put(led_pin, false);
        sleep_ms(1000);
    }
}
Save and exit. Create a file named “CMakeLists.txt” and copy in the following code:
# Set minimum required version of CMake
cmake_minimum_required(VERSION 3.12)

# Include build functions from Pico SDK
include($ENV{PICO_SDK_PATH}/external/pico_sdk_import.cmake)

# Set name of project (as PROJECT_NAME) and C/C   standards
project(blink C CXX ASM)
set(CMAKE_C_STANDARD 11)
set(CMAKE_CXX_STANDARD 17)

# Creates a pico-sdk subdirectory in our project for the libraries
pico_sdk_init()

# Tell CMake where to find the executable source file
add_executable(${PROJECT_NAME}
    main.c
)

# Create map/bin/hex/uf2 files
pico_add_extra_outputs(${PROJECT_NAME})

# Link to pico_stdlib (gpio, time, etc. functions)
target_link_libraries(${PROJECT_NAME}
    pico_stdlib
)

# Enable usb output, disable uart output
pico_enable_stdio_usb(${PROJECT_NAME} 1)
pico_enable_stdio_uart(${PROJECT_NAME} 0)
Save and exit. You do not need to worry about building this project locally on your computer. We’re going to use Docker and GitHub Actions to do that!
Create Docker Image
In the top level of the repository, create a file named “Dockerfile.” Copy in the following:
# Fetch ubuntu image
FROM ubuntu:22.04

# Install prerequisites
RUN \
    apt update && \
    apt install -y git python3 && \
    apt install -y cmake gcc-arm-none-eabi libnewlib-arm-none-eabi build-essential

# Install Pico SDK
RUN \
    mkdir -p /project/src/ && \
    cd /project/ && \
    git clone https://github.com/raspberrypi/pico-sdk.git --branch master && \
    cd pico-sdk/ && \
    git submodule update --init && \
    cd /

# Set the Pico SDK environment variable
ENV PICO_SDK_PATH=/project/pico-sdk/

# Copy in our source files
COPY src/* /project/src/

# Build project
RUN \
    mkdir -p /project/src/build && \
    cd /project/src/build && \
    cmake .. && \
    make

# Command that will be invoked when the container starts
ENTRYPOINT ["/bin/bash"]
This should look familiar if you worked through our Getting Started with Docker guide.
If you look at chapter 2 of the Getting Started with Pico documentation, you can see where we got the commands to build the toolchain in the Docker image. We use aptitude to install the necessary tools (e.g. cmake, gcc-arm-none-eabi) and git to clone the SDK, which contains all the necessary libraries for working with the RP2040 peripherals.
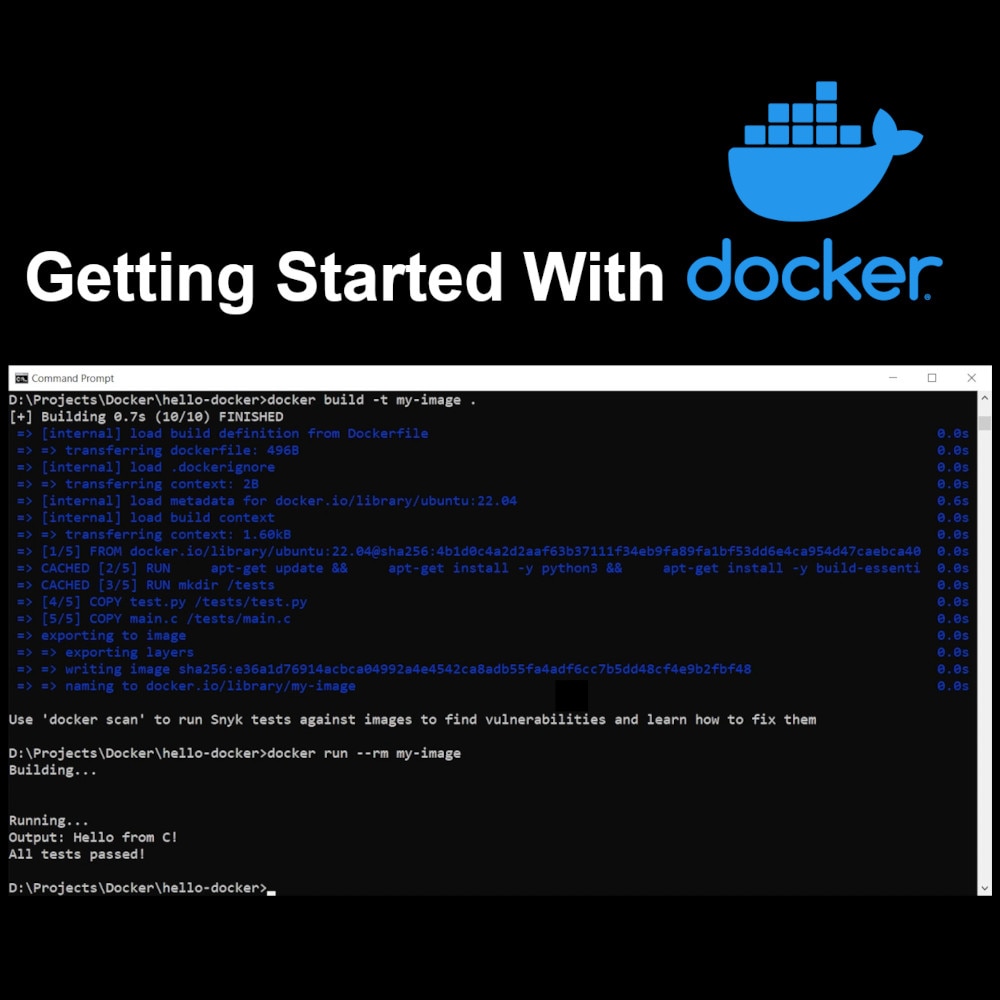
If you would like to run the Docker image locally to produce the .uf2 file, simply run the following commands (make sure Docker Desktop is running):
docker build -t pico-builder-image .
docker create --name pico-builder-container pico-builder-image
docker cp pico-builder-container:/project/src/build/blink.uf2 ./blink.uf2
Note the “blink” name is set by the project() command in CMakeLists.txt! If you change the name of your project there, then the .uf2 file will have a different name.
You can remove the Docker container and image with the following:
docker rm pico-builder-container
docker rmi pico-builder-image
Automate with GitHub Actions
As we saw with our Getting Started with GitHub Actions tutorial, we can automate this build process inside GitHub! Create a “workflows” directory inside of a “.github” directory in your repository:
mkdir -p .github/workflows
In there, create a file named “deploy.yml.” In that file, copy in the following:
name: Deploy new version

# Only deploy when a new tag is pushed
on:
    push:
        tags:
          - "v*.*.*"

# Must match the project() name in CMakeLists.txt
env:
    APP_NAME: blink

# Allow this workflow to write back to the repository
permissions:
    contents: write

# Build binary and send to releases
jobs:
    build-deploy:
        runs-on: ubuntu-latest
        name: Build and deploy
        steps:

          - name: Check out this repository
            uses: actions/checkout@v3

          - name: Build Docker image
            run: docker build -t pico-builder-image .

          - name: Create Docker container
            run: docker create --name pico-builder-container pico-builder-image

          - name: Copy out .uf2 file
            run: docker cp pico-builder-container:/project/src/build/${APP_NAME}.uf2 ./${APP_NAME}.uf2

          - name: Put environment variable into the env context
            run: echo "app_name=$APP_NAME" >> $GITHUB_ENV

          - name: Push to release
            uses: softprops/action-gh-release@v1
            if: startsWith(github.ref, 'refs/tags/')
            with:
                files: ${{ env.app_name }}.uf2
                body_path: CHANGELOG.md
A few things to note:
We only run this workflow when we push a tag with the format “v*.*.*” (e.g. “v1.0.3”)
You must set the APP_NAME environment variable to the same name used in the project() function in CMakeLists.txt
We need to set write permissions in order to have our GitHub repository host the binary on the “releases” page
We run the Docker image in the GitHub Actions VM
We use the community-supported action-gh-release GitHub Action to create a new release page from our tagged commit, which consists of a snapshot of the source code and the compiled .uf2 file from that snapshot
Save and exit. Feel free to create a .gitignore file in your repository so that you don’t accidentally upload any compiled object or binary files.
When creating a new release, it’s often a good idea to tell users what new changes they can expect in that release. Create a file named “CHANGELOG.md” in the top level of your repository. In that file, copy in the following (note that we are using Markdown here):
# CHANGELOG.md

## 0.0.1 (2023-02-11)

Fixes:

 - None

Features:

 - Initial release of blink program
 - Added workflow to automatically generate uf2 binary on each release
Push your changes to your GitHub repository:
git add --all
git commit -m “Initial version that simply blinks an LED”
git push
Feel free to view your repository page to ensure everything was uploaded correctly. Create and push a new tag for that commit:
git tag v0.0.1
git push origin v0.0.1
If you head to your GitHub repository page and click through the Actions to view the workflows, you should see that the “Build and deploy” workflow ran successfully (this might take some time).
Go to the main repository page and click “Releases” on the right-side panel. You should see your changelog comments listed along with the compiled .uf2 file and compressed snapshots of the source code.
We hope this helps you get started creating continuous delivery and continuous deployment pipelines in your own projects!
Recommended Reading
If you would like to dig deeper into continuous delivery, continuous deployment, and GitHub Actions, we recommend checking out the following literature: