製造商零件編號 AKX00069
PLUG AND MAKE KIT BREADBOARD-FRE
Arduino
License: See Original Project Bluetooth / BLE Encoder Microcontrollers Movement Rotary Wireless LED / Display Drivers Arduino
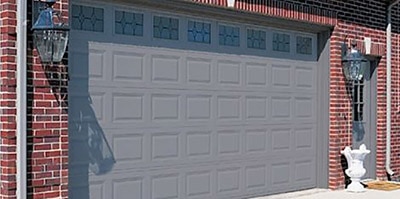
Have you ever found it challenging to park your car perfectly in your garage without hitting the wall, while also making sure the garage door can close? While looking at the Arduino Plug and Make templates for my previous project, Build a Custom Fusion 360 Controller with the Arduino Plug and Make Kit, I noticed that they had a template called Smart Lights. After reading the Learning Outcomes on their learning page, the idea of creating a parking sensor came to mind. The wonderful thing about this template is that it also sets up a dashboard on Arduino Cloud, which I believe is where this project will be unique.
Or
I started off by walking through the full tutorial that Arduino provides, Smart Lights | Plug and Make. Once I had finished reviewing the tutorial, I had the basics of light control and the dashboard complete. I then walked through adding the Movement Modulino to get all the basics of the build together. Before tweaking the code, I then proceeded to download the Arduino IoT remote app. After signing into the app, I could interact with the dashboard that was already built by using the on-screen button to turn off and on the Pixel Modulino remotely, and also changing the colors of the Pixels. Based on the idea in my head for this project, I decided to start by setting up the dashboard the way I wanted prior to tweaking the code to the way I wanted it.
The Arduino Dashboard builder is really easy to change and manipulate the way it is set up based on what your project needs. For me, I wanted to visualize three things: the desired parking distance, the distance the vehicle currently is, and a switch to turn off and on the pixels. I started by removing everything but the switch widget. To do this, I clicked on the top right corner button called edit. Next, I was able to click on each of the widgets I wanted to remove and then select the trashcan on the top center of the screen. Once I only had the switch widget left, I first added the Car Distance visualization by adding a Gauge widget. When I was walking through the original tutorial, I did some testing of the distance Modulino and found that it was able to read out to about 1400mm, or just about 48 inches. While this is not a really long distance, I figured it could work for my project. On the Gauge widget, I set the range from a minimum of 300 to a maximum of 1400. This way, I could see an updated distance from where I currently was. Next, I wanted to set up a desired distance widget. I would use this to set the distance that I wanted to park from the Arduino. For this, I used a Value widget. This type of widget allowed me to update the variable distance by clicking on the entry box and typing in the distance I desired.
Dashboard as shown on my computer
View of the dashboard from my phone
Now that I had the dashboard set up, I decided to dive into the code. I started by adding two Cloud variables on the Setup page. Along with the lampColor and pixelsOn variables that were included with the template, I added car_distance and desiredDistance, both of which were set up as integers. Once I had those set up, I headed back to the dashboard to link them to the widgets I had added previously. I then selected the Desired distance widget and linked the variable desiredDistance. Next, I selected the Car Distance widget and linked the car_distance variable.
After navigating back to the sketch, I decided again to try to use the built-in AI assistant to help me, as I had done in the previous project. When first trying to upload the code, I ran into an error where the new cloud variables I had declared were not included yet. I prompted the AI Assistant to help me set those up. It then proceeded to give the following bit of code.
void onCarDistanceChange() {

// Add your logic here for when carDistance changes

// For example:

// Serial.println("Car distance changed: " + String(carDistance));

}Once this was linked, I was able to upload the code to the Arduino Uno R4 Wi-Fi. For initial testing, I wanted to change the pixels to different colors at a few different set distances. This was the prompt that I gave the AI assistant:
The code the assistant delivered functioned exactly how I wanted it to at this point. It was responsive, and the colors changed once the thresholds were met for each distance. After getting this working, I decided to update the code by adding a distance variable that was controlled by the knob. That way, the user could change the distance they need very easily with the knob or the dashboard if they choose. To this variable, I added guard rails so that the distance couldn’t go below 200 or over 1000.
Once I uploaded this new code, I tested this functionality, and while it worked well, it took too long to change the desiredDistance variable as it changed by single digits. To speed up this functionality, I then asked to have it change by multiples of 5. This sped up the variable change speed significantly.
The next request I made was to have the LEDs blink red when the number was lower than the threshold to get the driver’s attention. At this point, the distance portion of the code was set up as follows:
void updateDistanceColors() {

if(measure >= desiredDistance + 200) {

ledColor = greenColor;

flashState = false;

}

else if(measure >= desiredDistance + 100) {

ledColor = yellowColor;

flashState = false;

}

else if(measure >= desiredDistance) {

ledColor = redColor;

flashState = false;

}

else { // Below desired distance - flash red

ledColor = redColor;

if(millis() - lastFlash > 500) {

flashState = !flashState;

void updateLEDS() {

if(pixelsOn == false || (measure < desiredDistance && !flashState)) {

leds.clear();

}

else if(pixelsOn == true) {

ModulinoColor ledsColor(r, g, b);

// Only update if not in distance mode

if(measure >= desiredDistance || !pixelsOn) {

ledColor = ledsColor;

}

}
After uploading this code and working through a few errors it generated, I got stuck in a loop where the assistant was repeating the same mistake over and over again. While this was a bit frustrating, it led me to an important discovery. I asked the AI assistant if it could look into the documentation to figure out the correct method for fixing the issue. To my surprise, this broke the assistant out of the loop, and it was able to solve the problem it was having previously. I’m going to have to save this trick for future projects, as I think it worked well and may require further testing.
The next idea that came to mind was to add motion tracking to the code. The idea was to have the LEDs turn off after not seeing any motion for a certain amount of time. In this case, I chose to use 5 seconds as the time limit. I also wanted to add a range to limit the slight changes that typically are seen by the distance sensor while an object is sitting stationary in front of it. This is what the code portion looked like after those changes were implemented
int brightness = 25;

int measure;

unsigned long lastFlash = 0;

unsigned long lastMovement = 0;

int lastDistance = 0;

const int MOVEMENT_THRESHOLD = 50; // mm change to detect movement

const unsigned long NO_MOVEMENT_TIMEOUT = 5000; // 5 seconds

bool flashState = false;

void setup() {

distance.begin();

encoder.set(700); // Start at 700mm threshold

buttons.setLeds(true, true, true);

lastMovement = millis();

leds.clear();

}


if (distance.available()) {

measure = distance.get();


// Check for movement

if(abs(measure - lastDistance) > MOVEMENT_THRESHOLD) {

lastMovement = millis();

}

lastDistance = measure;

carDistance = measure;

updateDistanceColors();

}

}

void updateLEDS() {

// Check if no movement detected for timeout period

bool noMovement = (millis() - lastMovement) > NO_MOVEMENT_TIMEOUT;


if(pixelsOn == false || noMovement) {

leds.clear();

}

else if(measure < desiredDistance && !flashState) {
At this point, I had the project working exactly like I wanted it. I was about to truly test it out to see how well it worked; however, there was one other minor change that I wanted to make. Since I grew up being trained in the Imperial measurement system, I’m not as fast at realizing what a distance is in millimeters as I am in inches, so I thought it would be nice to also add a dashboard widget that displays the distance in Inches for my quick reference. To add this last change, I started by adding a new cloud variable called distanceInches. From there, I went back to the dashboard and added a value widget and linked it to this variable. I then went back to the code and added one minor change to the code itself. Under the section of code that reads the distance, I added the following.
distanceInches = (carDistance/25.4); //convert distance to inches
This small change added the additional functionality that I wanted.
Here is what the final dashboards looked like
Here is the final project code I developed:
#include <Modulino.h>

#include "thingProperties.h"

#include <Arduino_LED_Matrix.h>

#include <Arduino_CloudConnectionFeedback.h>

// Initialize all the Modulino components we'll use

ArduinoLEDMatrix matrix; // Built-in LED matrix on UNO R4 WiFi

ModulinoButtons buttons; // 3 buttons (A, B, C)

ModulinoPixels leds; // LED strip with 8 pixels

ModulinoKnob encoder; // Rotary knob for adjusting distance

ModulinoDistance distance; // Ultrasonic distance sensor

// Define colors for the LED strip

ModulinoColor ledColor(0, 0, 255); // Current color (starts blue)

ModulinoColor greenColor(0, 255, 0); // Green = far away (safe)

ModulinoColor yellowColor(255, 255, 0); // Yellow = getting close (caution)

ModulinoColor redColor(255, 0, 0); // Red = at target or too close (stop/danger)

// Variables for controlling the system

int counter = 8; // Number of LEDs to light up (0-8)

int brightness = 25; // LED brightness level

int measure; // Current distance reading from sensor

unsigned long lastFlash = 0; // Timer for flashing red LEDs

bool flashState = false; // Track if LEDs should be on/off during flash

unsigned long lastMovement = 0; // Timer for when we last detected movement

int lastDistance = 0; // Previous distance reading to compare against

const int MOVEMENT_THRESHOLD = 10; // How much distance must change to count as movement (mm)

const unsigned long NO_MOVEMENT_TIMEOUT = 5000; // Turn off LEDs after 5 seconds of no movement

void setup() {

Serial.begin(9600);


// Start the built-in LED matrix

matrix.begin();


// Connect to Arduino Cloud

initProperties();

ArduinoCloud.begin(ArduinoIoTPreferredConnection);

waitForArduinoCloudConnection(matrix);

setDebugMessageLevel(2);

ArduinoCloud.printDebugInfo();


// Set initial values for cloud variables

pixelsOn = false; // LEDs start turned off

desiredDistance = 700; // Default parking distance is 700mm (about 28 inches)


// Initialize all Modulino components

Modulino.begin();

leds.begin();

buttons.begin();

encoder.begin();

distance.begin();


// Set the knob starting position to match our default distance

encoder.set(700);


// Turn on all 3 button LEDs so we can see them

buttons.setLeds(true, true, true);


// Record current time as last movement (prevents immediate timeout)

lastMovement = millis();


// Make sure LED strip starts off

leds.clear();

}

void loop() {

// Keep cloud connection alive and sync variables

ArduinoCloud.update();


// READ THE KNOB: Update desired parking distance

int rawValue = encoder.get(); // Get knob position

int newDesiredDistance = (rawValue / 5) * 5; // Round to nearest 5mm for cleaner values

// Keep distance within reasonable limits (200mm to 1000mm)

if(newDesiredDistance >= 200 && newDesiredDistance <= 1000) {

desiredDistance = newDesiredDistance;

}


// READ THE BUTTONS: Check if any buttons are pressed

bool button_a = buttons.isPressed(0); // Left button

bool button_b = buttons.isPressed(1); // Middle button

bool button_c = buttons.isPressed(2); // Right button


// HANDLE BUTTON PRESSES: Only act when button state changes

if (buttons.update()) {

// Button A: Decrease number of lit LEDs

if(button_a && counter >= 0) {

counter--;

if(counter <= 0) {

pixelsOn = false; // Turn off system if we go to 0 LEDs

counter = 0;

}

}


// Button B: Toggle the entire LED system on/off

if (button_b) {

pixelsOn = !pixelsOn;

}


// Button C: Increase number of lit LEDs (and turn system on)

if(button_c && counter <= 8) {

pixelsOn = true; // Turn on system when adding LEDs

counter++;

}

}


// READ DISTANCE SENSOR: Get new measurement if available

if (distance.available()) {

measure = distance.get(); // Get distance in millimeters


// DETECT MOVEMENT: Compare current reading to last reading

if(abs(measure - lastDistance) > MOVEMENT_THRESHOLD) {

lastMovement = millis(); // Reset the "no movement" timer

}


// Store values for next loop and cloud reporting

lastDistance = measure;

carDistance = measure; // Send to cloud

distanceInches = (carDistance/25.4); // Convert to inches for cloud


// Determine what color the LEDs should be based on distance

updateDistanceColors();

}


// Update the actual LED strip display

updateLEDS();

}

// DETERMINE LED COLOR: Based on how close car is to desired parking distance

void updateDistanceColors() {

// Define distance zones relative to desired parking spot

int yellowDistance = desiredDistance + 100; // Yellow zone starts 100mm past target

int greenDistance = desiredDistance + 200; // Green zone starts 200mm past target


// GREEN: Car is far away (200mm+ past target) - safe to keep moving forward

if(measure >= greenDistance) {

ledColor = greenColor;

flashState = false; // Solid color, no flashing

}

// YELLOW: Car is getting close (100-200mm past target) - slow down

else if(measure >= yellowDistance && measure < greenDistance) {

ledColor = yellowColor;

flashState = false; // Solid color, no flashing

}

// RED: Car is at target distance - perfect parking spot, stop here

else if(measure >= desiredDistance) {

ledColor = redColor;

flashState = false; // Solid color, no flashing

}

// FLASHING RED: Car is too close (past the target) - back up!

else {

ledColor = redColor;

// Create flashing effect by toggling on/off every 250ms

if(millis() - lastFlash > 250) {

flashState = !flashState;

lastFlash = millis();

}

}

}

// UPDATE LED STRIP: Actually control what shows on the LEDs

void updateLEDS() {

// Check if no movement detected for timeout period (car parked/left)

bool noMovement = (millis() - lastMovement) > NO_MOVEMENT_TIMEOUT;


// TURN OFF LEDS: If system is off OR no movement for 5+ seconds

if(pixelsOn == false || noMovement) {

leds.clear(); // Turn off all LEDs

}

// FLASHING STATE: When too close and in "flash off" part of cycle

else if(measure < desiredDistance && !flashState) {

leds.clear(); // Turn off LEDs for flash effect

}

// NORMAL DISPLAY: Show the appropriate color

else {

ModulinoColor displayColor(0, 0, 0); // Start with black/off


// Use the color determined by updateDistanceColors()

displayColor = ledColor;


// Clear any previous LED states

leds.clear();


// Light up the number of LEDs specified by 'counter' variable

for(int i = 0; i < counter; i++) {

leds.set(i, displayColor, brightness);

}

}

leds.show();

}

void onPixelsOnChange() {

// LEDs will update automatically in updateLEDS()

}

void onLampColorChange() {

// Color will update automatically in updateLEDS()

}

void onCarDistanceChange() {

// This reports sensor data to cloud

}

void onDesiredDistanceChange() {

// This updates from dashboard control

}At the time of writing this, I haven’t had a chance to test this with my car; however, I have done testing in my house and am fairly confident that it will work for a parking sensor in the garage. If I were to build this project again, I would change from the distance Modulino to an ultrasonic sensor or another sensor to get a longer readout for distance than I can currently get. I’m sure there are other improvements that can be made, and I challenge you to take this project and make it your own.
If you are interested in purchasing the products used in this project, check out the list above or in the product carousel below. If you do build the project and run into any issues or have any ideas for improvements, comment on the TechForum link below. I’d love to hear what you come up with.