使用伺服開發板控制 NeoPixel LED
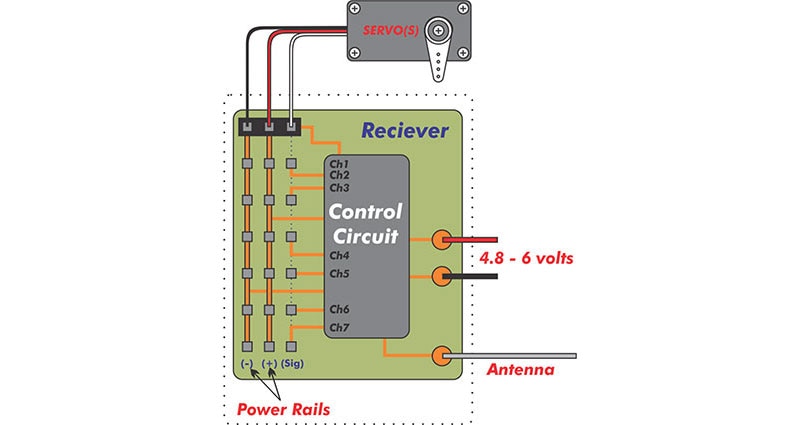
在同一專案中使用多個伺服機時,可採用 Kitronik 的 Simply Servos Board (圖 1),以提供足夠的 3 V 至 12 V 電源軌。此板件內建 3 V 電源調節和排針,可快速添加 Raspberry Pi Pico,操作伺服機。但是,如果使用有三條引線、需 5 V 電源,並且可能消耗大量電流的另一個裝置呢?像是 Adafruit 的 NeoPixel LED 燈條!
![]() 圖 1:Kitronik Simply Servos Board(圖片來源:Kitronik)
圖 1:Kitronik Simply Servos Board(圖片來源:Kitronik)
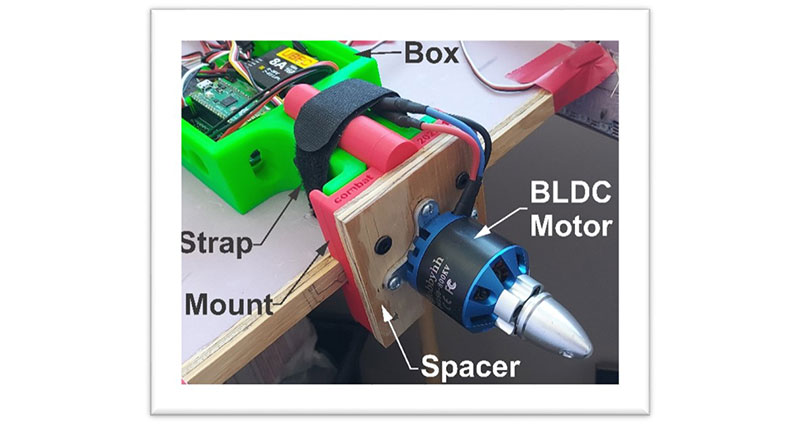
我最近有個想法,想使用我的其中一架無線電控制作戰飛行器製作一架夜間飛行器。我可以隨便找個微控制器來用,再想辦法連接 NeoPixel 燈條到電源供應器。不過,如果可以使用伺服線快速連接,而且還更容易維護,不是更好嗎?Simply Servos Board 不僅適用於伺服機。此平台可簡化專案,大幅減少對客製化接線和大量連接器的需求。
文末的部落格和影片連結詳細介紹飛行平台,以及提供如何轉換作戰飛行器的有趣影片。使用 Arduino IDE 對 Pico 進行編程,並依據無線電控制發射器的輸入執行 NeoPixels。我計劃在機身兩側使用跑馬燈,隨著油門增加而加速滾動。隨著天色變暗,Neopixel 可能會過於明亮而使眼睛不適。輔助通道用於調暗 LED。最後,當飛行器在黑暗中著陸時,著陸燈會很有用。油門處於或低於著陸速度時,不會增加一個通道,而是底部的 NeoPixel 會變成亮白色。我使用基本的編程,但還有改進的空間或其他可探索的功能。
複製Arduino IDE Code:

//Rx throttle as LED speed control. Rx Aux 2 as dimmer. Channels 1 and 2 as inputs on Simply Servos.
//Remaining servo ports on board (channels 3-8, pins 4-9) used as NeoPixel outputs.
#include <neopixelconnect.h>

//Number of NeoPixels in each string
#define FIN_LEN 34  //Number of NeoPixels on each fin
#define BOT_LEN 28  //Number of NeoPixels on each bottom skid
#define AUX_LEN 61  //Number of NeoPixels on each auxiliary location
#define THRESH 60   //Landing versus flight throttle threshold

//Rx channel Pico GPIO inputs
#define THROT 2
#define AUX2 3

// Create an instance of NeoPixelConnect and initialize it for each strand of NeoPixels
// (pin, number of pixels in string, programmable IO location (0 or 1), programmable IO state machine usage (0-3))
NeoPixelConnect R_Aux(4, AUX_LEN, pio0, 0);
NeoPixelConnect L_Aux(5, AUX_LEN, pio1, 0);
NeoPixelConnect R_Bot(6, BOT_LEN, pio0, 1);
NeoPixelConnect L_Bot(7, BOT_LEN, pio1, 1);
NeoPixelConnect R_Fin(8, FIN_LEN, pio0, 2);
NeoPixelConnect L_Fin(9, FIN_LEN, pio1, 2);

uint8_t AuxSingLED;  //Single LED variable on auxiliary string

//Function - Get intensity level from Rx Aux2 output
uint8_t get_pixel_intensity() {
  return map(pulseIn(AUX2, HIGH), 900, 2200, 0, 255);
}

//Function - Get speed level from Rx Throttle output
uint8_t get_pixel_speed() {
  return map(pulseIn(THROT, HIGH), 990, 1902, 100, 0);
}

void setup() {
  pinMode(THROT, INPUT);  //Set Pico GPIO pin 2 as input
  pinMode(AUX2, INPUT);   //Set Pico GPIO pin 3 as input
}

void loop() {
  uint8_t LEDInten = get_pixel_intensity();  //Get NeoPixel intensity value
  uint8_t LEDSpeed = get_pixel_speed();      //Get NeoPixel speed value
  if (LEDSpeed < 10) LEDSpeed = 0;           //Dampen lower speed limit

  if (LEDSpeed < THRESH) {                                   //Throttle high color
    R_Bot.neoPixelFill(LEDInten, 0, 0, true);                //Fill string with red
    L_Bot.neoPixelFill(LEDInten, 0, 0, true);                //Fill string with red
  } else {                                                   //Throttle low color
    R_Bot.neoPixelFill(LEDInten, LEDInten, LEDInten, true);  //Fill string with white
    L_Bot.neoPixelFill(LEDInten, LEDInten, LEDInten, true);  //Fill string with white
  }

  R_Fin.neoPixelFill(0, LEDInten, 0, true);  //Fill string with green
  L_Fin.neoPixelFill(0, LEDInten, 0, true);  //Fill string with green

  R_Aux.neoPixelFill(0, 0, LEDInten, false);                           //Fill string with blue
  R_Aux.neoPixelSetValue(AuxSingLED, LEDInten, 0, 0, false);           //Set a NeoPixel to red
  R_Aux.neoPixelSetValue(AuxSingLED - 1, LEDInten / 10, 0, 0, false);  //Set trailing NeoPixel to dimmed red
  R_Aux.neoPixelSetValue(AuxSingLED + 1, LEDInten / 10, 0, 0, true);   //Set leading NeoPixel to dimmed red
  L_Aux.neoPixelFill(0, 0, LEDInten, false);                           //Fill string with blue
  L_Aux.neoPixelSetValue(AuxSingLED, LEDInten, 0, 0, false);           //Set a NeoPixel to red
  L_Aux.neoPixelSetValue(AuxSingLED - 1, LEDInten / 10, 0, 0, false);  //Set trailing NeoPixel to dimmed red
  L_Aux.neoPixelSetValue(AuxSingLED + 1, LEDInten / 10, 0, 0, true);   //Set leading NeoPixel to dimmed red

  AuxSingLED = AuxSingLED + 3;                //Marquis - move R_Aux and L_Aux red LEDs along NeoPixel string 3 pixels at a time.
  if (AuxSingLED >= AUX_LEN) AuxSingLED = 0;  //If at end of string, return to start.

  delay(LEDSpeed);  //Set how long to delay code execution cycle depending upon throttle level.
}

Arduino IDE Code END:
</neopixelconnect.h>
清單 1:用於控制 NeoPixel 燈條的 Arduino IDE 程式碼。
無任何延遲功能有助於程式執行,且藉由操縱油門的輸入值或輸入值映射,LED 可以更快速運作。其餘的燈條可用於任何想要的圖案或顏色。請記住,飛行員依據可識別的燈光模式,判定飛機的方向和航向。夜間飛行有趣且充滿挑戰。在傍晚練習夜間飛行時,仍可同時看到飛行器及其 LED 燈。
其他資源:
影片:使用 NeoPixel LED 探索無線電控制夜間飛行
部落格:如何建造低成本 RC 作戰無人機

Have questions or comments? Continue the conversation on TechForum, Digi-Key's online community and technical resource.
Visit TechForum


