LED Matrix Alarm Clock
2025-08-08 | By Adafruit Industries
License: See Original Project 3D Printing Amplifiers LED Matrix STEMMA
Courtesy of Adafruit
Guide by Ruiz Brothers and Liz Clark
Overview
You can build a 3D printed IoT alarm clock using CircuitPython and electronics from Adafruit.
This LED matrix alarm clock is inspired by the cute plush toy monsters LaBuBu by Pop Mart.
It gets time from the internet and features sound effects, brightness dimming for nighttime and cute animations like winking eyes.
The clock is powered by an Adafruit QT Py ESP32-S3 with an amplifier for high quality audio output.
In the CircuitPython code, you can set your time zone, alarm time, volume, and the LED brightness settings for day and night.
The clock keeps time using the internet Network Time Protocol (NTP) via WiFi. The alarm sounds are audio .mp3 files that are randomized each time they’re triggered.
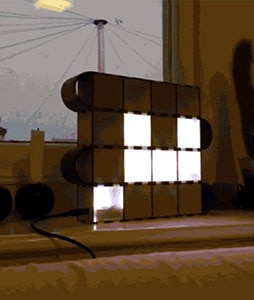
Scrolling text is displayed when an alarm goes off, and a winking eyes animation plays -- giving the clock some character.
A rotary encoder is used to set the alarms. You just press on the encoder and turn the knob to set hours and minutes. Text will display to show if the alarm is On or Off.
Parts
Circuit Diagram
Circuit Diagram
The diagram below provides a general visual reference for wiring of the components once you get to the Assembly page. This diagram was created using the software package Fritzing.
Adafruit Library for Fritzing
Adafruit uses the Adafruit's Fritzing parts library to create circuit diagrams for projects. You can download the library or just grab individual parts. Get the library and parts from GitHub - Adafruit Fritzing Parts.
Header Connections
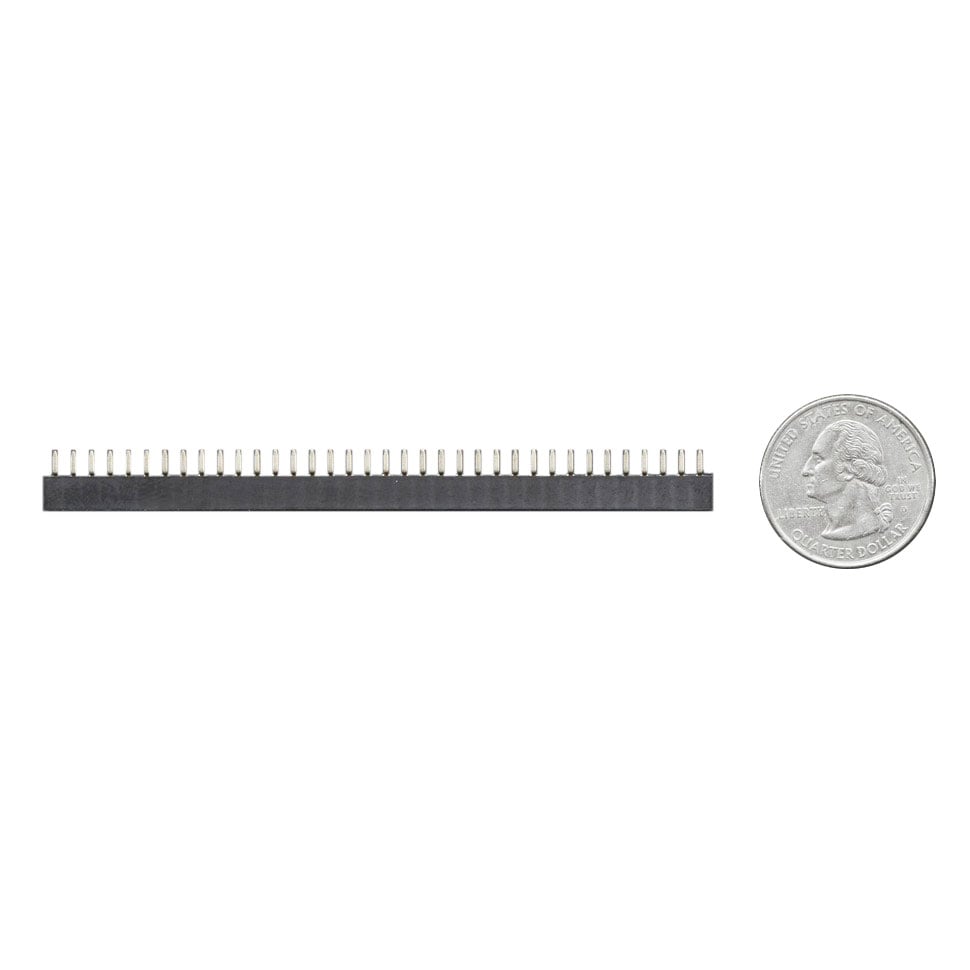
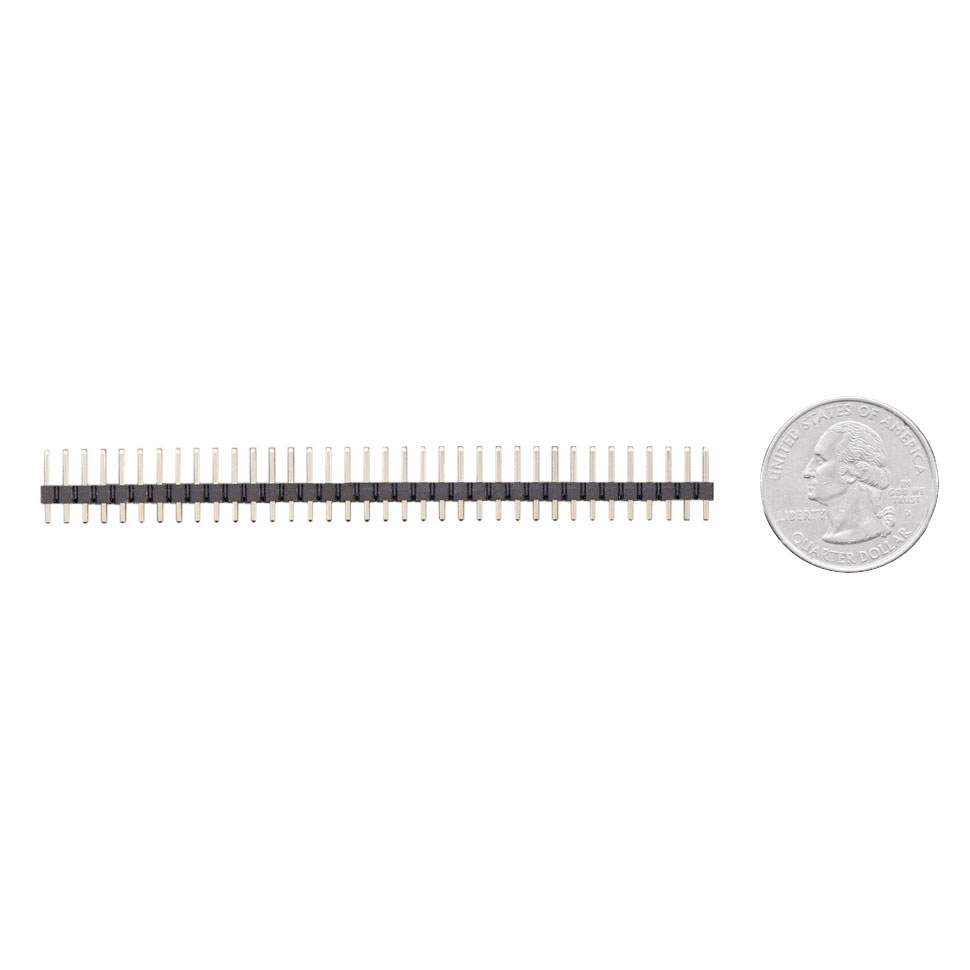
The I2S Amplifier BFF board connects to the QT Py via short header pins and short header sockets on the QT Py.
The header pins are soldered to the I2S Amplifier BFF, under the speaker port.
The short socket headers are soldered to the QT Py, under the USB C port.
3D Printing
3D Printed Parts
STL files for 3D printing will need to be oriented for printing using either FDM or SLS machines.
Parts were printed with PLA filament.
Original design source files may be downloaded using the links below.
3MF files include multicolor sections but a multicolor printer is not required. The sections have a .1mm indented so they can easily be painted with acrylic paints or markers.
Slice with settings for PLA material
The parts were sliced using BambuStudio using the slice settings below.
PLA filament 220c extruder
0.2 layer height
10% gyroid infill
200mm/s print speed
60c heated bed
Install CircuitPython
CircuitPython is a derivative of MicroPython designed to simplify experimentation and education on low-cost microcontrollers. It makes it easier than ever to get prototyping by requiring no upfront desktop software downloads. Simply copy and edit files on the CIRCUITPY drive to iterate.
CircuitPython QuickStart
Follow this step-by-step to quickly get CircuitPython running on your board.
There are two versions of this board: one with 8MB Flash/No PSRAM and one with 4MB Flash/2MB PSRAM. Each version has their own UF2 build for CircuitPython. There isn't an easy way to identify which version of the board you have by looking at the board silk. If you aren't sure which version you have, try either build to see which one works.
There are two versions of this board: one with 8MB Flash/No PSRAM and one with 4MB Flash/2MB PSRAM.
Click the link above to download the latest CircuitPython UF2 file.
Save it wherever is convenient for you.
Plug your board into your computer, using a known-good data-sync cable, directly, or via an adapter if needed.
Click the reset button once (highlighted in red above), and then click it again when you see the RGB status LED(s) (highlighted in green above) turn purple (approximately half a second later). Sometimes it helps to think of it as a "slow double-click" of the reset button.
If you do not see the LED turning purple, you will need to reinstall the UF2 bootloader. See the Factory Reset page in this guide for details.
On some very old versions of the UF2 bootloader, the status LED turns red instead of purple.
For this board, tap reset and wait for the LED to turn purple, and as soon as it turns purple, tap reset again. The second tap needs to happen while the LED is still purple.
Once successful, you will see the RGB status LED(s) turn green (highlighted in green above). If you see red, try another port, or if you're using an adapter or hub, try without the hub, or different adapter or hub.
If double-clicking doesn't work the first time, try again. Sometimes it can take a few tries to get the rhythm right!
A lot of people end up using charge-only USB cables and it is very frustrating! Make sure you have a USB cable you know is good for data sync.
If after several tries, and verifying your USB cable is data-ready, you still cannot get to the bootloader, it is possible that the bootloader is missing or damaged. Check out the Factory Reset page for details on resolving this issue.
You will see a new disk drive appear called QTPYS3BOOT.
Drag the adafruit_circuitpython_etc.uf2 file to QTPYS3BOOT.
The BOOT drive will disappear, and a new disk drive called CIRCUITPY will appear.
That's it!
Create Your settings.toml File
CircuitPython works with WiFi-capable boards to enable you to make projects that have network connectivity. This means working with various passwords and API keys. As of CircuitPython 8, there is support for a settings.toml file. This is a file that is stored on your CIRCUITPY drive, that contains all of your secret network information, such as your SSID, SSID password and any API keys for IoT services. It is designed to separate your sensitive information from your code.py file so you are able to share your code without sharing your credentials.
CircuitPython previously used a secrets.py file for this purpose. The settings.toml file is quite similar.
Your settings.toml file should be stored in the main directory of your CIRCUITPY drive. It should not be in a folder.
CircuitPython settings.toml File
This section will provide a couple of examples of what your settings.toml file should look like, specifically for CircuitPython WiFi projects in general.
The most minimal settings.toml file must contain your WiFi SSID and password, as that is the minimum required to connect to WiFi. Copy this example, paste it into your settings.toml, and update:
your_wifi_ssid
your_wifi_password
CIRCUITPY_WIFI_SSID = "your_wifi_ssid"
CIRCUITPY_WIFI_PASSWORD = "your_wifi_password"
Many CircuitPython network-connected projects on the Adafruit Learn System involve using Adafruit IO. For these projects, you must also include your Adafruit IO username and key. Copy the following example, paste it into your settings.toml file, and update:
your_wifi_ssid
your_wifi_password
your_aio_username
your_aio_key
CIRCUITPY_WIFI_SSID = "your_wifi_ssid"
CIRCUITPY_WIFI_PASSWORD = "your_wifi_password"
ADAFRUIT_AIO_USERNAME = "your_aio_username"
ADAFRUIT_AIO_KEY = "your_aio_key"
Some projects use different variable names for the entries in the settings.toml file. For example, a project might use ADAFRUIT_AIO_ID in the place of ADAFRUIT_AIO_USERNAME. If you run into connectivity issues, one of the first things to check is that the names in the settings.toml file match the names in the code.
Not every project uses the same variable name for each entry in the settings.toml file! Always verify it matches the code.
settings.toml File Tips
Here is an example settings.toml file.
# Comments are supported
CIRCUITPY_WIFI_SSID = "guest wifi"
CIRCUITPY_WIFI_PASSWORD = "guessable"
CIRCUITPY_WEB_API_PORT = 80
CIRCUITPY_WEB_API_PASSWORD = "passw0rd"
test_variable = "this is a test"
thumbs_up = "\U0001f44d"
In a settings.toml file, it's important to keep these factors in mind:
Strings are wrapped in double quotes; ex: "your-string-here"
Integers are not quoted and may be written in decimal with optional sign (+1, -1, 1000) or hexadecimal (0xabcd).
Floats, octal (0o567) and binary (0b11011) are not supported.
Use \u escapes for weird characters, \x and \ooo escapes are not available in .toml files
Example: \U0001f44d for 👍 (thumbs up emoji) and \u20ac for € (EUR sign)
Unicode emoji, and non-ASCII characters, stand for themselves as long as you're careful to save in "UTF-8 without BOM" format
When your settings.toml file is ready, you can save it in your text editor with the .toml extension.
Accessing Your settings.toml Information in code.py
In your code.py file, you'll need to import the os library to access the settings.toml file. Your settings are accessed with the os.getenv() function. You'll pass your settings entry to the function to import it into the code.py file.
import os

print(os.getenv("test_variable"))
In the upcoming CircuitPython WiFi examples, you'll see how the settings.toml file is used for connecting to your SSID and accessing your API keys.
Code the Clock
Once you've finished setting up your QT Py ESP32-S3 with CircuitPython, you can access the code, audio files and necessary libraries by downloading the Project Bundle.
To do this, click on the Download Project Bundle button in the window below. It will download to your computer as a zipped folder.
# SPDX-FileCopyrightText: 2025 Liz Clark for Adafruit Industries
# SPDX-License-Identifier: MIT

'''LED Matrix Alarm Clock with Scrolling Wake Up Text and Winking Eyes'''
import os
import ssl
import time
import random
import wifi
import socketpool
import microcontroller
import board
import audiocore
import audiobusio
import audiomixer
import adafruit_is31fl3741
from adafruit_is31fl3741.adafruit_rgbmatrixqt import Adafruit_RGBMatrixQT
import adafruit_ntp
from adafruit_ticks import ticks_ms, ticks_add, ticks_diff
from rainbowio import colorwheel
from adafruit_seesaw import digitalio, rotaryio, seesaw
from adafruit_debouncer import Button

# Configuration
timezone = -4
alarm_hour = 11
alarm_min = 36
alarm_volume = .2
hour_12 = True
no_alarm_plz = False
BRIGHTNESS_DAY = 200
BRIGHTNESS_NIGHT = 50

# I2S pins for Audio BFF
DATA = board.A0
LRCLK = board.A1
BCLK = board.A2

# Connect to WIFI
wifi.radio.connect(os.getenv("CIRCUITPY_WIFI_SSID"), os.getenv("CIRCUITPY_WIFI_PASSWORD"))
print(f"Connected to {os.getenv('CIRCUITPY_WIFI_SSID')}")

context = ssl.create_default_context()
pool = socketpool.SocketPool(wifi.radio)
ntp = adafruit_ntp.NTP(pool, tz_offset=timezone, cache_seconds=3600)

# Initialize I2C and displays
i2c = board.STEMMA_I2C()
matrix1 = Adafruit_RGBMatrixQT(i2c, address=0x30, allocate=adafruit_is31fl3741.PREFER_BUFFER)
matrix2 = Adafruit_RGBMatrixQT(i2c, address=0x31, allocate=adafruit_is31fl3741.PREFER_BUFFER)

# Configure displays
for m in [matrix1, matrix2]:
    m.global_current = 0x05
    m.set_led_scaling(BRIGHTNESS_DAY)
    m.enable = True
    m.fill(0x000000)
    m.show()

# Audio setup
audio = audiobusio.I2SOut(BCLK, LRCLK, DATA)
wavs = ["/"+f for f in os.listdir('/') if f.lower().endswith('.wav') and not f.startswith('.')]
mixer = audiomixer.Mixer(voice_count=1, sample_rate=22050, channel_count=1,
                         bits_per_sample=16, samples_signed=True, buffer_size=32768)
mixer.voice[0].level = alarm_volume
audio.play(mixer)

def open_audio():
    """Open a random WAV file"""
    filename = random.choice(wavs)
    return audiocore.WaveFile(open(filename, "rb"))

def update_brightness(hour_24):
    """Update LED brightness based on time of day"""
    brightness = BRIGHTNESS_NIGHT if (hour_24 >= 20 or hour_24 < 7) else BRIGHTNESS_DAY
    matrix1.set_led_scaling(brightness)
    matrix2.set_led_scaling(brightness)
    return brightness

# Seesaw setup for encoder and button
seesaw = seesaw.Seesaw(i2c, addr=0x36)
seesaw.pin_mode(24, seesaw.INPUT_PULLUP)
button = Button(digitalio.DigitalIO(seesaw, 24), long_duration_ms=1000)
encoder = rotaryio.IncrementalEncoder(seesaw)
last_position = 0

# Font definitions
FONT_5X7 = {
    '0': [0b01110, 0b10001, 0b10011, 0b10101, 0b11001, 0b10001, 0b01110],
    '1': [0b00100, 0b01100, 0b00100, 0b00100, 0b00100, 0b00100, 0b01110],
    '2': [0b01110, 0b10001, 0b00001, 0b00010, 0b00100, 0b01000, 0b11111],
    '3': [0b11111, 0b00010, 0b00100, 0b00010, 0b00001, 0b10001, 0b01110],
    '4': [0b00010, 0b00110, 0b01010, 0b10010, 0b11111, 0b00010, 0b00010],
    '5': [0b11111, 0b10000, 0b11110, 0b00001, 0b00001, 0b10001, 0b01110],
    '6': [0b00110, 0b01000, 0b10000, 0b11110, 0b10001, 0b10001, 0b01110],
    '7': [0b11111, 0b00001, 0b00010, 0b00100, 0b01000, 0b01000, 0b01000],
    '8': [0b01110, 0b10001, 0b10001, 0b01110, 0b10001, 0b10001, 0b01110],
    '9': [0b01110, 0b10001, 0b10001, 0b01111, 0b00001, 0b00010, 0b01100],
    ' ': [0b00000, 0b00000, 0b00000, 0b00000, 0b00000, 0b00000, 0b00000],
    'W': [0b10001, 0b10001, 0b10001, 0b10101, 0b10101, 0b11011, 0b10001],
    'A': [0b01110, 0b10001, 0b10001, 0b11111, 0b10001, 0b10001, 0b10001],
    'K': [0b10001, 0b10010, 0b10100, 0b11000, 0b10100, 0b10010, 0b10001],
    'E': [0b11111, 0b10000, 0b10000, 0b11110, 0b10000, 0b10000, 0b11111],
    'U': [0b10001, 0b10001, 0b10001, 0b10001, 0b10001, 0b10001, 0b01110],
    'P': [0b11110, 0b10001, 0b10001, 0b11110, 0b10000, 0b10000, 0b10000],
    'O': [0b01110, 0b10001, 0b10001, 0b10001, 0b10001, 0b10001, 0b01110],
    'N': [0b10001, 0b11001, 0b10101, 0b10101, 0b10011, 0b10001, 0b10001],
    'F': [0b11111, 0b10000, 0b10000, 0b11110, 0b10000, 0b10000, 0b10000]
}

# Eye patterns
EYE_OPEN = [0b10101, 0b01110, 0b10001, 0b10101, 0b10001, 0b01110, 0b00000]
EYE_CLOSED = [0b00000, 0b00000, 0b00000, 0b11111, 0b00000, 0b00000, 0b00000]

class Display:
    """Handle all display operations"""
    def __init__(self, m1, m2):
        self.matrix1 = m1
        self.matrix2 = m2

    def clear(self):
        """Clear both displays"""
        self.matrix1.fill(0x000000)
        self.matrix2.fill(0x000000)

    def show(self):
        """Update both displays"""
        self.matrix1.show()
        self.matrix2.show()

    def pixel(self, matrix, x, y, color): # pylint: disable=no-self-use
        """Draw a pixel with 180-degree rotation"""
        fx, fy = 12 - x, 8 - y
        if 0 <= fx < 13 and 0 <= fy < 9:
            matrix.pixel(fx, fy, color)

    def draw_char(self, matrix, char, x, y, color):
        """Draw a character at position x,y"""
        if char.upper() in FONT_5X7:
            bitmap = FONT_5X7[char.upper()]
            for row in range(7):
                for col in range(5):
                    if bitmap[row] & (1 << (4 - col)):
                        self.pixel(matrix, x + col, y + row, color)

    def draw_colon(self, y, color, is_pm=False):
        """Draw colon split between displays with optional PM indicator"""
        # Two dots for the colon
        for dy in [(1, 2), (4, 5)]:
            for offset in dy:
                self.pixel(self.matrix1, 12, y + offset, color)
                self.pixel(self.matrix2, 0, y + offset, color)
        # PM indicator dot
        if is_pm:
            self.pixel(self.matrix1, 12, y + 6, color)
            self.pixel(self.matrix2, 0, y + 6, color)

    def draw_time(self, time_str, color, is_pm=False):
        """Draw time display across both matrices"""
        self.clear()
        y = 1
        # Draw digits
        if len(time_str) >= 5:
            self.draw_char(self.matrix1, time_str[0], 0, y, color)
            self.draw_char(self.matrix1, time_str[1], 6, y, color)
            self.draw_colon(y, color, is_pm)
            self.draw_char(self.matrix2, time_str[3], 2, y, color)
            self.draw_char(self.matrix2, time_str[4], 8, y, color)
        self.show()

    def draw_scrolling_text(self, text, offset, color):
        """Draw scrolling text across both matrices"""
        self.clear()
        char_width = 6
        total_width = 26
        # Calculate position for smooth scrolling
        y = 1
        for i, char in enumerate(text):
            # Start from right edge and move left
            char_x = total_width - offset + (i * char_width)
            # Draw character if any part is visible
            if -6 < char_x < total_width:
                if char_x < 13:  # On matrix1
                    self.draw_char(self.matrix1, char, char_x, y, color)
                else:  # On matrix2
                    self.draw_char(self.matrix2, char, char_x - 13, y, color)
        self.show()

    def draw_eye(self, matrix, pattern, color):
        """Draw eye pattern centered on matrix"""
        x, y = 4, 1  # Center position
        for row in range(7):
            for col in range(5):
                if pattern[row] & (1 << (4 - col)):
                    self.pixel(matrix, x + col, y + row, color)

    def wink_animation(self, color):
        """Perform winking animation"""
        # Sequence: open -> left wink -> open -> right wink -> open
        sequences = [
            (EYE_OPEN, EYE_OPEN),
            (EYE_CLOSED, EYE_OPEN),
            (EYE_OPEN, EYE_OPEN),
            (EYE_OPEN, EYE_CLOSED),
            (EYE_OPEN, EYE_OPEN)
        ]
        for left_eye, right_eye in sequences:
            self.clear()
            self.draw_eye(self.matrix1, left_eye, color)
            self.draw_eye(self.matrix2, right_eye, color)
            self.show()
            time.sleep(0.3)

    def blink_time(self, time_str, color, is_pm=False, count=3):
        """Blink time display for mode changes"""
        for _ in range(count):
            self.clear()
            self.show()
            time.sleep(0.2)
            self.draw_time(time_str, color, is_pm)
            time.sleep(0.2)

# Initialize display handler
display = Display(matrix1, matrix2)

# State variables
class State:
    """Track all state variables"""
    def __init__(self):
        self.color_value = 0
        self.color = colorwheel(0)
        self.is_pm = False
        self.alarm_is_pm = False
        self.time_str = "00:00"
        self.set_alarm = 0
        self.active_alarm = False
        self.alarm_str = f"{alarm_hour:02}:{alarm_min:02}"
        self.current_brightness = BRIGHTNESS_DAY
        # Timers
        self.refresh_timer = Timer(3600000)  # 1 hour
        self.clock_timer = Timer(1000)       # 1 second
        self.wink_timer = Timer(30000)       # 30 seconds
        self.scroll_timer = Timer(80)        # Scroll speed
        self.blink_timer = Timer(500)        # Blink speed
        self.alarm_status_timer = Timer(100) # Status scroll
        # Display state
        self.scroll_offset = 0
        self.blink_state = True
        self.showing_status = False
        self.status_start_time = 0
        self.alarm_start_time = 0
        # Time tracking
        self.first_run = True
        self.seconds = 0
        self.mins = 0
        self.am_pm_hour = 0

class Timer:
    """Simple timer helper"""
    def __init__(self, interval):
        self.interval = interval
        self.last_tick = ticks_ms()

    def check(self):
        """Check if timer has elapsed"""
        if ticks_diff(ticks_ms(), self.last_tick) >= self.interval:
            self.last_tick = ticks_add(self.last_tick, self.interval)
            return True
        return False

    def reset(self):
        """Reset timer"""
        self.last_tick = ticks_ms()

# Initialize state
state = State()

def format_time_display(hour_24, minute, use_12hr=True):
    """Format time for display with AM/PM detection"""
    if use_12hr:
        hour = hour_24 % 12
        if hour == 0:
            hour = 12
        is_pm = hour_24 >= 12
    else:
        hour = hour_24
        is_pm = False
    return f"{hour:02}:{minute:02}", is_pm

def sync_time():
    """Sync with NTP server"""
    try:
        print("Getting time from internet!")
        now = ntp.datetime
        state.am_pm_hour = now.tm_hour
        state.mins = now.tm_min
        state.seconds = now.tm_sec
        state.time_str, state.is_pm = format_time_display(state.am_pm_hour, state.mins, hour_12)
        update_brightness(state.am_pm_hour)
        if not state.active_alarm and not state.showing_status:
            display.draw_time(state.time_str, state.color, state.is_pm)
        print(f"Time: {state.time_str}")
        state.first_run = False
        return True
    except Exception as e: # pylint: disable=broad-except
        print(f"Error syncing time: {e}")
        return False

# Main loop
while True:
    button.update()

    # Handle button presses
    if button.long_press:
        if state.set_alarm == 0 and not state.active_alarm:
            # Enter alarm setting mode
            state.blink_timer.reset()
            state.set_alarm = 1
            state.alarm_is_pm = alarm_hour >= 12 if hour_12 else False
            hour_str, _ = format_time_display(alarm_hour, 0, hour_12)
            display.blink_time(hour_str[:2] + ":  ", state.color, state.alarm_is_pm)
            # Draw the alarm hour after blinking to keep it displayed
            display.draw_time(hour_str[:2] + ":  ", state.color, state.alarm_is_pm)
        elif state.active_alarm:
            # Stop alarm
            mixer.voice[0].stop()
            state.active_alarm = False
            update_brightness(state.am_pm_hour)
            state.scroll_offset = 0
            # Immediately redraw the current time
            display.draw_time(state.time_str, state.color, state.is_pm)
            print("Alarm silenced")

    if button.short_count == 1:  # Changed from == 1 to >= 1 for better detection
        # Cycle through alarm setting modes
        state.set_alarm = (state.set_alarm + 1) % 3
        if state.set_alarm == 0:
            # Exiting alarm setting mode - redraw current time
            state.wink_timer.reset()
            display.draw_time(state.time_str, state.color, state.is_pm)
        elif state.set_alarm == 1:
            # Entering hour setting
            hour_str, _ = format_time_display(alarm_hour, 0, hour_12)
            display.draw_time(hour_str[:2] + ":  ", state.color, state.alarm_is_pm)
              # Reset timer to prevent immediate blinking
        elif state.set_alarm == 2:
            # Entering minute setting
            display.blink_time(f"  :{alarm_min:02}", state.color, state.alarm_is_pm)
            # Draw the minutes after blinking to keep them displayed
            display.draw_time(f"  :{alarm_min:02}", state.color, state.alarm_is_pm)
              # Reset timer to prevent immediate blinking

    if button.short_count == 3:  # Changed for better detection
        # Toggle alarm on/off
        no_alarm_plz = not no_alarm_plz
        print(f"Alarm disabled: {no_alarm_plz}")
        state.showing_status = True
        state.status_start_time = ticks_ms()
        state.scroll_offset = 0

    # Handle encoder (your existing code)
    position = -encoder.position
    if position != last_position:
        delta = 1 if position > last_position else -1
        if state.set_alarm == 0:
            # Change color
            state.color_value = (state.color_value + delta * 5) % 255
            state.color = colorwheel(state.color_value)
            display.draw_time(state.time_str, state.color, state.is_pm)
        elif state.set_alarm == 1:
            # Change hour
            alarm_hour = (alarm_hour + delta) % 24
            state.alarm_is_pm = alarm_hour >= 12 if hour_12 else False
            hour_str, _ = format_time_display(alarm_hour, 0, hour_12)
            display.draw_time(hour_str[:2] + ":  ", state.color, state.alarm_is_pm)
        elif state.set_alarm == 2:
            # Change minute
            alarm_min = (alarm_min + delta) % 60
            display.draw_time(f"  :{alarm_min:02}", state.color, state.alarm_is_pm)
        state.alarm_str = f"{alarm_hour:02}:{alarm_min:02}"
        last_position = position

    # Handle alarm status display
    if state.showing_status:
        if state.alarm_status_timer.check():
            status_text = "OFF " if no_alarm_plz else "ON "
            display.draw_scrolling_text(status_text, state.scroll_offset, state.color)
            text_width = 4*6 if no_alarm_plz else 3*6
            state.scroll_offset += 1
            # Reset when text has completely scrolled off
            if state.scroll_offset > text_width + 18:
                state.scroll_offset = 0
                state.showing_status = False
                if state.set_alarm == 0 and not state.active_alarm:
                    display.draw_time(state.time_str, state.color, state.is_pm)

    # Handle active alarm scrolling
    if state.active_alarm:
        # Auto-silence alarm after 1 minute
        if ticks_diff(ticks_ms(), state.alarm_start_time) >= 60000:
            mixer.voice[0].stop()
            state.active_alarm = False
            update_brightness(state.am_pm_hour)
            state.scroll_offset = 0
            display.draw_time(state.time_str, state.color, state.is_pm)
            print("Alarm auto-silenced")
        elif state.scroll_timer.check():
            display.draw_scrolling_text("WAKE UP ", state.scroll_offset, state.color)
            text_width = 8 * 6  # "WAKE UP " is 8 characters
            state.scroll_offset += 1
            # Reset when text has completely scrolled off
            if state.scroll_offset > text_width + 26:
                state.scroll_offset = 0

    # Handle alarm setting mode blinking
    elif state.set_alarm > 0:
        # Only blink if enough time has passed since mode change
        if state.blink_timer.check():
            state.blink_state = not state.blink_state
            if state.blink_state:
                # Redraw during the "on" part of blink
                if state.set_alarm == 1:
                    hour_str, _ = format_time_display(alarm_hour, 0, hour_12)
                    display.draw_time(hour_str[:2] + ":  ", state.color, state.alarm_is_pm)
                else:
                    display.draw_time(f"  :{alarm_min:02}", state.color, state.alarm_is_pm)
            else:
                # Only clear display during the "off" part of blink
                display.clear()
                display.show()

    # Normal mode operations
    else:  # state.set_alarm == 0
        # Winking animation
        if not state.active_alarm and not state.showing_status and state.wink_timer.check():
            print("Winking!")
            display.wink_animation(state.color)
            display.draw_time(state.time_str, state.color, state.is_pm)

        # Time sync
        if state.refresh_timer.check() or state.first_run:
            if not sync_time():
                time.sleep(10)
                microcontroller.reset()

        # Local timekeeping
        if state.clock_timer.check():
            state.seconds += 1
            if state.seconds > 59:
                state.seconds = 0
                state.mins += 1
                if state.mins > 59:
                    state.mins = 0
                    state.am_pm_hour = (state.am_pm_hour + 1) % 24
                    update_brightness(state.am_pm_hour)
                # Update display
                state.time_str, state.is_pm = format_time_display(state.am_pm_hour,
                                                                  state.mins, hour_12)
                if not state.active_alarm and not state.showing_status:
                    display.draw_time(state.time_str, state.color, state.is_pm)
                # Check alarm
                if f"{state.am_pm_hour:02}:{state.mins:02}" == state.alarm_str and not no_alarm_plz:
                    print("ALARM!")
                    wave = open_audio()
                    mixer.voice[0].play(wave, loop=True)
                    state.active_alarm = True
                    state.alarm_start_time = ticks_ms()
                    state.scroll_offset = 0
Upload the Code and Libraries to the QT Py ESP32-S3
After downloading the Project Bundle, plug your QT Py ESP32-S3 into the computer's USB port with a known good USB data+power cable. You should see a new flash drive appear in the computer's File Explorer or Finder (depending on your operating system) called CIRCUITPY. Unzip the folder and copy the following items to the QT Py ESP32-S3's CIRCUITPY drive.
lib folder
nice-alarm.wav
square-alarm.wav
code.py
Your QT Py ESP32-S3 CIRCUITPY drive should look like this after copying the lib folder, two .WAV files and code.py file:
Add Your settings.toml File
As of CircuitPython 8.0.0, there is support for Environment Variables. Environment variables are stored in a settings.toml file. Similar to secrets.py, the settings.toml file separates your sensitive information from your main code.py file. Add your settings.toml file as described in the Create Your settings.toml File page earlier in this guide. You'll need to include values for your CIRCUITPY_WIFI_SSID and CIRCUITPY_WIFI_PASSWORD.
CIRCUITPY_WIFI_SSID = "your-ssid-here"
CIRCUITPY_WIFI_PASSWORD = "your-ssid-password-here"
How the CircuitPython Code Works
At the top of the code are user configurable settings for the clock. You'll set your time zone, alarm time, alarm volume, 12 hours vs. 24 hour time and LED brightness for day and night.
# Configuration
timezone = -4
alarm_hour = 11
alarm_min = 36
alarm_volume = .2
hour_12 = True
no_alarm_plz = False
BRIGHTNESS_DAY = 200
BRIGHTNESS_NIGHT = 50
WiFi
The clock keeps time using network time protocol (NTP) with WiFi.
# Connect to WIFI
wifi.radio.connect(os.getenv("CIRCUITPY_WIFI_SSID"), os.getenv("CIRCUITPY_WIFI_PASSWORD"))
print(f"Connected to {os.getenv('CIRCUITPY_WIFI_SSID')}")

context = ssl.create_default_context()
pool = socketpool.SocketPool(wifi.radio)
ntp = adafruit_ntp.NTP(pool, tz_offset=timezone, cache_seconds=3600)
LEDs
The two RGB matrix displays connect over I2C. One is on the default address (0x30) and the second is on address 0x31.
# Initialize I2C and displays
i2c = board.STEMMA_I2C()
matrix1 = Adafruit_RGBMatrixQT(i2c, address=0x30, allocate=adafruit_is31fl3741.PREFER_BUFFER)
matrix2 = Adafruit_RGBMatrixQT(i2c, address=0x31, allocate=adafruit_is31fl3741.PREFER_BUFFER)

# Configure displays
for m in [matrix1, matrix2]:
    m.global_current = 0x05
    m.set_led_scaling(BRIGHTNESS_DAY)
    m.enable = True
    m.fill(0x000000)
    m.show()
Audio
.WAV files are played when the alarm goes off on the clock. Any .WAV file that is added to the CIRCUITPY drive is stored in the wavs array. When an alarm is triggered, one of the .WAV files is opened and played on a loop.
# Audio setup
audio = audiobusio.I2SOut(BCLK, LRCLK, DATA)
wavs = ["/"+f for f in os.listdir('/') if f.lower().endswith('.wav') and not f.startswith('.')]
mixer = audiomixer.Mixer(voice_count=1, sample_rate=22050, channel_count=1,
                         bits_per_sample=16, samples_signed=True, buffer_size=32768)
mixer.voice[0].level = alarm_volume
audio.play(mixer)

def open_audio():
    """Open a random WAV file"""
    filename = random.choice(wavs)
    return audiocore.WaveFile(open(filename, "rb"))
seesaw
The rotary encoder is instantiated over I2C. The button on the encoder is passed to a debouncer Button object. This lets you use long press and short press detection.
# Seesaw setup for encoder and button
seesaw = seesaw.Seesaw(i2c, addr=0x36)
seesaw.pin_mode(24, seesaw.INPUT_PULLUP)
button = Button(digitalio.DigitalIO(seesaw, 24), long_duration_ms=1000)
encoder = rotaryio.IncrementalEncoder(seesaw)
last_position = 0
Custom Display Class
A custom 5x7 font, eye bitmaps and Display class is used for the LED matrices. The custom class takes care of drawing characters, animating the eyes, scrolling text and rotating the displays in software.
# Eye patterns
EYE_OPEN = [0b10101, 0b01110, 0b10001, 0b10101, 0b10001, 0b01110, 0b00000]
EYE_CLOSED = [0b00000, 0b00000, 0b00000, 0b11111, 0b00000, 0b00000, 0b00000]

class Display:
    """Handle all display operations"""
    def __init__(self, m1, m2):
        self.matrix1 = m1
        self.matrix2 = m2
State Tracking
A State class takes care of tracking all of the different states, modes and timers used in the loop.
# State variables
class State:
    """Track all state variables"""
    def __init__(self):
        self.color_value = 0
        self.color = colorwheel(0)
        self.is_pm = False
        self.alarm_is_pm = False
        self.time_str = "00:00"
        self.set_alarm = 0
        self.active_alarm = False
        self.alarm_str = f"{alarm_hour:02}:{alarm_min:02}"
        self.current_brightness = BRIGHTNESS_DAY
        # Timers
        self.refresh_timer = Timer(3600000)  # 1 hour
        self.clock_timer = Timer(1000)       # 1 second
        self.wink_timer = Timer(30000)       # 30 seconds
        self.scroll_timer = Timer(80)        # Scroll speed
        self.blink_timer = Timer(500)        # Blink speed
        self.alarm_status_timer = Timer(100) # Status scroll
        # Display state
        self.scroll_offset = 0
        self.blink_state = True
        self.showing_status = False
        self.status_start_time = 0
        self.alarm_start_time = 0
        # Time tracking
        self.first_run = True
        self.seconds = 0
        self.mins = 0
        self.am_pm_hour = 0
The Loop
In the loop, the button is tracked to determine if a long press or short press is received. A long press lets you set a new alarm on the clock or turn off an active alarm. A single short press lets you navigate the alarm setting. Three short presses in a row lets you toggle the alarm on or off.
# Main loop
while True:
    button.update()

    # Handle button presses
    if button.long_press:
        if state.set_alarm == 0 and not state.active_alarm:
            # Enter alarm setting mode
            state.blink_timer.reset()
            state.set_alarm = 1
            state.alarm_is_pm = alarm_hour >= 12 if hour_12 else False
            hour_str, _ = format_time_display(alarm_hour, 0, hour_12)
            display.blink_time(hour_str[:2] + ":  ", state.color, state.alarm_is_pm)
            # Draw the alarm hour after blinking to keep it displayed
            display.draw_time(hour_str[:2] + ":  ", state.color, state.alarm_is_pm)
        elif state.active_alarm:
            # Stop alarm
            mixer.voice[0].stop()
            state.active_alarm = False
            update_brightness(state.am_pm_hour)
            state.scroll_offset = 0
            # Immediately redraw the current time
            display.draw_time(state.time_str, state.color, state.is_pm)
            print("Alarm silenced")

    if button.short_count == 1:
        # Cycle through alarm setting modes
        state.set_alarm = (state.set_alarm + 1) % 3
        if state.set_alarm == 0:
            # Exiting alarm setting mode - redraw current time
            state.wink_timer.reset()
            display.draw_time(state.time_str, state.color, state.is_pm)
        elif state.set_alarm == 1:
            # Entering hour setting
            hour_str, _ = format_time_display(alarm_hour, 0, hour_12)
            display.draw_time(hour_str[:2] + ":  ", state.color, state.alarm_is_pm)
              # Reset timer to prevent immediate blinking
        elif state.set_alarm == 2:
            # Entering minute setting
            display.blink_time(f"  :{alarm_min:02}", state.color, state.alarm_is_pm)
            # Draw the minutes after blinking to keep them displayed
            display.draw_time(f"  :{alarm_min:02}", state.color, state.alarm_is_pm)
              # Reset timer to prevent immediate blinking

    if button.short_count == 3:
        # Toggle alarm on/off
        no_alarm_plz = not no_alarm_plz
        print(f"Alarm disabled: {no_alarm_plz}")
        state.showing_status = True
        state.status_start_time = ticks_ms()
        state.scroll_offset = 0
Encoder
The encoder lets you change the color of the RGB LEDs. It cycles through the rainbow. When you are setting a new alarm, the encoder lets you rotate through the hours and minutes.
# Handle encoder (your existing code)
    position = -encoder.position
    if position != last_position:
        delta = 1 if position > last_position else -1
        if state.set_alarm == 0:
            # Change color
            state.color_value = (state.color_value + delta * 5) % 255
            state.color = colorwheel(state.color_value)
            display.draw_time(state.time_str, state.color, state.is_pm)
        elif state.set_alarm == 1:
            # Change hour
            alarm_hour = (alarm_hour + delta) % 24
            state.alarm_is_pm = alarm_hour >= 12 if hour_12 else False
            hour_str, _ = format_time_display(alarm_hour, 0, hour_12)
            display.draw_time(hour_str[:2] + ":  ", state.color, state.alarm_is_pm)
        elif state.set_alarm == 2:
            # Change minute
            alarm_min = (alarm_min + delta) % 60
            display.draw_time(f"  :{alarm_min:02}", state.color, state.alarm_is_pm)
        state.alarm_str = f"{alarm_hour:02}:{alarm_min:02}"
        last_position = position
Text on a Clock
When you toggle the alarm with three short button presses, "ON" or "OFF" scrolls across the displays to let you know if the alarm is on or off.
# Handle alarm status display
    if state.showing_status:
        if state.alarm_status_timer.check():
            status_text = "OFF " if no_alarm_plz else "ON "
            display.draw_scrolling_text(status_text, state.scroll_offset, state.color)
            text_width = 4*6 if no_alarm_plz else 3*6
            state.scroll_offset += 1
            # Reset when text has completely scrolled off
            if state.scroll_offset > text_width + 18:
                state.scroll_offset = 0
                state.showing_status = False
                if state.set_alarm == 0 and not state.active_alarm:
                    display.draw_time(state.time_str, state.color, state.is_pm)
When an alarm is active, "WAKE UP" scrolls across the displays.
# Handle active alarm scrolling
    if state.active_alarm:
        # Auto-silence alarm after 1 minute
        if ticks_diff(ticks_ms(), state.alarm_start_time) >= 60000:
            mixer.voice[0].stop()
            state.active_alarm = False
            update_brightness(state.am_pm_hour)
            state.scroll_offset = 0
            display.draw_time(state.time_str, state.color, state.is_pm)
            print("Alarm auto-silenced")
        elif state.scroll_timer.check():
            display.draw_scrolling_text("WAKE UP ", state.scroll_offset, state.color)
            text_width = 8 * 6  # "WAKE UP " is 8 characters
            state.scroll_offset += 1
            # Reset when text has completely scrolled off
            if state.scroll_offset > text_width + 26:
                state.scroll_offset = 0
Setting an Alarm
When you are setting a new alarm, the hours or minutes will blink on and off.
# Handle alarm setting mode blinking
    elif state.set_alarm > 0:
        # Only blink if enough time has passed since mode change
        if state.blink_timer.check():
            state.blink_state = not state.blink_state
            if state.blink_state:
                # Redraw during the "on" part of blink
                if state.set_alarm == 1:
                    hour_str, _ = format_time_display(alarm_hour, 0, hour_12)
                    display.draw_time(hour_str[:2] + ":  ", state.color, state.alarm_is_pm)
                else:
                    display.draw_time(f"  :{alarm_min:02}", state.color, state.alarm_is_pm)
            else:
                # Only clear display during the "off" part of blink
                display.clear()
                display.show()
Eyes on a Clock
When the clock is just being a clock, you'll see the blinking eye animation every 30 seconds.
else:  # state.set_alarm == 0
        # Winking animation
        if not state.active_alarm and not state.showing_status and state.wink_timer.check():
            print("Winking!")
            display.wink_animation(state.color)
            display.draw_time(state.time_str, state.color, state.is_pm)
Finally, the Clock Code
Every hour, the clock syncs with the NTP server to make sure that the time is accurate. Between syncs, time is kept locally on the QT Py using ticks().
# Time sync
        if state.refresh_timer.check() or state.first_run:
            if not sync_time():
                time.sleep(10)
                microcontroller.reset()

        # Local timekeeping
        if state.clock_timer.check():
            state.seconds += 1
            if state.seconds > 59:
                state.seconds = 0
                state.mins += 1
                if state.mins > 59:
                    state.mins = 0
                    state.am_pm_hour = (state.am_pm_hour + 1) % 24
                    update_brightness(state.am_pm_hour)
                # Update display
                state.time_str, state.is_pm = format_time_display(state.am_pm_hour,
                                                                  state.mins, hour_12)
                if not state.active_alarm and not state.showing_status:
                    display.draw_time(state.time_str, state.color, state.is_pm)
                # Check alarm
                if f"{state.am_pm_hour:02}:{state.mins:02}" == state.alarm_str and not no_alarm_plz:
                    print("ALARM!")
                    wave = open_audio()
                    mixer.voice[0].play(wave, loop=True)
                    state.active_alarm = True
                    state.alarm_start_time = ticks_ms()
                    state.scroll_offset = 0
Assemble
Header Connections
The I2S Amplifier BFF board connects to the QT Py via short header pins and short header sockets on the QT Py.
The header pins are soldered to the I2S Amplifier BFF, under the speaker port.
The short socket headers are soldered to the QT Py, under the USB C port.
Speaker Wires
Solder Pico Plug wires to the speaker.
+ connects to the red wire
- connects to the black wire
Cut Matrix Pad Jumper to the second display
Use a hobby knife or flush cutters to carefully cut the trace on the 0x30 pad jumper.
Add solder to join the 0x31 pad as seen here.
Connect Matrix display
Use 50mm STEMMA cable to connect the two matrix displays.
Use a 100mm STEMMA cable on the left display (connects to the QTPy).
Use a 200mm or longer, STEMMA cable on the right display (connects to the rotary encoder board).
Mount grid cover
Place the grid part into the inside the "front dome" part. The grid press fits into the display cut out.
Mount Matrix displays
Use M2.5x5mm screws to mount the matrix displays to the standoffs inside the front dome part.
Connect cables to QTPy and Audio BFF
Attach the STEMMA cables to the QT Py and the speaker wire to the Audio BFF boards.
Board Mount
Align the QT Py board to the mount with the USB port facing the two mounting tabs.
Press fit the QT Py to mount
The QT Py mounts to the holder part with the Audio BFF facing down.
Add M3x5mm screws to the two mounting tabs on the holder.
Rotary knob
Remove the hex nut and washer to fit the rotary knob into the back dome part.
Plug the STEMMA cable to the port and mount the rotary board to the back dome, with the port to one side as shown.
Use M2.5 screws to mount the rotary board to the standoffs inside the dome part.
Mount speaker
Place the speaker into the back dome cut out part with the wire contacts facing out.
Once the speaker is placed, rotate until the contacts face towards the back of the dome part.
Snap fit domes
Align the speaker cutout on the front dome to the back dome and firmly press fit together to attach both halves of the dome parts.
Attach rotary knob tail
Align the D shape on the steam to the cutout on the printed tail knob.
Press fit the tail part to the stem to fit.
Complete
Connect a USB C cable into the port cutout to power the clock!


