Mfr Part # 5300
ESP32-S2 TFT FEATHER PCB ANT
Adafruit Industries LLC
License: See Original Project 3D Printing Air Pressure Environmental
Courtesy of Adafruit
Guide by Tyler Cooper
Overview
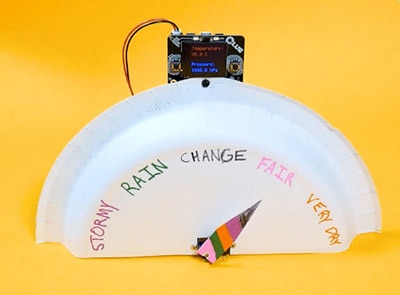
This guide will help you create a fun little indoor barometer to help you predict changes in the weather without writing a single line of code. This project explores how to combine WipperSnapper firmware with Adafruit IO Actions to read data from an Adafruit DPS310 Barometric Pressure Sensor and adjust a custom designed analog panel meter.
What is WipperSnapper?
WipperSnapper is a firmware designed to turn any WiFi-capable board into an Internet-of-Things device without programming a single line of code. WipperSnapper connects to Adafruit IO, a web platform designed (by Adafruit!) to display, respond, and interact with your project's data.
Simply load the WipperSnapper firmware onto your board, add credentials, and plug it into power. Your board will automatically register itself with your Adafruit IO account.
From there, you can add components to your board such as buttons, switches, potentiometers, sensors, and more! Components are dynamically added to hardware, so you can immediately start interacting, logging, and streaming the data your projects produce without writing code.
What is a Barometer?
A barometer is an instrument that measures atmospheric pressure, which helps predict weather changes. Higher pressure often means clear, fair weather, while lower pressure can signal rain, storms, or windy conditions. Barometers are widely used in meteorology, aviation, and even hiking to anticipate weather shifts.
Parts
You can use any Wipper-compatible board, we just happened to have this feather on hand.
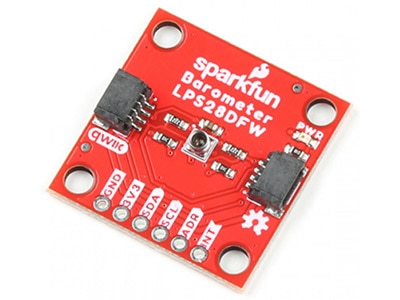
Adafruit DPS310 Precision Barometric Pressure / Altitude Sensor
Assembled Terminal Block Breakout FeatherWing for all Feathers
Wiring
First thing you will need to do is wire everything up so you can connect to Adafruit IO, install the WipperSnapper firmware, and test everything out. Use the wiring diagram below to wire everything up exactly as shown.
Connect the DPS310 breakout with a STEMMA QT cable
Board GND to the Analog Panel Meter - (right terminal on back)
Board A0 pin to the Analog Panel Meter + (left terminal on back) use any PWM-output capable pin!
WipperSnapper Setup
The WipperSnapper firmware and ecosystem are in BETA and are actively being developed to add functionality, more boards, more sensors, and fix bugs. We encourage you to try out WipperSnapper with the understanding that it is not final release software and is still in development. If you encounter any bugs, glitches, or difficulties during the beta period, or with this guide, please contact us via http://io.adafruit.com/support.
What is WipperSnapper
WipperSnapper is a firmware designed to turn any WiFi-capable board into an Internet-of-Things device without programming a single line of code. WipperSnapper connects to Adafruit IO, a web platform designed (by Adafruit!) to display, respond, and interact with your project's data.
Simply load the WipperSnapper firmware onto your board, add credentials, and plug it into power. Your board will automatically register itself with your Adafruit IO account.
From there, you can add components to your board such as buttons, switches, potentiometers, sensors, and more! Components are dynamically added to hardware, so you can immediately start interacting, logging, and streaming the data your projects produce without writing code.
Sign up for Adafruit.io
You will need an Adafruit IO account to use WipperSnapper on your board. If you do not already have one, head over to io.adafruit.com to create a free account.
Add a New Device to Adafruit IO
Log into your Adafruit IO account. Click the New Device button at the top of the page.
After clicking New Device, you should be on the board selector page. This page displays every board that is compatible with the WipperSnapper firmware.
In the board selector page's search bar, search for the Feather ESP32 V2. Once you've located the board, you'd like to install WipperSnapper on, click the Choose Board button to bring you to the self-guided installation wizard.
Follow the step-by-step instructions on the page to install WipperSnapper on your device and connect it to Adafruit IO.
If the installation was successful, a popover should appear displaying that your board has successfully been detected by Adafruit IO.
Give your board a name and click "Continue to Device Page".
You should be brought to your board's device page.
Feedback
Adafruit.io WipperSnapper is in beta, and you can help improve it!
If you have suggestions or general feedback about the installation process - visit https://io.adafruit.com/support, click "Contact Adafruit IO Support" and select "I have feedback or suggestions for the WipperSnapper Beta".
Troubleshooting
If you encountered an issue during installation, please try the steps below first.
If you're still unable to resolve the issue, or if your issue is not listed below, get in touch with us directly at https://io.adafruit.com/support. Make sure to click “Contact Adafruit IO Support" and select "There is an issue with WipperSnapper. Something is broken!"
I don't see my board on Adafruit IO, it is stuck connecting to WiFi.
First, make sure that you selected the correct board on the board selector.
Next, please make sure that you entered your WiFi credentials properly, there are no spaces/special characters in either your network name (SSID) or password, and that you are connected to a 2.4GHz wireless network.
If you're still unable to connect your board to WiFi, please make a new post on the WipperSnapper technical support forum with the error you're experiencing, the LED colors which are blinking, and the board you're using.
I don't see my board on Adafruit IO, it is stuck "Registering with Adafruit IO."
Try hard resetting your board by unplugging it from USB power and plugging it back in.
If the error is still occurring, please make a new post on the WipperSnapper technical support forum with information about what you're experiencing, the LED colors which are blinking (if applicable), and the board you're using.
"Uninstalling" WipperSnapper
WipperSnapper firmware is an application that is loaded onto your board. There is nothing to "uninstall". However, you may want to "move" your board from running WipperSnapper to running Arduino or CircuitPython. You also may need to restore your board to the state it was shipped to you from the Adafruit factory.
Moving from WipperSnapper to CircuitPython
Follow the steps on the Installing CircuitPython page to install CircuitPython on your board running WipperSnapper.
If you are unable to double-tap the RST button to enter the UF2 bootloader, follow the "Factory Resetting a WipperSnapper Board" instructions below.
Uploading this sketch will overwrite WipperSnapper. If you want to re-install WipperSnapper, follow the instructions at the top of this page.
Moving from WipperSnapper to Arduino
If you want to use your board with Arduino, you will use the Arduino IDE to load any sketch onto your board.
First, follow the page below to set up your Arduino IDE environment for use with your board.
Then, follow the page below to upload the "Arduino Blink" sketch to your board.
Uploading this sketch will overwrite WipperSnapper. If you want to re-install WipperSnapper, follow the instructions at the top of this page.
Factory Resetting a WipperSnapper Board
Sometimes, hardware gets into a state that requires it to be "restored" to the original state it shipped in. If you'd like to get your board back to its original factory state, follow the guide below.
Factory Reset your Adafruit Feather HUZZAH ESP32-V2
Adafruit IO Configuration
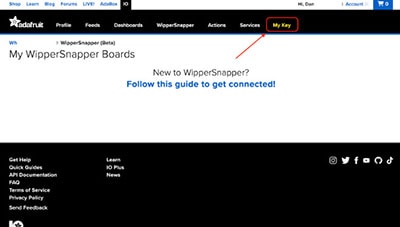
Assuming you have already gone through the WipperSnapper Setup page and connected your board to WipperSnapper, navigate to the WipperSnapper board list.
On this page, select the WipperSnapper board you just connected.
If you do not see your board listed - go back to the WipperSnapper Setup Page and make sure it registers with Adafruit.io
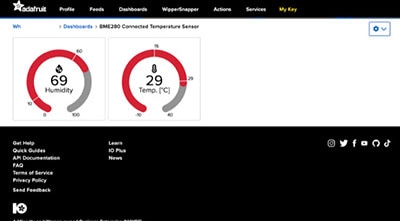
On the device page, quickly check that your device is online and is running the latest version of the WipperSnapper firmware.
The device tile on the left indicates the version number of the firmware running on the connected board.
If the firmware version is green with a checkmark - continue with this guide.
If the firmware version is red with an "X" - update to the latest WipperSnapper firmware on your board before continuing.
Adding Components
When you are on the new Barometer device page, start by adding the barometric pressure sensor. Click on either the New Component Button, or the big + icon in the middle of the page.
In the pop-up, search for DPS310 and click on it to get to the set-up screen.
On the next page, you can choose to uncheck the two temperature sensors if you want, as you will not be using those readings for this guide. Though, you could keep one or both of these checked if you want to be able to read this information from the sensor. You can leave the rest of the information set to the default (the code will check the sensor every 15 minutes).
Next, click the New Component button again and we will set up the analog panel meter. In the popup, you are actually going to search for RGB LED. Right now, there isn't a generic PWM option, or analog meter option, so you'll use the RGB LED component to send a PWM signal to the panel meter.
Change the RGB LED Name to Panel Meter and choose A0 from the RGB LED Pin dropdown.
Your Devices page should now look like this:
The next step will set up the Adafruit IO Actions to get this all to work.
Set up Adafruit IO Action
In the top navigation click on the Actions link, then on the next page click the 'New Action' button.
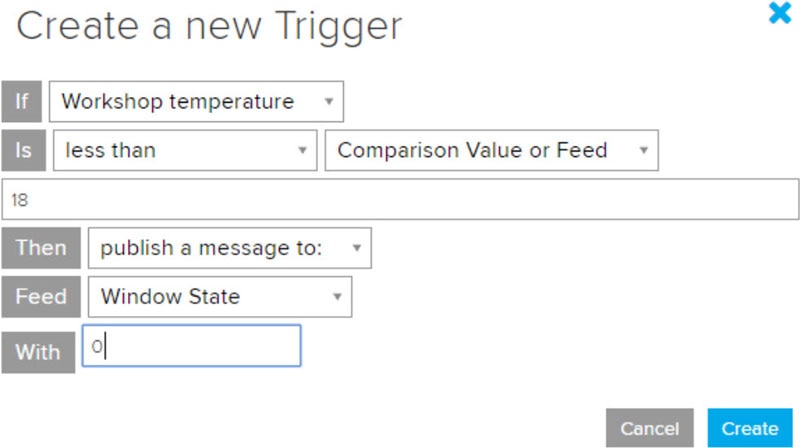
In the pop-up, name your action Barometer, and describe what your action will do. In this case 'Check barometric pressure and adjust panel meter.'
Here is how you will want to set up your action. Set to trigger the action any time the barometric pressure sensor receives data (every 15 minutes). Then, use the map block to convert the barometric pressure value (hPa) to a value the meter can use (PWM). Then round that value to a whole number and set the panel meter to that value.
If you aren't sure how to use Adafruit IO Actions, please check out this guide: https://learn.adafruit.com/how-to-use-blockly-for-actions-on-adafruit-io.
Once you have your new Adafruit IO Action set up like above, click the Save and Run button. You should see your panel meter show the correct hPa value.
Custom Meter Label
If you want to create a custom label for your panel meter, you can do it in a variety of ways. You can just tape a label over the top of the existing one and hand draw your own label, or you can print out your own using the template below.
I used Avery brand removable labels that fit perfectly to the panel meter. These labels are also not permanent, so are easy to remove if you want to change the meter design in the future.
Here are the files to print your own label. There is a PDF version that you should be able to use to print directly onto the label. There is also an included EPS file you can use if you want to make changes to the label for a different project.
Disassemble the Panel Meter
Start by removing the two screws on the back holding the clear cover to the panel meter. Then inside you will see two tiny screws holding the graphic panel in place. Remove these screws and carefully slide the panel out.
Once you have printed the label, I found it easiest to align the two circles to the screw holes on the existing panel. If you try to adhere the label to the front of the panel, you will see the text show through the label.
Once you have the sticker/label adhered to the back of the panel, you can use a hobby knife to cut around the panel from behind like this:
Now go ahead and assemble everything back together how it was before with your new label facing out.
Optional 3D Printed Stand
If you have access to a 3D printer, here is a file to print out a simple stand to hold up your new barometer. Just unscrew the nuts/washers from the back of the meter and insert the two screws through the holes in the 3D print. Then hold everything together with the nuts/washers.
Barometer_Panel_Meter_Stand.stl