Mfr Part # DFR0992-EN
UNIHIKER K10 AI EDUCATIONAL TOOL
DFRobot
Speakers Wired I2C / TWI Wireless Bluetooth / BLE Displays LCD / TFT Microcontrollers Audio Microphone
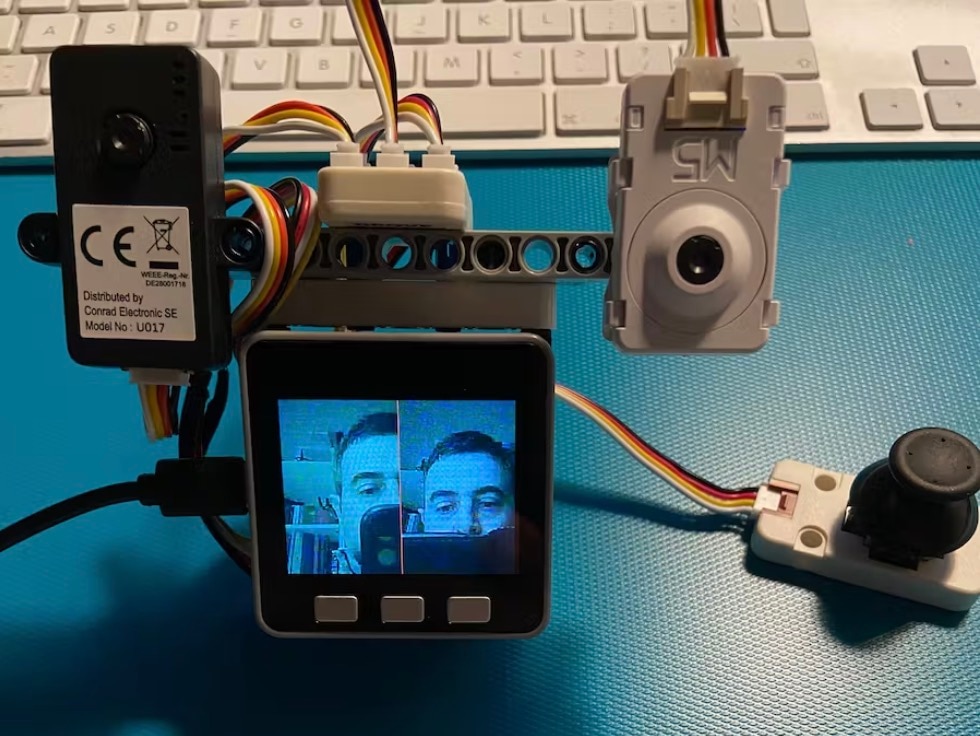
When working on the UNIHIKER K10 AI vision recognition project, we often need to recognize our own face or point the camera in a different direction. However, since the K10's camera is fixed on the board, this can be difficult.
To solve this, we can use a 24-pin FPC Extension Board and an FPC cable to extend the camera, allowing it to face the user or in another direction.

1UNIHIKER K10
124-pin 0.5mm FPC adapter board
124-pin 0.5mm FPC cable
Note: Any 24-pin 0.5mm FPC board and cable will work.

Mind+ Graphical Programming Software (Minimum Version Requirement: V1.8.1 RC1.0)
1. The K10 camera connector is located on the backside of the board, near the top edge. First, we need to remove the original camera.

2. Use your fingernail to lift the black latch vertically upwards as below.

3. Gently pull out the FPC cable, then slowly wiggle the camera to detach it from the K10. Be careful not to tear the cable.

4. After removing the camera, take the FPC extension cable and insert it into the K10’s camera port with the blue side facing up.

Push it in fully, then secure the black latch to prevent loosening.

5. Next, take the FPC adapter board and lift the black latch of the P1 vertically with your fingernail.

Insert the FPC extension cable, then lock the black latch back in place.

6. For the P3 connector: Pull the black latch sideways - parallel to the board - on both ends simultaneously.

Insert the camera facing the opposite direction into the P3, then push the black latch back to secure it.

7. Assembly complete

Open Mind+, Connect UNIHIKER K10, and upload the following test code:

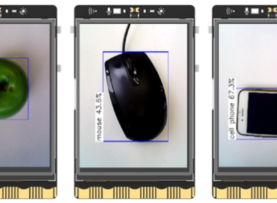
The camera display is successful, and the flipping modification works!


If you'd like to see any tips on using the UNIHIKER K10, feel free to join our Discord: https://discord.gg/PVAWBMPwsk