製造商零件編號 ABX00173
ARDUINO UNO Q 4GB RAM 32GB EMMC
Arduino
The Arduino UNO Q is unlike any previous Arduino board – this is a full Linux single-board computer with an onboard Arduino IDE-compatible microcontroller. While you have likely seen the specs on the board, you may be curious about how to get started with the UNO Q. To help with this, we’ll walk through the out-of-the-box experience and show you how easy it is to get started by demonstrating one of the included example projects.

While the board can be used connected to a PC, in this demo, we will use it in standalone mode. If you want to follow along with this demo, you will need the following:
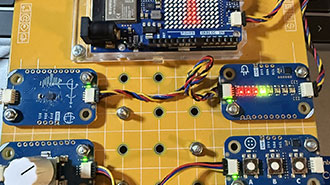
Plug your USB-C docking station into the UNO Q’s USB port, connect your monitor, keyboard, and mouse to the dock, and connect the Modulino to the UNO Q via the Qwiic port.

With all the connections made, connect the power supply to the USB-C docking station to power the board. Once powered, you should see the board begin to boot.

When the board finishes booting, you should see the initial login screen.

You will need to set the password for your board and then confirm the password to log in.

Upon login, you will see the Arduino App Lab. During the initial setup, you will need to give your board a name to help differentiate it from any other boards you may have running locally, especially in a classroom environment. You can either type in a name or go with one of the randomly created names offered.

Then you will need to select a Wi-Fi network to connect to.

Type in the network password and select confirm to connect.

Once the connection is established, the UNO Q will check for App Lab updates…

And if updates are available, it will prompt you to install the updates.


When the updates have finished installing, you will need to restart the App Lab. Simply click the “X” in the top corner of the window to close the application.

From the desktop, you can click the App Lab icon on the bottom toolbar to relaunch the application.


After updating, the application may ask again for you to name your board, as well as set the password for your Linux account. It is recommended to reenter the Linux password you created earlier when the board was first booted to avoid any issues.


With the updates complete, you can now begin to browse the App Lab example projects.

For this demo, we will be launching the “Home climate monitoring and storage” example.

This example will use the MCU to read and interpret the sensor data from the Thermo Modulino via the Qwiic connector. The sensor data is then passed to the Linux SBC to store in an InfluxDB database and display the sensor data via a local webpage. You can explore all the files related to this example in the file tree on the left side of the screen.


Should you want to develop a project based on one of the included examples, or just test some modifications, clicking the down arrow will allow you to duplicate the project to the “My Apps” directory, where you can make and save modifications to the files.

To build and run this example, click the play button in the upper right corner.

The window will switch to the console view as the project builds.

And if everything builds correctly, the text will turn green with a message stating the project has started.

Now, with the project running, open the web browser from the desktop toolbar.

In the browser address bar, type in localhost:7000 to view the sensor data. Here you can see both live and historical data from your sensor.

To stop the project from running, return to the App Lab window and click the stop button in the upper right-hand corner.

Again, the console will let you know when the program has stopped.

The App Lab program also provides a command-line interface (CLI) that can be used in much the same way as the graphical interface. To use the CLI, start by launching a terminal window from the desktop toolbar.

The following command will launch the same example we previously ran from the GUI.
Arduino-app-cli app start examples: home-climate-monitoring-and-storage

Similar to the console in the App Lab, you will be able to watch as the project builds and be notified when the project has started running.


Launching the browser and navigating back to localhost:7000 you will again see the database updating with new sensor data.

You can stop the application through the terminal by issuing a similar stop command.
Arduino-app-cli app stop examples: home-climate-monitoring-and-storage

Below are a few screenshots showcasing the preinstalled software and options under the Applications button in the upper left corner of the desktop.


Finally, to safely power off the board, select “Log out”

And then “Shut Down”

The Arduino UNO Q is a powerful SBC and MCU board all in one, and upcoming carrier boards will expand the functionality with additional peripheral support. The board, with its familiar Arduino footprint and IDE-supported MCU running Zephyr OS under the hood, and the well-known Linux OS, allowing for Python scripting and supporting applications, makes this a powerhouse for advanced project development. To learn more about the UNO Q, check out the product highlight here: www.digikey.com/en/product-highlight/a/arduino/uno-q-microcontroller-board
Order your Arduino UNO Q today, and share your projects with us here on Maker.io or by tagging @digikey on social media.