From Webcam to Cloud: Building an IoT-Ready Computer Vision System
2025-10-29 | By Hector Eduardo Tovar Mendoza
In this project, you will learn how to build an IoT system using just your laptop, a webcam, and MQTT. Computer vision allows computers to “see” and understand the world around them, and it’s becoming increasingly important in applications like surveillance, robotics, automation, and IoT. Many makers and engineers want to experiment with vision-based IoT projects, but they often think they need expensive cameras or specialized hardware. The good news is that you don’t.
Requirements
For this project, you will need the following:
- Computer (Windows, Mac, Linux)
- Webcam (Integrated in your computer or webcam)
- Vscode (The code editor we will be using for this)
- Python (Any version, minimum 3.8)
Development
After installing VS Code, you must create a folder for this project. Then, go to the top bar, look for Terminal, and click on New Terminal. After this, at the bottom, you will see a terminal. There, write the following command:


The command:
- python (or python3) -m venv env
After doing this, you will see a folder called env. This is a virtual environment that helps you manage dependencies. The next step is to activate this environment:
- In Windows: ./env/Scripts/Activate.ps1
- In Mac/Linux: env/bin/activate

Now you'll see next to your command line in the terminal a green (env). This means the environment is activated. Now we must install the required packages for this project.
The commands are:
- pip install opencv-python
- pip install ultralytics
- pip install paho-mqtt
Finally, create a file called main.py with the New File button in VS Code.

Now we start testing that our camera can be opened with OpenCV, so we copy the next code:
import cv2


def test_camera():
    cap = cv2.VideoCapture(0) # If you have multiple cameras, change the index accordingly to it


    if not cap.isOpened():
        print("Can't open camera.")
        return


    print("Camera opened successfully. Press 'ESC' to exit.")


    while True:
        ret, frame = cap.read()
        if not ret:
            print("Can't read the camera.")
            break


        cv2.imshow("Test Camera", frame)


        # Exit with ESC Key
        key = cv2.waitKey(1) & 0xFF
        if key == 27:
            break


    # Release resources
    cap.release()
    cv2.destroyAllWindows()


if __name__ == "__main__":
    test_camera()
Real-Time Object Detection
YOLO (You Only Look Once) is a modern and efficient object detection model that can identify multiple objects in real time with high accuracy and speed. It’s widely used in applications ranging from security cameras to robotics and industrial automation.
For this project, we’ll use a standard YOLO example that detects all the objects the model is trained on. Later, you can customize it to detect only the objects you care about, making it highly flexible for different use cases.
This is the code:
import cv2
from ultralytics import YOLO


def run_yolo_webcam():
    # Load the pre-trained YOLOv8 model
    model = YOLO("yolov8n.pt")


    # Open the webcam
    cap = cv2.VideoCapture(0) # If you have multiple cameras, change the index accordingly
    if not cap.isOpened():
        print("❌ Could not open webcam")
        return


    print("Webcam opened. Press 'ESC' to exit.")


    while True:
        # Read a frame from the webcam
        ret, frame = cap.read()
        if not ret:
            print("Failed to grab frame")
            break


        # Run YOLO inference on the frame
        results = model(frame)


        # Draw bounding boxes and labels on the frame
        annotated_frame = results[0].plot()


        # Show the frame with detections
        cv2.imshow("YOLOv8 Detection", annotated_frame)


        # Exit if 'ESC' is pressed
        if cv2.waitKey(1) & 0xFF == 27:
            break


    # Release resources
    cap.release()
    cv2.destroyAllWindows()


if __name__ == "__main__":
    # Use YOLOv8 nano model (lightweight, fast), there are multiple models but for now we use the nano one
    run_yolo_webcam()

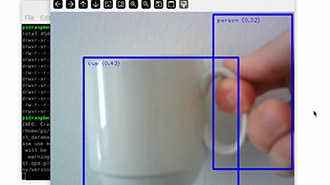
You’ll see that the camera is detecting all types of objects in real time, which is a great sign that the model is working correctly and ready for further customization.
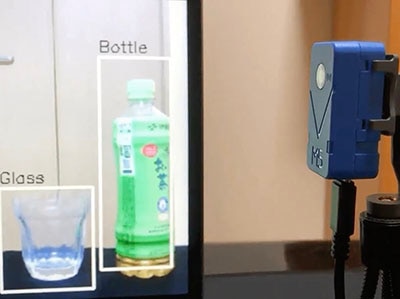
Data Extraction
Now we can extract useful data, such as detecting objects like bottles, persons, bicycles, dogs, etc. For this, we are using the classes from YOLO, which you can refer to at this link.

Now, for obtaining something like this in our camera we must copy the following code:
import cv2
from ultralytics import YOLO
from collections import Counter


def run_yolo_data():
    # Load YOLOv8 model
    model = YOLO("yolov8n.pt")


    # Open webcam
    cap = cv2.VideoCapture(0) # Change the index if you have multiple cameras
    if not cap.isOpened():
        print("Could not open webcam")
        return


    print("Webcam opened. Press 'ESC' to exit.")


    while True:
        ret, frame = cap.read()
        if not ret:
            print("Failed to grab frame")
            break


        # Run inference
        results = model(frame)


        # Extract detected object class IDs
        detected_classes = results[0].boxes.cls.cpu().numpy().astype(int)


        # Convert IDs to labels using model.names
        labels = [model.names[c] for c in detected_classes]


        # Count occurrences of each object type
        counts = Counter(labels)


        # Get number of people (class name = 'person')
        num_people = counts.get("person", 0) # Here is where you can change the classname from person to any of your choice
        num_bottle = counts.get("bottle", 39)


        # Print summary
        print(f"People detected: {num_people} | Bottle: {num_bottle}")


        # Optionally, show annotated frame
        annotated_frame = results[0].plot()
        cv2.imshow("YOLOv8 Detection", annotated_frame)


        if cv2.waitKey(1) & 0xFF == 27:
            break


    cap.release()
    cv2.destroyAllWindows()


if __name__ == "__main__":
    run_yolo_data()
IoT Integration (Cloud Connection)
Now, what can we do with this data? We can send it to the cloud, where it can be used for many applications. In this guide, we’ll focus on smart security cameras, where we can do the following.
First of all, we must install Mosquitto, which will be our MQTT broker for sending data. MQTT is a lightweight protocol for sending data, similar to HTTP, but the main difference is that with MQTT, you’ll always receive the data you subscribe to.
To install it, use the following link: https://mosquitto.org/download/

When installing it, it will appear that it might put your PC at risk, but don't worry, it's fine.
Now remember where you installed it, as it shows in this photo:

Now, on your computer, open two terminals. Type the following command in both:
cd C:\Program Files\mosquitto
Now the C:\Program Files\mosquitto is referring to the location where I installed it.
Now, here you can listen and publish data in MQTT using the following commands:
Terminal 1
mosquitto_pub -h localhost -t "yolo/detections" -m "Hello MQTT" -> This is for posting data
Terminal 2
mosquitto_sub -h localhost -t "yolo/detections" -> This is for listening to the data
This way, you can see how the data is published and received in real time, and we can close Terminal 1

Now, in this picture, we can see the following
The mosquitto MQTT receives the following data:
{"event": "intruder_detected", "timestamp": 1756602249, "people": 1}
The camera is detecting a person, and when it detects a person, it sends the data every 30 seconds.
With just a simple camera and a laptop, you are already replicating the main feature of a smart security camera that normally costs hundreds of dollars. Detecting intruders, counting people, and sending events to the cloud every 30 seconds is not only possible, but also surprisingly easy to achieve with free tools and only a few lines of Python.
This is the code:
import cv2
import time
import json
import paho.mqtt.client as mqtt
from ultralytics import YOLO
from collections import Counter


# MQTT broker config
MQTT_BROKER = "localhost"
MQTT_PORT = 1883
MQTT_TOPIC = "yolo/detections"


def run_yolo_mqtt():
    # Load YOLOv8 model
    model = YOLO("yolov8n.pt")


    # Connect to MQTT broker
    client = mqtt.Client()
    client.connect(MQTT_BROKER, MQTT_PORT, 60)


    # Open webcam
    cap = cv2.VideoCapture(0)
    if not cap.isOpened():
        print("Could not open webcam")
        return


    print("Webcam opened. Press 'ESC' to exit.")


    last_sent = 0  # Track last message sent time


    while True:
        ret, frame = cap.read()
        if not ret:
            print("Failed to grab frame")
            break


        # Run inference
        results = model(frame)


        # Extract detected classes
        detected_classes = results[0].boxes.cls.cpu().numpy().astype(int)
        labels = [model.names[c] for c in detected_classes]


        # Count objects
        counts = Counter(labels)
        num_people = counts.get("person", 0)


        # Send MQTT message only if a person is detected every 30 sec, you can change it also
        now = time.time()
        if num_people > 0 and (now - last_sent) >= 30:
            # The message you can change it to any format you like, timestamp we can change it do date.now() to put the date and time
            message = {
                "event": "intruder_detected",
                "timestamp": int(now),
                "people": num_people
            }
            client.publish(MQTT_TOPIC, json.dumps(message))
            print(f"Sent MQTT message: {message}")
            last_sent = now


        # Show annotated frame
        annotated_frame = results[0].plot()
        cv2.imshow("YOLOv8 Detection", annotated_frame)


        # Exit when ESC is pressed
        if cv2.waitKey(1) & 0xFF == 27:
            break


    cap.release()
    cv2.destroyAllWindows()
    client.disconnect()


if __name__ == "__main__":
    run_yolo_mqtt()
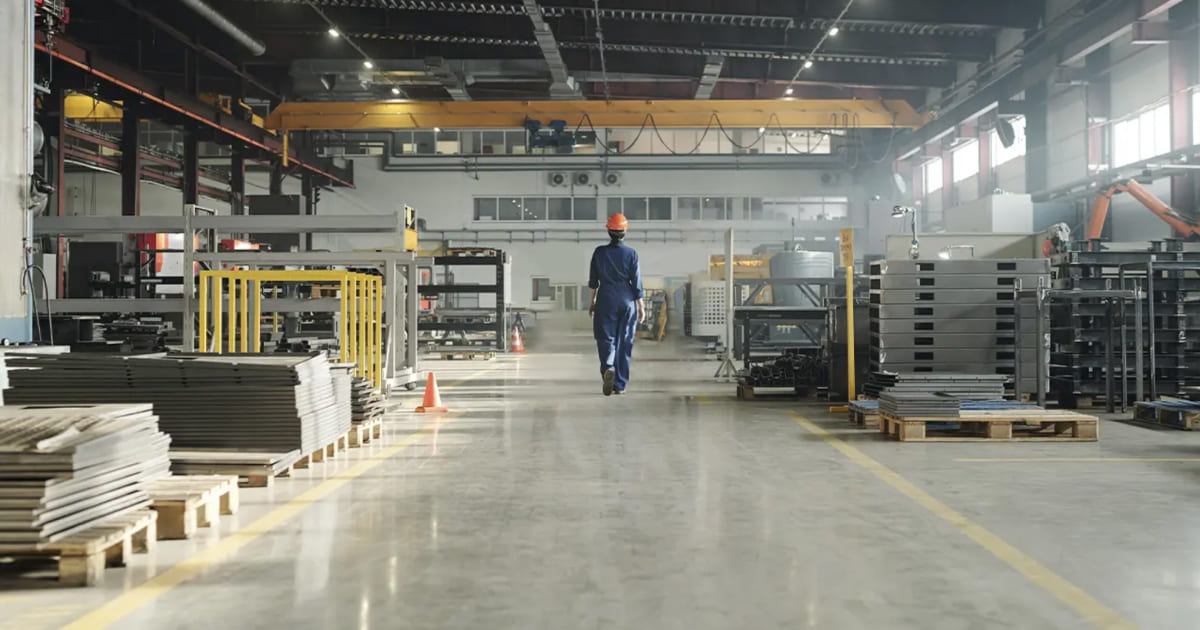
Applications & Extensions
We can do tons of things using YOLO, such as in automation tasks like sorting or separating objects by color, shape, or size. For example, in a manufacturing line, you could automatically detect defective products, separate recyclable materials, or track items moving along a conveyor belt.
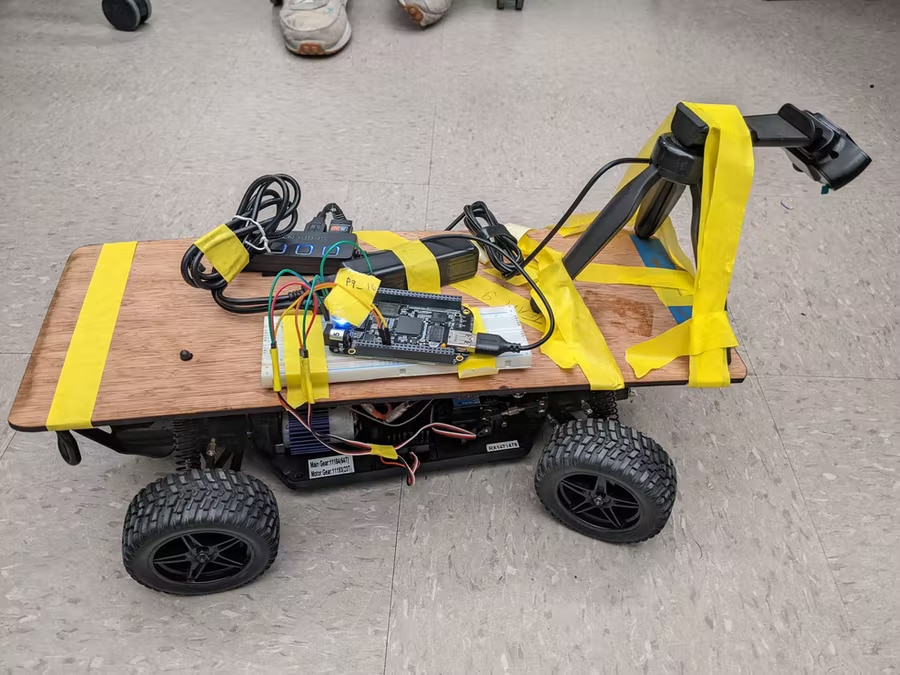
One of the main features we can explore, as will be shown in the next blog, is how to train a custom model based on the object of your choice using only photos. This makes it possible to create highly specific detection systems without needing huge datasets or expensive equipment.
An example is the following:

This model was trained for LARC OPEN 2025, a robotics competition where the robot must detect and separate different types of beans, which are differentiated by color. Using only images of the beans, the model learns to recognize each type and guide the robot in sorting them accurately.
Other possible applications include:
- Smart home automation: Turn on lights, alarms, or appliances when a person or specific object is detected.
- Retail and inventory management: Automatically count products on shelves or track stock levels.
- Robotics: Help robots identify and interact with objects for tasks like picking, sorting, or navigation.
- Agriculture: Monitor crops, detect pests, or identify fruit ripeness automatically.
Now imagine what you can achieve using only your computer and a webcam. Computer vision is a highly innovative and practical way to detect, classify, and interact with the real world. With just minimal hardware, you can implement solutions that previously required expensive cameras, sensors, or robotic systems.
This project shows how combining computer vision with IoT can be achieved using just a laptop, a webcam, and open-source tools. Even with minimal hardware, you can build real-time object detection systems, smart security cameras, people counters, or robotic vision applications.
The key takeaway is that the barrier to experimenting with IoT + Vision is very low. You don’t need expensive devices, complex setups, or advanced hardware to start creating innovative solutions. With just a simple webcam and Python, you can develop functional, practical, and intelligent systems.
I hope this blog inspires makers, students, and engineers to explore automation, robotics, and smart applications, showing that powerful IoT and AI solutions are possible even with the simplest resources.