製造商零件編號 DKS-PCB-RULER-12INCH
PCB LAYOUT REFERENCE RULER 12"
DigiKey Standard
Computer Vision is a very important topic of interest in today’s world, especially when it comes to artificial intelligence. There are many real-life applications that use computer vision in robotics, for example. However, instead of jumping directly to using neural networks, it is important for us to build the basics around computer vision, starting from simple techniques such as edge, line, and color detection. By the end of this first tutorial, I want to use the example project of detecting every electrical engineer’s favorite DigiKey ruler to illustrate three fundamental computer vision techniques:
The end result will look like this:

To begin with, let’s install OpenCV for Python. Open VS Code on your machine and create a virtual environment. For Windows users like me, enter the following command in your terminal:
python -m venv myenv

You will notice a folder called ‘myenv’ has been added to your directory.
Next, we activate the virtual environment using:
myenv\Scripts\activate
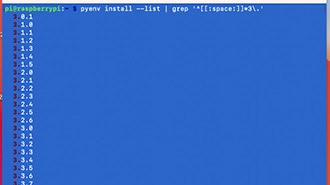
Check to see that you are using the correct virtual environment interpreter for Python:

Finally, we install OpenCV:
pip install opencv-contrib-python
It is good practice to use virtual environments when using Python since it creates a separate workplace on your machine where you can have Python modules that are a different version from the one on your computer. These versions do not interfere with each other and also prevent the versions you install from conflicting with the other versions used by applications on your computer. Additionally, since your code exists within your virtual environment, you can share it with other people, and they will have the right versions of modules needed. Finally, when you are done, you can delete the virtual environment and remove the files together without disrupting dependencies required by your computer.
Let’s start off slow and simple. We will load an image into Python and display it using the cv2 module.
import cv2

import numpy as np


#load image of ruler

image = cv2.imread("digikeyruler.jpg")


(height, width) = image.shape[:2] #.shape returns (height, width, channels)


#fit the pop up window on my display

window_width = int(width * 0.5)

window_height = int(height * 0.5)

cv2.namedWindow("Ruler", cv2.WINDOW_NORMAL)

cv2.resizeWindow("Ruler", window_width, window_height)


cv2.imshow("Ruler", image)

cv2.waitKey(0)

cv2.destroyAllWindows()
After running the code, this is my output:

If I did not modify the image dimensions, cv2.imshow would pop up in a very useless manner!

We see that the DigiKey ruler of interest is a red colored rectangle on a black background, and as the coder, we have to make the choice of creating an appropriate mask – pixels that are red colored will be labeled as 1, and pixels that are not red will be labeled with 0. In order to do so, we need to translate the image from BGR (image pixels are in reverse of RGB) to the Hue, Saturation, Value (HSV) space, where:
This is the code that allows us to do so and the associated result:
hsv = cv2.cvtColor(image, cv2.COLOR_BGR2HSV)


# Define HSV thresholds for red (dual range)

# red-orange

lower_red1 = np.array([0, 100, 100])

upper_red1 = np.array([10, 255, 255])


# red-magenta

lower_red2 = np.array([160, 100, 100])

upper_red2 = np.array([180, 255, 255])


# Create two masks and combine them

mask1 = cv2.inRange(hsv, lower_red1, upper_red1)

mask2 = cv2.inRange(hsv, lower_red2, upper_red2)

mask = cv2.bitwise_or(mask1, mask2)


# display mask

window_width = int(width * 0.5)

window_height = int(height * 0.5)

cv2.namedWindow("Mask", cv2.WINDOW_NORMAL)

cv2.resizeWindow("Mask", window_width, window_height)

cv2.imshow("Mask", mask)

cv2.waitKey(0)

Important! The Hue element takes a value between 0-179, and red exists on both extrema: 0-10 gives orange while 160-179 gives magenta. Since we want to identify red, we have to account for both these thresholds and perform a logical OR operation on them to create our mask.
We can also clean up small gaps in the binary image:
# Morphological operation to clean up small gaps

kernel = cv2.getStructuringElement(cv2.MORPH_RECT, (7, 7)) # Using a 7x7 kernel matrix

clean_mask = cv2.morphologyEx(mask, cv2.MORPH_CLOSE, kernel)


#display clean mask

window_width = int(width * 0.5)

window_height = int(height * 0.5)

cv2.namedWindow("Clean Mask", cv2.WINDOW_NORMAL)

cv2.resizeWindow("Clean Mask", window_width, window_height)

cv2.imshow("Clean Mask", clean_mask)

cv2.waitKey(0)

cv2.destroyAllWindows()

Now, we can finally find the contours in the image and display them! Contours are found by finding the edges present in the image.
#draw contours on the image

contours,  = cv2.findContours(cleanmask, cv2.RETR_EXTERNAL, cv2.CHAIN_APPROX_SIMPLE)

cv2.drawContours(image, contours, -1, (0, 255, 0), 3) #-1 means a solid line, (0, 255, 0)

Corresponds to the color green in BGR, and 3 is the thickness of the line

window_width = int(width * 0.5)

window_height = int(height * 0.5)

cv2.namedWindow("Contours", cv2.WINDOW_NORMAL)

cv2.resizeWindow("Contours", window_width, window_height)

cv2.imshow("Contours", image)

cv2.waitKey(0)

cv2.destroyAllWindows()

With the help of our handy DigiKey ruler and OpenCV, we saw how to make design decisions to utilize Computer Vision to meet our requirements. We learned the techniques of displaying images after changing the dimensions to fit on our screen, choosing thresholds for a mask based on what we want to detect, closing gaps in an image, and drawing contours around shapes. It is important to remember that sometimes multiple contours can be detected, and in those cases, it is up to us to look and decide on which contour corresponds to our desired object. What is more, we learned the good practice of creating a virtual environment for projects, and the venv can be deactivated by running deactivate in the terminal. Next time, we will look at how to detect coins using the Hough circle transform!