H-Bridges: An Introductory Application of Transistors
2024-09-20 | By Antonio Velasco
In the world of electronics, transistors serve as the key to a great deal of technologies. From the gate level in chips to basic hobbyist projects, these components are the backbone of modern electronics. In this blog, I'll provide an introductory application for transistors in the form of an H-Bridge: a basic motor driver.
Overview of Transistors
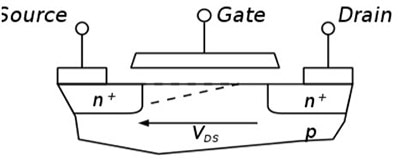
For this project, we'll utilize Bipolar Junction Transistors (BJTs). Transistors, in general, are essentially a type of switch, which can be turned "on" or "off" depending on an input. They'll have three pins: the collector, the emitter, and the base. The base is the input for turning it off and on, and the collector/emitter are the areas where current flows.
There are two types of transistors to consider:
NPN Transistors, where when a HIGH voltage is applied to the base, current flows from the collector to the emitter. When a LOW voltage is applied, no current flows.

PNP Transistors, where it is essentially the opposite. A LOW voltage being applied to the base allows current to flow from the emitter to the collector. A HIGH voltage being applied means no current will flow.

Current will always flow from the emitter to the collector (PNP) or the collector to the emitter (NPN), but not the other way around. For example, in the PNP transistor, current will never flow from the collector to the emitter, and vice versa for the NPN.
H-Bridges
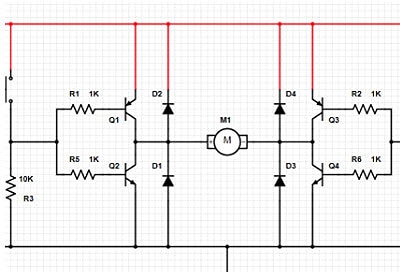
Now, let's take a look at H-bridges. The goal is to, with a single voltage source, control the direction in which a motor can run. The schematic will be as shown:

Each of the transistors will represent switches in this schedule, which will affect the direction in which the motor (M) runs.
Let's say that our motor will either turn clockwise or counterclockwise depending on the way the terminals receive the current.
For example, consider the following diagram:

In each situation, the motor will turn a different way as it is receiving the current from opposite terminals. In the 1st scenario, the current is being pulled from right to left, and in the 2nd scenario, current is being pulled from left to right. For a simple bipolar DC brushed motor, changing the direction of current will reverse or change the direction of the turn.
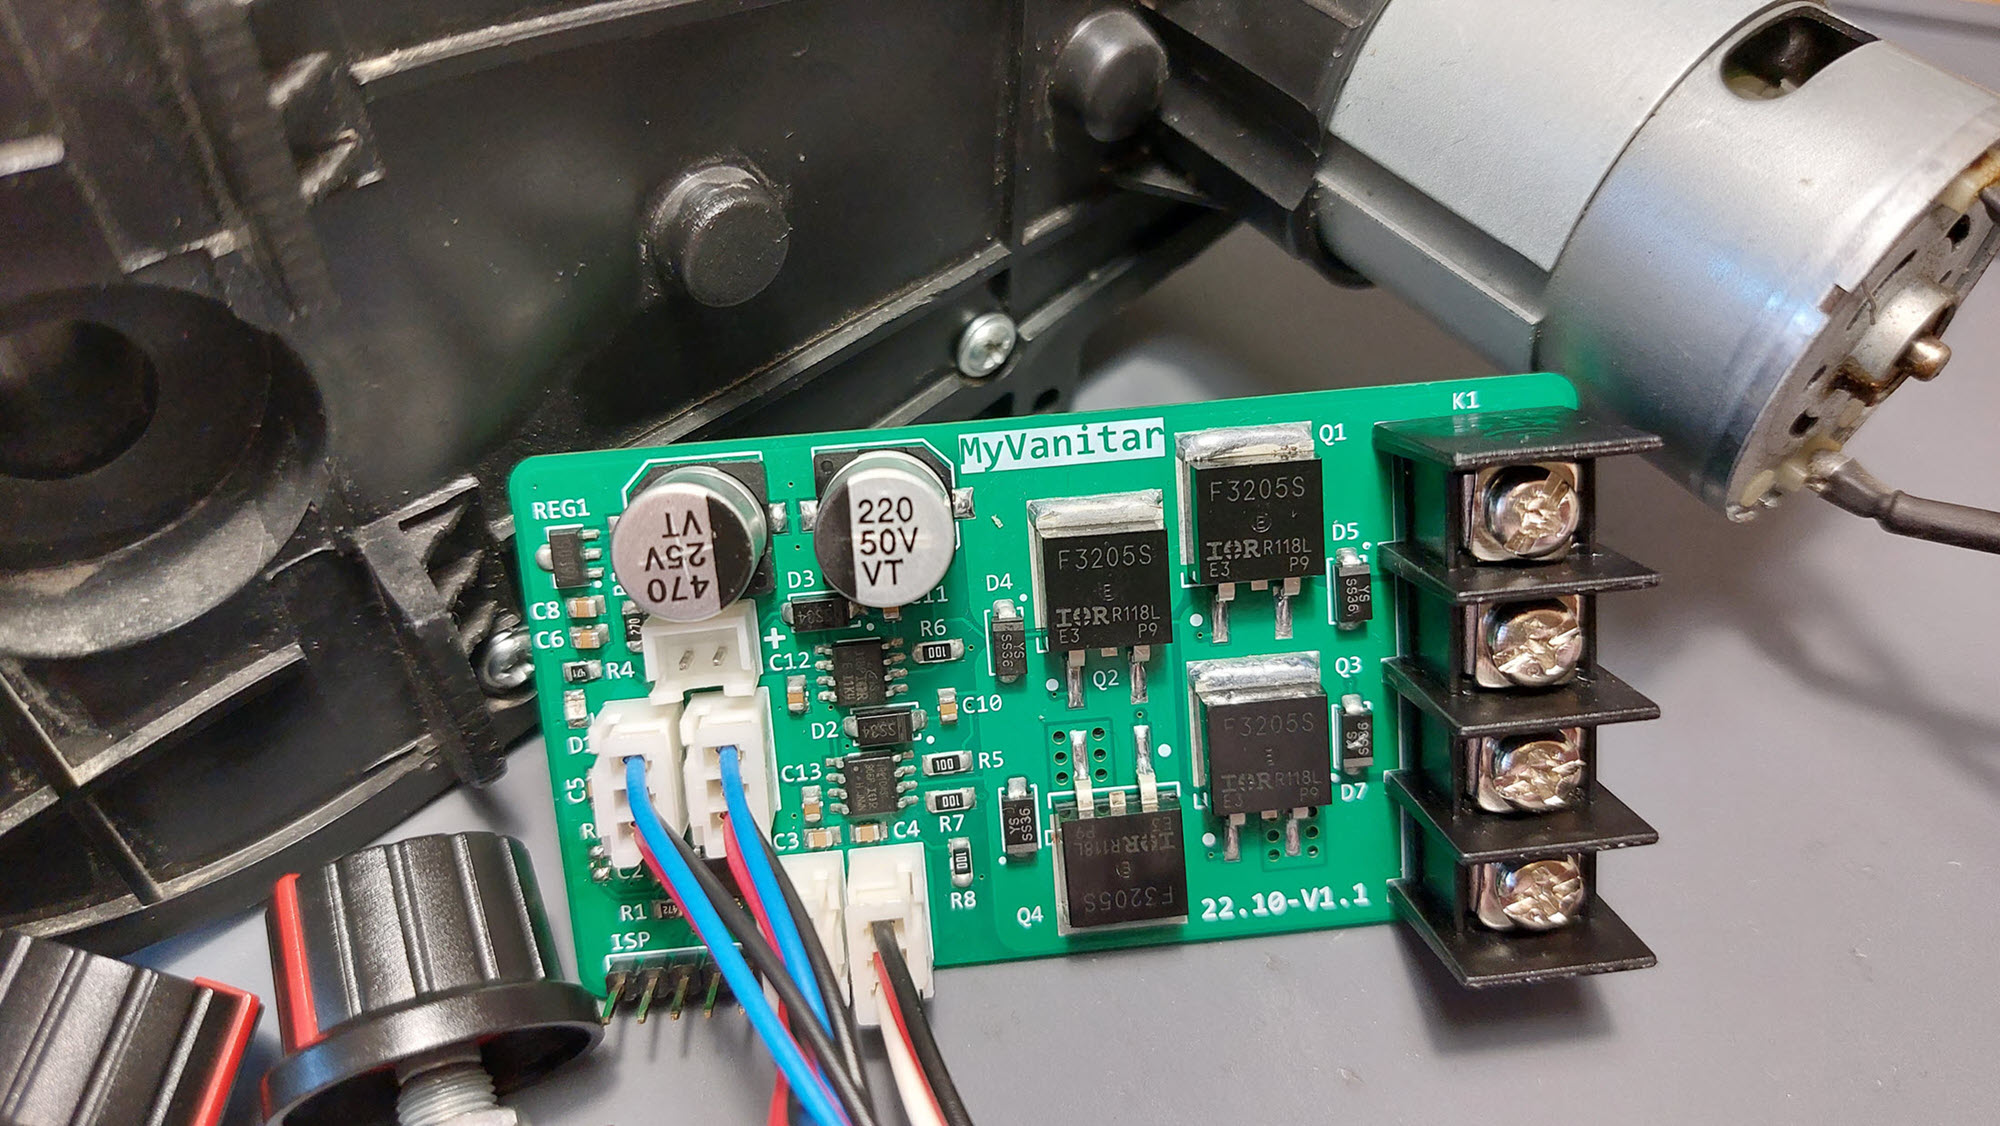
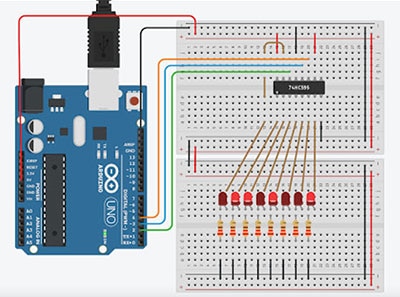
For this project, I used the schematic from UCI's Open Project Space, a year-long embedded systems program that teaches 100 students about these concepts through project-based learning.

Constructing it like so will create our H-Bridge, with a way to control it through the Arduino. Please note the placement of the diodes so as to allow the current to flow properly through the circuit. Also, remember that NPN and PNP transistors are turned on differently (as mentioned earlier). This project will give you experience with both.

The code on the Arduino itself is very simple: setting up the pins gets you to a functional H-Bridge already. The code in the loop() section is what I used to test it. In each case, the motor will spin a different way, and loop back and forth. If I were to incorporate this into a project, say a rover that I wanted to move back and forth, I would write if-statements to receive an input from a controller and set the pins accordingly to the direction I want the motor to move.
After that, you have a completed motor driver! This is just one of many uses for transistors, and as shown, they are an extremely valuable addition to any project.