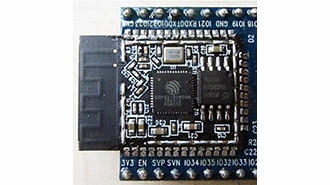
Mfr Part # ESP32-S3-DEVKITC-1-N32R8V
ESP32-S3-WROOM-2-N32R8V DEV BRD
Espressif Systems
In the previous parts of our “Introduction to Zephyr” series, we looked at setting up a basic Zephyr application and using CMake to manage our build. This time, we’ll dive into another core component of the Zephyr build system: Kconfig.
Kconfig is a configuration system originally developed for the Linux kernel. It provides a powerful and flexible way to enable, disable, or parameterize components and features of a large and complex system like Zephyr. By leveraging Kconfig, we can control which libraries, drivers, and functionalities are included in the final firmware image, all without hard coding these decisions directly into our source code.
In this tutorial, we’ll:
Along the way, we’ll continue building on our Docker-based development environment and ESP32 platform. By the end, you’ll have a working application that prints random numbers to the console and a solid understanding of how to manage Zephyr configurations using Kconfig and menuconfig.
All example code and solutions for this series can be found in this repository: https://github.com/ShawnHymel/introduction-to-zephyr/
Zephyr supports a huge range of hardware platforms, drivers, middleware, and OS features. Not every application needs every feature, so Kconfig helps developers customize their firmware images to only include what’s necessary. Instead of editing code files directly, Kconfig lets you specify options—like enabling a particular driver or selecting a pseudo-random number generator—through configuration symbols.
These symbols are stored in .config files generated during the build process. You can edit them interactively using menuconfig (a text-based user interface), guiconfig (a graphical user interface) or by placing desired configuration symbols in a prj.conf file at the project root. Each symbol can be turned on or off (y or n), or given a numeric/string value, all controlled by Kconfig’s logic.
You can read more about how Zephyr uses the Kconfig system here: https://docs.zephyrproject.org/latest/build/kconfig/menuconfig.html
To start, we’ll create a new application directory named 03_kconfig_demo that generates random numbers using Zephyr’s random API. The random API can produce pseudo-random numbers or connect to a true hardware entropy source if available (for example, the ESP32 has a hardware RNG).
Note that the code for this tutorial can be found here: https://github.com/ShawnHymel/introduction-to-zephyr/tree/main/workspace/apps/03_demo_kconfig
Inside the container (or your development environment), create the new application directory and the necessary files:
Directory structure:
workspace/apps/03_kconfig_demo/
├─ CMakeLists.txt
├─ prj.conf
└─ src/
   └─ main.c
main.c
We’ll write a simple loop that prints a random number every second:
#include <zephyr/random/random.h>

// Settings
static const int32_t sleep_time_ms = 1000;

int main(void)
{
    uint32_t rnd;
    double rnd_float;

    // Do forever
    while (1) {

        // Print random number
        rnd = sys_rand32_get();
        rnd_float = (double)rnd / (UINT32_MAX + 1.0);
        printk("Random value: %.3f\r\n", rnd_float);

        // Sleep
        k_msleep(sleep_time_ms);
    }

    return 0;
}
CMakeLists.txt
Our CMakeLists.txt is straightforward, similar to previous examples:
cmake_minimum_required(VERSION 3.20.0)

set(ZEPHYR_EXTRA_MODULES "${CMAKE_SOURCE_DIR}/../../modules/say_hello")

find_package(Zephyr REQUIRED HINTS $ENV{ZEPHYR_BASE})
project(random)

target_sources(app PRIVATE src/main.c)

prj.conf
For now, leave prj.conf empty. Zephyr requires it to exist even if it has no content. Later, we might add Kconfig symbols here if needed:
Let’s try to build this application:
west build -p always -b esp32s3_devkitc/esp32s3/procpu
You might see an error like:
undefined reference to `z_impl_sys_rand_get'
collect2: error: ld returned 1 exit status
This indicates that even though we included the correct headers and called sys_rand32_get(), the corresponding random number generator library isn’t actually built into our firmware. Why? Because we haven’t told Kconfig to enable the appropriate symbols.
In Zephyr, including a header file doesn’t automatically link its implementation. Many drivers, subsystems, and services are gated behind Kconfig symbols that must be enabled. Let’s fix that using menuconfig.
menuconfig provides an interactive, terminal-based menu for browsing and setting Kconfig symbols. To run it, invoke:
west build -p always -b esp32s3_devkitc/esp32s3/procpu -t menuconfig
This brings up a text-based UI with menus you can navigate using arrow keys and Enter. Key tips:
Search for “random” by pressing / and typing “^random” (menuconfig supports regex, and ‘^’ means to search at the beginning of the string). You’ll see various symbols and menus related to random number generation. Navigate to the "Random Number Generators" menu. Here, you’ll see options for pseudo-random and entropy-based random number generation.

The pseudo-random number generator (PRNG) typically uses a system timer or other software-based approach for speed but is not truly random. It’s often good enough for basic scenarios. For full entropy (true randomness), you’d rely on hardware RNG or the entropy driver—if your MCU and board support it.
The ESP32-S3 has a hardware RNG, but we’ll use the simple pseudo-random generator for this demo. Search for and enable Allow non-random number generator. This should automatically select the System timer as your Random generator source.

Return to the main menu and exit (or press ‘q’), saving your configuration.
This process updates the build’s .config file (in build/zephyr/.config). After enabling the pseudo-random number generator, rebuild (note the lack of the -p pristine tag):
west build -b esp32s3_devkitc/esp32s3/procp
Now, the application should link properly and build without error.
If you run and flash the firmware onto your ESP32-S3 (using esptool as we did in previous episodes), you should see a stream of random values printed out every second.

Every time you run west build, Zephyr’s build system merges configuration fragments from various places: the board’s default configuration, the SOC’s defaults, the drivers, and your prj.conf (and any extra conf files you specify). The result is a unified .config file in build/zephyr/.config.
You can open this file after running menuconfig and saving changes. Search for CONFIG_RANDOM to see what got enabled.
Remember that .config is generated at build time and will be overwritten if you run west build -p always (which forces a pristine build). To preserve your manual menuconfig changes, avoid -p always. Each time you run menuconfig, Kconfig stores the previous settings in .conf.old. You can use diff to see what changed between the two menuconfig runs:
diff build/zephyr/.config.old build/zephyr/.config
You can also use Zephyr’s diffconfig tool to view the difference between the previous menuconfig runs:
python $ZEPHYR_BASE/scripts/kconfig/diffconfig build/zephyr/.config.old build/zephyr/.config
You can copy these differences to your prj.conf file to save the Kconfig settings between builds (even if you delete the build/ directory or run with -p always). Remember that Kconfig settings are not permanent unless you write them into prj.conf or a board-specific conf file. Relying solely on menuconfig for persistent configuration can lead to changes being overwritten after a pristine build.
What if your application runs on multiple boards, but only some boards have a particular hardware RNG? You might not want to enable certain symbols globally in prj.conf.
Zephyr supports specifying additional configuration fragments via EXTRA_CONF_FILE or CONF_FILE. For example, you could place board-specific Kconfig settings in a separate file:
workspace/apps/03_demo_kconfig/boards/
└─ esp32s3_devkitc.conf
This file could contain hardware-specific symbols for ESP32-S3. Then build with:
west build -p always -b esp32s3_devkitc/esp32s3/procpu -- -DEXTRA_CONF_FILE=boards/esp32s3_devkitc.conf
This approach keeps your main prj.conf clean and board-agnostic, while allowing you to add board-specific configuration without editing .config directly.
So far, we’ve only toggled existing Kconfig symbols. Zephyr also lets you define your own symbols for custom modules. Let’s create a simple module that prints “Hello!” when enabled.
In your workspace, create an out-of-tree Zephyr module with the following structure:
workspace/modules/say_hello/
├─ zephyr/
│  └─ module.yaml
├─ say_hello.h
├─ say_hello.c
├─ Kconfig
└─ CMakeLists.txt
say_hello.h:
#ifndef SAY_HELLO_H_
#define SAY_HELLO_H_

// Public function declaration
void say_hello(void);

#endif /* SAY_HELLO_H_ */

say_hello.c:
#include <zephyr/kernel.h>

#include "say_hello.h"

void say_hello(void) {
    printk("Hello!\r\n");
}
Kconfig (for your module):
# Create a new option in menuconfig
config SAY_HELLO
    bool "Basic print test to console"
    default n   # Set the library to be disabled by default
    depends on PRINTK   # Make it dependent on PRINTK
    help
        Adds say_hello() function to print a basic message to the console.
This defines a new Kconfig symbol SAY_HELLO which the user can enable or disable from menuconfig.
CMakeLists.txt (in modules/say_hello):
# Check if SAY_HELLO is set in Kconfig
if(CONFIG_SAY_HELLO)

    # Add your source file directory
    zephyr_include_directories(.)

    # Add the source file you want to compile
    zephyr_library_sources(say_hello.c)

endif()
This CMake logic ensures that say_hello.c is only compiled and linked if CONFIG_SAY_HELLO is set.
module.yaml
We also need a module.yaml file so Zephyr knows this directory is a module:
name: say_hello
build:
  cmake: .
  kconfig: Kconfig
Back in your main application (03_kconfig_demo), update CMakeLists.txt to tell Zephyr about the extra module:
cmake_minimum_required(VERSION 3.20.0)

set(ZEPHYR_EXTRA_MODULES "${CMAKE_SOURCE_DIR}/../../modules/say_hello")

find_package(Zephyr REQUIRED HINTS $ENV{ZEPHYR_BASE})
project(random)

target_sources(app PRIVATE src/main.c)

Using the say_hello Module in src/main.c
#include <zephyr/random/random.h>

#ifdef CONFIG_SAY_HELLO
#include "say_hello.h"
#endif

// Settings
static const int32_t sleep_time_ms = 1000;

int main(void)
{
    uint32_t rnd;
    double rnd_float;

    // Do forever
    while (1) {

        // Print random number
        rnd = sys_rand32_get();
        rnd_float = (double)rnd / (UINT32_MAX + 1.0);
        printk("Random value: %.3f\r\n", rnd_float);

#ifdef CONFIG_SAY_HELLO
        say_hello();
#endif

        // Sleep
        k_msleep(sleep_time_ms);
    }

    return 0;
}
If CONFIG_SAY_HELLO is y, it prints “Hello!” after each random number. If not, those function calls will be left out of the build, keeping the firmware smaller.
Enable SAY_HELLO by adding to boards/esp32s3_devkitc.conf:
CONFIG_SAY_HELLO=y
Build again with:
west build -p always -b esp32s3_devkitc/esp32s3/procpu -- -DEXTRA_CONF_FILE=boards/esp32s3_devkitc.conf
After flashing, you should see random values and “Hello!” printed every loop.
If you disable CONFIG_SAY_HELLO, the module’s code won’t be included, and you won’t see the greeting.
Now, let’s go a step further and convert the random 32-bit integer into a floating-point number between 0.0 and 1.0. Modify src/main.c:
#include <zephyr/random/random.h>

// Settings
static const int32_t sleep_time_ms = 1000;

int main(void)
{
	uint32_t rnd;
	double rnd_float;

// Do forever
while (1) {

                // Print random number
		rnd = sys_rand32_get();
		rnd_float = (double)rnd / (UINT32_MAX + 1.0);
		printk("Random number: %.3f\r\n", rnd_float);

		// Sleep
		k_msleep(sleep_time_ms);
	}

	return 0;
}
Potential Problem: Many embedded builds disable floating-point formatting by default to save space. You may see something like "*float*" printed to the console instead of your actual number. In that case, you’ll need to enable floating-point support in Zephyr’s menuconfig or switch to a standard library like Newlib with floating-point support enabled.
To do this, open menuconfig again:
west build -p always -b esp32s3_devkitc/esp32s3/procpu -t menuconfig -- -DEXTRA_CONF_FILE=boards/esp32s3_devkitc.conf
Search for picolibc or newlib and explore enabling floating-point formatting. Some configurations require turning on certain CONFIG_NEWLIB_LIBC_FLOAT_PRINTF or CONFIG_PICOLIBC_IO_FLOAT options. This part is left as a challenge—try enabling these symbols and see if you can print floating-point numbers successfully!
You can find my solution here: https://github.com/ShawnHymel/introduction-to-zephyr/tree/main/workspace/apps/03_solution_kconfig_float
In this post, we explored how to use Kconfig and menuconfig within Zephyr to configure subsystems like random number generators. If you’d like to dive more into Kconfig, I recommend the following resources:
With a solid grasp of CMake, Kconfig, and the fundamental building blocks of Zephyr, you’re well on your way to developing more advanced embedded applications.