How to Design a Custom Storage Box in Bento3D
2025-10-01 | By Travis Foss
Have you ever searched for and struggled to find a storage box for some small parts or even a variety of tools that you want to store together? Do you have a few minutes to design and print a custom box using a 3D printer? One of the more interesting storage design tools that I have found is Bento3D. This is a straightforward method to design a custom box for storing your tools or parts.

Bento3D is a web-based tool that allows users to design custom storage trays, along with an enclosure tailored to their specific use cases. To get started with Bento3D, visit the site here: https://bento3d.design/.
Let me walk you through a quick design of a partition tray and an enclosure.

When you first land on the Bento3D page, it defaults to a partition tray. If you notice the top left corner, there is a button with a dropdown to select between 'Partition' and 'Partition & Box'. I am going to design the partition first. For my build, I am looking at building a 100mm x 100mm partition that will stack 3 high in the case. To accomplish this, I start by clicking on the parameters button just to the right of the Partition drop-down. A new list of 3 parameters appears. The first is the thickness parameter. This sets the wall thickness in the partition. The second option is the Stack option. This gives the option to choose between stacked trays or unstacked ones. I am choosing the stackable selection. The last option is the Fillet option. This option sets the size of the fillets included on the corners. For both the Thickness and the fillet, I will leave them at the defaults of 2mm.

Next, I am setting the size of the box. To accomplish this, three buttons/sliders can be moved to set the size. The one on the left of the screen sets the depth of the tray, meaning front-to-back distance. The width option at the bottom of the screen sets how wide the tray will be. The Height on the right side sets the depth of the tray. To set the size, there are two ways to accomplish it. The first way is to click on the dimension and type in the size that is required.
.gif?la=en&ts=3b8d9455-3c03-4d8c-9062-ea3a9eb5b1bf "How to Design a Custom Storage Box in Bento3D")
The second way is to drag the slider to set the size. To accomplish this, click on the name of the parameter, in this case, I am using the depth slider, and drag it to the correct size needed.
.gif?la=en&ts=12761fe6-3f0c-4975-bb4a-8a9ed2b56790 "How to Design a Custom Storage Box in Bento3D")
For this box, I set the tray size to 100mm x 100mm x 10mm. Next, I am going to set up the dividers in the partition tray. At the top center of the page, there is a button called GRID, which I clicked on.
The page shows up with two plus signs on the right and bottom sides of the page.

To start the design of the partitions, I click on the right plus sign first. This automatically adds a partition in the center of the tray.

Bento3D has some quick options for dividing up the tray. As you can see in the GIF below, these are a wonderful way to set up the division in the tray. In my case, I wanted one partition that was 40mm wide, and the other side could be whatever the remaining size is, in this case, 56mm.

Once the dividers that go top to bottom were set the way I liked, I clicked on the bottom right plus sign. I added two other horizontal dividers to the right column so there were three individual tray slots on that side.
Here is the final design that I ended with for my trays.

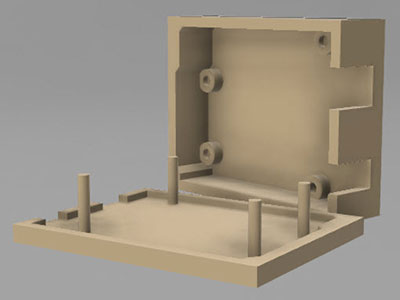
The next step is to click on the download button at the top center of the page. Once the page loads, you will get a 3D preview of what your box will look like once it is printed.

Since my tray looked correct, I clicked on the download option to get the STL file. It is in the top right. Next, I am going to design the box to hold these three trays. There is a bit of a trick to creating this, which I think would be helpful for anyone who is looking to make a multi-tray box. First, I head back to the Size button at the top. My dimensions from the original tray are still loaded, so the only thing I need to change is the height to 30mm (make sure to read until the end, so you don’t run into the problem I had with this). The reason for this is so that the three 10mm high trays will be able to stack inside the box. With the trays already designed, the next thing was to click on the download button. This generates the STL for the enclosure box. Once the box is rendered, there is a neat little tool at the bottom of the page that lets you see the box in an exploded parts diagram. As you click and drag the slide, the parts will separate, allowing you to see each piece. One thing to note is that it shows the tray as one single piece; however, the tray that I designed will be 3 pieces.

Once I was satisfied that my enclosure looked correct, I downloaded the Lid, Box, and Latch files. From there, I loaded all the STLs into my slicer and 3D printed them. One thing to note about the trays is that they will require support around the bottom edge of the tray due to the inset edge to allow the trays to stack.
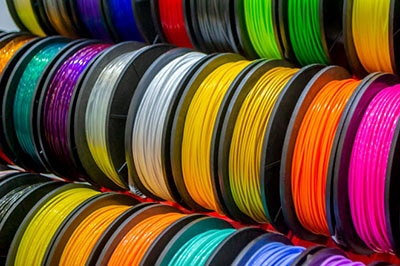
For hardware to assemble the box, Bento3D recommends M2 x 30mm Pan head screws inserted into the hinges, and 2 x 28 mm steel dowel pins be used for the latch and the latching mechanism. I found that a few pieces of 1.75mm filament also work in place of these fasteners. They may not be as durable as using the recommended fasteners; however, I had extra filament available, but not the recommended fasteners.
After printing my box and the Trays, I put them together and found a problem with them. Even though the trays are stated to be 10mm deep, for every extra tray that is stacked, it adds an extra 1mm in height. So, in my case, the trays sat at 32mm instead of the 30mm I had originally thought. Here is what the first box I printed looked like. Note how the lip of the tray extends above the top of the bottom portion of the box. This prevented the lid from being able to close.


After noticing this and measuring twice, I redesigned the box portion to be 32mm high. I then printed a second box with the new height.
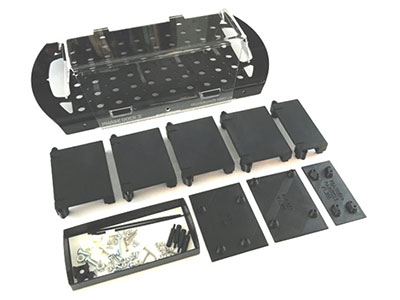
Here is what my final assembly of the box looked like.


Hopefully, this Tutorial inspires you to create some of your own storage containers. If you have any cool creations you would like to share, post them on our TechForum post linked below. We would also love to hear what other interesting tools you use for 3D printing. With the major expansion of people getting into 3D printing in the past few years, I am sure everyone would like to learn other tools that they could be using to further their 3D Printing skills.