


Mfr Part # SC0073
SBC 1.4GHZ 4 CORE 1GB RAM
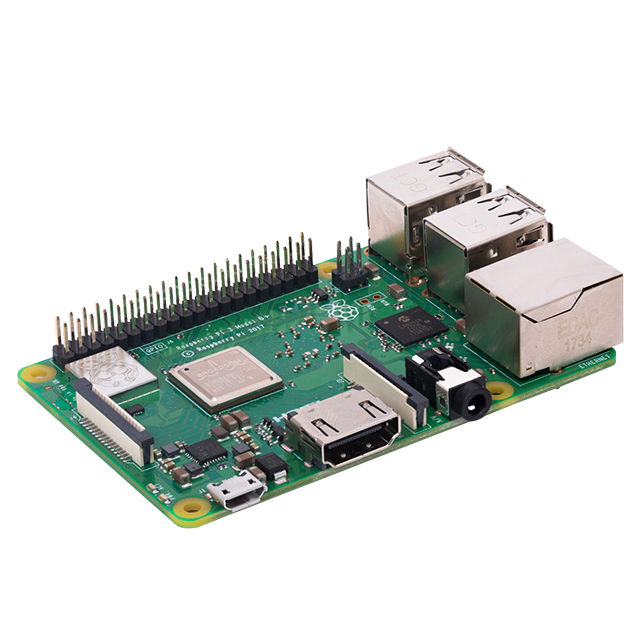
Raspberry Pi
When it comes to IoT projects on the Raspberry Pi, many may think of Raspbian and other Linux-based distros. However, Microsoft has released a simple version of Windows 10, called Windows 10 IoT Core. It contains many .net framework elements that can make creating Windows-based IoT projects a breeze!
Unlike other systems, Windows 10 IoT requires a Windows 10 installation for access, programming, and downloading, so no matter how much you may love your Windows 7 system, you will have to bite the bullet and get Windows 10. Fortunately, Windows 10 can be purchased cheaply from websites like Software Geeks, and it can be installed alongside a previous Windows installation. That means you won’t have to wipe and format your drive!
Microsoft tries to make the installation of Windows 10 IoT simple with the use of the IoT Core Dashboard. This dashboard allows you to create a customized Windows 10 IoT system by targeting specified CPUs, but whether or not this actually makes things simpler depends on the user. We’ll use the Dashboard in this How-To, mainly because the Dashboard can flash a microSD card without the need for ISO to USB packages.
You can download Windows 10 IoT Core here.
You can download the Windows 10 IoT Core Dashboard here.
Insert a microSD card into a card reader and ensure that Windows recognizes the inserted card. Open the Windows 10 IoT dashboard and click the button titled “Set up a new device.” Since the dashboard can target many different systems, make sure that Raspberry 2 & 3 is selected as the device type. In the build version, choose the latest build and choose the microSD card that you inserted as the drive target in the drive selection.
Before you can download the image to the SD card, you will also need to set the admin password. Once all of this is done, accept the software license terms and click “Download and Install.”

As the OS downloads, you will need to get a copy of Visual Studio 2017. This package allows you to create programs in VB.net, C#, and C++ using the .net framework. Make sure to choose the community edition, as the other versions are not free.
You can get Visual Studio 2017 here.
The next step requires us to create a universal application. To do this, After Launching Visual Studio 2017 click File > New Project and then Visual Basic > Windows Universal > Blank App. If this is the first time you have done this, the system may require you to download some new libraries before continuing.

Before any IoT programs can be written, we need the Windows 10 IoT template, which can be downloaded here.
When the template has been downloaded, install it by running the downloaded file. Once installed, check in Visual Studio 2017 for the Window IoT Core option under new projects.

After the SD card has the Windows 10 IoT Core Image downloaded onto it, eject it from the Windows 10 computer and Insert the SD card into the Pi, connect the needed peripherals (monitor, mouse, keyboard, etc.) and then turn on the Pi. Windows IoT takes a while to boot up on its first boot, so be patient. The system will ask you questions about privacy and other settings; fill these in with the answers in whatever way makes the most sense to you.
During the setup, it will also ask you to connect to a network; make sure your network configuration is correct! Once booted, and your Pi is connected to your local network (i.e., the same network that your PC is connected to), go to the dashboard to see if you can see your Pi on the network.

Make a new Windows IoT Core background application by navigating to File > New Project. Under Windows IoT Core, select Background Application.

Replace the code in startuptask.vb with the test code below.
Imports Windows.ApplicationModel.Background
Imports Windows.Devices.Gpio
Imports Windows.System.Threading

Public NotInheritable Class StartupTask
    Implements IBackgroundTask

    Const LED_PIN As Short = 26
    Const INTERVAL As Short = 1   'Interval in seconds
    Private gpio
    Private pin As GpioPin
    Private pinValue As GpioPinValue
    Private blinktimer As ThreadPoolTimer
    Private cancelled As Boolean = False
    Private deferral As BackgroundTaskDeferral = Nothing

    Public Sub Run(taskInstance As IBackgroundTaskInstance) Implements IBackgroundTask.Run

        'Handler for cancelled background task
        AddHandler taskInstance.Canceled, New BackgroundTaskCanceledEventHandler(AddressOf onCanceled)

        'Background task continues to run even after IBackgroundTask.Run returns
        deferral = taskInstance.GetDeferral()

        'Initialize GPIO
        initGPIO()

        'Create a periodic timer
        blinktimer = ThreadPoolTimer.CreatePeriodicTimer(New TimerElapsedHandler(AddressOf blinktimer_tick), TimeSpan.FromMilliseconds(1))

    End Sub

    Private Sub onCanceled(sender As IBackgroundTaskInstance, reason As BackgroundTaskCancellationReason)
        cancelled = True
    End Sub

    Sub blinktimer_tick(state As Object)

        If Not canceled Then
            'Toggele Pin Value
            If (pinValue = GpioPinValue.High) Then
                pinValue = GpioPinValue.Low
            Else
                pinValue = GpioPinValue.High
            End If

            pin.Write(pinValue)
        Else
            'if the task is cancelled
            'Stop the timer And finish execution
            blinktimer.Cancel()
            deferral.Complete()
        End If
    End Sub

    Private Sub initGPIO()
        'Get the default GPIO controller for the system
        gpio = GpioController.GetDefault()

        If Not gpio Is Nothing Then
            'Open a connection to the GPIO Pin
            pin = gpio.openpin(LED_PIN)
            pinValue = GpioPinValue.Low

            'Write Pin value low to turn on LED
            pin.Write(pinValue)

            'Set the pin for output
            pin.SetDriveMode(GpioPinDriveMode.Output)
        End If

    End Sub

End Class
Navigate to Project > Properties, and in Debug, select Find next to “Remote machine.” Your machine should appear under Auto Detected.

To confirm that everything has worked, click the green arrow.
If no error messages show up, you are ready to make .net apps on Windows IoT Core!

