UNIHIKER K10 AI Sensor-Gesture Magic Wand
2025-04-10 | By Pico J
License: Attribution Non-commercial Arduino
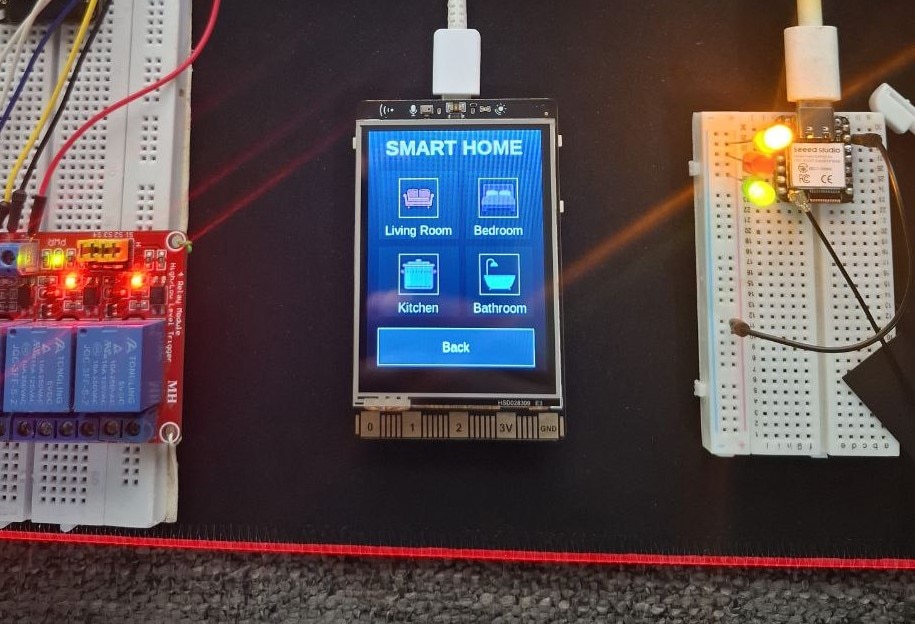
The UNIHIKER K10 Magic Wand project deploys Edge Impulse-trained AI models to the UNIHIKER K10. The project uses the K10's onboard accelerometer for model training and inference and ESP NOW to communicate between multiple UNIHIKER K10s.
HARDWARE LIST
3 X UNIHIKER K10
1 X WS2812 LED strip
1 X Button
2 X Relay module
1 X 32GB TF card
1 X CR123A battery holder
STEP 1 EdgeImpulse setup
Edge Impulse is a publicly available AI model training platform that allows users to send data from a serial port to a PC and then use the Edge Impulse CLI tool provided by Edge Impulse to forward the serial data to the Edge Impulse platform.
- Sign up for Edge Impulse
- Download Python3
- Download node.js V14 or higher
Open up PowerShell as administrator.
Input “npm install -g edge-impulse-cli --force” to install the edge impulse cli tool.
STEP 2 Upload the data forward code to UNIHIKER K10
In order for the sensor data to be uploaded to the K10 for training, a data forwarding code needs to be uploaded to the K10.
#include "unihiker_k10.h"

volatile float mind_n_test;

UNIHIKER_K10 k10;


void setup() {
	k10.begin();
	Serial.begin(9600);
}
void loop() {
	if ((k10.isGesture(TiltForward))) {
		mind_n_test = 1;
	}
	else {
		if ((k10.isGesture(TiltBack))) {
			mind_n_test = 2;
		}
		else {
			if ((k10.isGesture(TiltLeft))) {
				mind_n_test = 3;
			}
			else {
				if ((k10.isGesture(TiltRight))) {
					mind_n_test = 4;
				}
				else {
					if ((k10.isGesture(ScreenUp))) {
						mind_n_test = 5;
					}
					else {
						if ((k10.isGesture(ScreenDown))) {
							mind_n_test = 6;
						}
						else {
							mind_n_test = 0;
						}
					}
				}
			}
		}
	}
	Serial.print(mind_n_test);
	Serial.print(",");
	Serial.print((k10.getAccelerometerX()));
	Serial.print(",");
	Serial.print((k10.getAccelerometerY()));
	Serial.print(",");
	Serial.print((k10.getAccelerometerZ()));
	Serial.print(",");
	Serial.println((k10.getStrength()));
	delay(100);
}
STEP 3 Forward the data to Edge Impulse
Open up PowerShell, then input the following command to forward data from K10 to the Edge Impulse:
edge-impulse-data-forwarder --frequency 100
Enter your Edge Impulse account and go with a name for your magic wand, and finally give each of the five variables output in the above code a different variable name, here I've named it k,x,y,z,v.
STEP 4 Collect data, train model and deployment
Login to your Edge Impulse account, and choose your data collecting device:
Select the data acquisition section, fill in the label for the motion sensor data, and select 2000ms for the sampling duration to start sampling.
Then we came to the most crucial step in the whole project, data collection.
After clicking Start Sampling, you have 2 seconds to wave the K10 in your hand.
You can wave the K10 to draw circles, triangles, squares, and so on. And you need to make sure that you have the same label for the same type of action before waving.
Strongly recommend that you collect enough data in both the Training and Test datasets. Edge Impulse will use the Training data for training and substitute the Test data into the model for validation.
After collecting data, you can go to “Create impulse” to set the size and frequency of the eigenvalue acquisition window.
The eigenvalues can be generated as illustrated in the following figure
Next, you can enter the “Classfier” for model training, you can set the number of training cycles, here I set 100 times, and then select the model version, float32 model will be slightly larger, but the accuracy will be improved a lot.
Once the training is complete, you can see the accuracy of the trained model on the right side. This accuracy is verified by substituting the model using the test dataset we collected earlier.
Once you are satisfied with the accuracy, we can export the model and deploy it.
Click on Deployment. Select Arduino library, TensorFlow Lite, and then build.
An Arduino library would be downloaded.
STEP 5 Magic Wand code and wired up
After downloading the library, copy it to the libraries folder of Arduino IDE 1.8.19 and unzip it.
Then copy the conv.cpp and depthwise_conv.cpp to the library in the following path
src→edge-impulse-sdk→tensorflow→lite→micro→kernels
Then upload the following code to the magic wand.
Because of the Edge Impulse model involved, this code takes a very long time to compile, about 40 minutes or so.
The library files needed for the build are also attached below.
Meanwhile, the Magic Wand K10's screen displays some pictures, which are also placed in the TransmitterPic folder.
#include <esp_now.h>
#include <WiFi.h>
#include "unihiker_k10.h"
#include <DFRobot_NeoPixel.h>
#include <magic-xhl_inferencing.h> //Need to change to your own library

UNIHIKER_K10 k10;
DFRobot_NeoPixel neoPixel_P1;
uint8_t      screen_dir=2;

//MAC
uint8_t MAC1[] = {0x7C, 0xDF, 0xA1, 0xFE, 0xEF, 0xC4};//Magic wand mac address
uint8_t MAC0[] = {0x7C, 0xDF, 0xA1, 0xFD, 0x67, 0xB8};//First HAT mac address
uint8_t MAC2[] = {0x68, 0xB6, 0xB3, 0x22, 0x06, 0x34};//Second HAT mac address

typedef struct struct_message {
  uint8_t ID;
  char data[50];
} struct_message;
struct_message sendData;
struct_message recvData;
esp_now_peer_info_t peerInfo;
int x,y,z,v;
int mind_n_test = 0;
int i = 0;
int max_probability_class = 0;


void OnDataSent(const uint8_t *mac_addr, esp_now_send_status_t status) {
  char macStr[18];
  snprintf(macStr, sizeof(macStr), "%02X:%02X:%02X:%02X:%02X:%02X",
           mac_addr[0], mac_addr[1], mac_addr[2],
           mac_addr[3], mac_addr[4], mac_addr[5]);
  if(status == ESP_NOW_SEND_SUCCESS){
    Serial.print("Send Success to ");
    Serial.println(macStr);
  }else{
    Serial.print("Send Fail to ");
    Serial.println(macStr);
  }
}

// Callback when data is received
void OnDataRecv(const uint8_t * mac, const uint8_t *Data, int len) {
  memcpy(&recvData, Data, sizeof(recvData));
  Serial.println("=========");
  Serial.print("Bytes received: ");
  Serial.println(len);
  Serial.println(recvData.ID);
  Serial.println(recvData.data);
  Serial.println("---------");
}

static float features[100];

int featureIndex = 0;

int raw_feature_get_data(size_t offset, size_t length, float *out_ptr) {
    memcpy(out_ptr, features + offset, length * sizeof(float));
    return 0;
}

void print_inference_result(ei_impulse_result_t result);

void setup()
{
    Serial.begin(9600);
    k10.begin();
    k10.initScreen(screen_dir);
    k10.creatCanvas();
    k10.setScreenBackground(0xFFFFFF);
    k10.rgb->write(-1, 0xFF0000);
    k10.initSDFile();
    k10.canvas->canvasDrawImage(0, 0, "S:/Fail.png");
    k10.canvas->updateCanvas();
    neoPixel_P1.begin(2, 7);
    pinMode(1, INPUT);
    WiFi.mode(WIFI_STA);
    //Init ESP-NOW
    if (esp_now_init() != ESP_OK) {
        Serial.println("Error initializing");
        return;
    }

    //Register the send callback function
    esp_now_register_send_cb(OnDataSent);

    peerInfo.channel = 0;
    peerInfo.encrypt = false;
    //Register MAC0 devices
    memcpy(peerInfo.peer_addr, MAC0, 6);
    if (esp_now_add_peer(&peerInfo) != ESP_OK){
        Serial.println("Failed to add peer0");
        return;
    }
    //Register MAC2 devices
    memcpy(peerInfo.peer_addr, MAC2, 6);
    if (esp_now_add_peer(&peerInfo) != ESP_OK){
        Serial.println("Failed to add peer0");
        return;
    }

    //Register the receive callback function
    esp_now_register_recv_cb(OnDataRecv);
    sendData.ID = 1;
    k10.rgb->write(-1, 0x000000);
}

void loop()
{
    if (digitalRead(1)) {
        Serial.println("====================");
        k10.canvas->canvasDrawImage(0, 0, "S:/Effective.png");
        k10.canvas->updateCanvas();
        featureIndex = 0;
        neoPixel_P1.setRangeColor(0, 13, 0xFF0000);
        delay(100);

    while (featureIndex < 100) {
      if ((k10.isGesture(TiltForward))) {
        mind_n_test = 1;
      }
      else {
        if ((k10.isGesture(TiltBack))) {
          mind_n_test = 2;
          }
          else {
            if ((k10.isGesture(TiltLeft))) {
              mind_n_test = 3;
              }
              else {
                if ((k10.isGesture(TiltRight))) {
                  mind_n_test = 4;
                  }
                  else {
                    if ((k10.isGesture(ScreenUp))) {
                      mind_n_test = 5;
                      }
                      else {
                        if ((k10.isGesture(ScreenDown))) {
                          mind_n_test = 6;
                          }
                          else {
                            mind_n_test = 0;
                            }
                          }
                        }
                      }
                    }
                  }
    // Store data in the features array
    //Serial.print(features[featureIndex]);Serial.print(",");
    features[featureIndex++] = mind_n_test;
    //Serial.print(features[featureIndex]);Serial.print(",");
    features[featureIndex++] = k10.getAccelerometerX();
    //Serial.print(features[featureIndex]);Serial.print(",");
    features[featureIndex++] = k10.getAccelerometerY();
    //Serial.print(features[featureIndex]);Serial.print(",");
    features[featureIndex++] = k10.getAccelerometerZ();
    //Serial.print(features[featureIndex]);Serial.print(",");
    features[featureIndex++] = k10.getStrength();
    delay(100);
    }

        ei_printf("Edge Impulse standalone inferencing (Arduino)\n");

        if (sizeof(features) / sizeof(float) != EI_CLASSIFIER_DSP_INPUT_FRAME_SIZE) {
            ei_printf("The size of your 'features' array is not correct. Expected %lu items, but had %lu\n",
                EI_CLASSIFIER_DSP_INPUT_FRAME_SIZE, sizeof(features) / sizeof(float));
            delay(1000);
            return;
        }

        ei_impulse_result_t result = { 0 };

        signal_t features_signal;
        features_signal.total_length = sizeof(features) / sizeof(features[0]);
        features_signal.get_data = &raw_feature_get_data;

        EI_IMPULSE_ERROR res = run_classifier(&features_signal, &result, false /* debug */);
        if (res != EI_IMPULSE_OK) {
            ei_printf("ERR: Failed to run classifier (%d)\n", res);
            return;
        }

        ei_printf("run_classifier returned: %d\r\n", res);
        print_inference_result(result);
        //neoPixel_P1.setRangeColor(0, 6, 0x00FF00);
        // for (int index = 0; index < 7; index++) {
        //     neoPixel_P1.shift(1);
        //     delay(20);
        // }
        if(max_probability_class == 1){
            strcpy(sendData.data, "Action_1");
            for (int i = 0; i < 7; i++) {
              neoPixel_P1.setRangeColor(i, i, 0x00FF00);
              neoPixel_P1.setRangeColor(13-i, 13-i, 0x00FF00);
              delay(200);
            }
            esp_now_send(0, (uint8_t *)&sendData, sizeof(sendData));
            k10.canvas->canvasDrawImage(0, 0, "S:/Action_1.png");
            Serial.println("esp_now_send");

        }else if(max_probability_class == 2){
            strcpy(sendData.data, "Action_2");
            for (int i = 0; i < 7; i++) {
              neoPixel_P1.setRangeColor(i, i, 0x00FF00);
              neoPixel_P1.setRangeColor(13-i, 13-i, 0x00FF00);
              delay(20);
            }
            esp_now_send(0, (uint8_t *)&sendData, sizeof(sendData));
            k10.canvas->canvasDrawImage(0, 0, "S:/Action_2.png");
            Serial.println("esp_now_send");
        }else if(max_probability_class == 3){
            strcpy(sendData.data, "Action_3");
            for (int i = 0; i < 7; i++) {
              neoPixel_P1.setRangeColor(i, i, 0x00FF00);
              neoPixel_P1.setRangeColor(13-i, 13-i, 0x00FF00);
              delay(20);
            }
            esp_now_send(0, (uint8_t *)&sendData, sizeof(sendData));
            k10.canvas->canvasDrawImage(0, 0, "S:/Action_3.png");
            Serial.println("esp_now_send");
        }
        k10.canvas->updateCanvas();
        delay(2000);
        k10.canvas->canvasDrawImage(0, 0, "S:/Fail.png");
        k10.canvas->updateCanvas();
        neoPixel_P1.clear();
    }
}


void print_inference_result(ei_impulse_result_t result) {
    ei_printf("Timing: DSP %d ms, inference %d ms, anomaly %d ms\r\n",
            result.timing.dsp,
            result.timing.classification,
            result.timing.anomaly);

#if EI_CLASSIFIER_OBJECT_DETECTION == 1
    ei_printf("Object detection bounding boxes:\r\n");
    for (uint32_t i = 0; i < result.bounding_boxes_count; i++) {
        ei_impulse_result_bounding_box_t bb = result.bounding_boxes[i];
        if (bb.value == 0) {
            continue;
        }
        ei_printf("  %s (%f) [ x: %u, y: %u, width: %u, height: %u ]\r\n",
                bb.label,
                bb.value,
                bb.x,
                bb.y,
                bb.width,
                bb.height);
    }
#else
    ei_printf("Predictions:\r\n");
    float max_value = 0.0;
    for (uint16_t i = 0; i < EI_CLASSIFIER_LABEL_COUNT; i++) {
        ei_printf("  %s: ", ei_classifier_inferencing_categories[i]);
        ei_printf("%.5f\r\n", result.classification[i].value);
        if (result.classification[i].value > max_value) {
            max_value = result.classification[i].value;
            max_probability_class = i + 1; // 更新为当前类别(从1开始)
        }
    }

    ei_printf("Max Probability Class: %d\n", max_probability_class);
#endif

#if EI_CLASSIFIER_HAS_ANOMALY
    ei_printf("Anomaly prediction: %.3f\r\n", result.anomaly);
#endif
}
After uploading the code, please follow the pictures as shown to install the buttons and WS2812 LED strips.
STEP 6 Magic HAT code and wired up
The HAT K10 accepts ESPNOW messages and drives the WS2812 LED strip as well as relays. The relays control the power to the servos, and the servos in the hat I purchased will start moving as soon as power is applied.
If you purchased a hat servo that requires a PWM signal or other signal to drive it, you may need to modify the code below appropriately.
#include <esp_now.h>
#include <WiFi.h>
#include "unihiker_k10.h"

//On black hat and orange hat K10 upload need to open the corresponding macro definition, comment out another macro definition
#define blackHAT
//#define orangeHAT

UNIHIKER_K10 k10;
uint8_t      screen_dir=2;
static int status = 0;
float startTime = 0;
float endTime = 0;

//MAC
uint8_t MAC1[] = {0x7C, 0xDF, 0xA1, 0xFE, 0xEF, 0xC4};//Magic Wand Mac Address
uint8_t MAC0[] = {0x7C, 0xDF, 0xA1, 0xFD, 0x67, 0xB8};//First hat Mac Address
uint8_t MAC2[] = {0x68, 0xB6, 0xB3, 0x22, 0x06, 0x34};//Orange hat Mac Address

typedef struct struct_message {
  uint8_t ID;
  char data[50];
} struct_message;
struct_message sendData;
struct_message recvData;
esp_now_peer_info_t peerInfo;

int recv_action;

// Callback when data is sent
void OnDataSent(const uint8_t *mac_addr, esp_now_send_status_t status) {
  char macStr[18];
  snprintf(macStr, sizeof(macStr), "%02X:%02X:%02X:%02X:%02X:%02X",
           mac_addr[0], mac_addr[1], mac_addr[2],
           mac_addr[3], mac_addr[4], mac_addr[5]);
  if(status == ESP_NOW_SEND_SUCCESS){
    Serial.print("Send Success to ");
    Serial.println(macStr);
  }else{
    Serial.print("Send Fail to ");
    Serial.println(macStr);
  }
}

/*
Callback when data is received
ACTION 1 means circle, first hat move
ACTION 2 means shake, both hat stop
ACTION 3 means triangle, second hat move
The two HAT's K10's need to be uploaded with different programs, the program switching is achieved by the #define macro definition at the beginning of that program
*/
void OnDataRecv(const uint8_t * mac, const uint8_t *Data, int len) {
  memcpy(&recvData, Data, sizeof(recvData));
  Serial.println("=========");
  Serial.print("Bytes received: ");
  Serial.println(len);
  Serial.println(recvData.ID);
  Serial.println(recvData.data);
  if (String(recvData.data) == "Action_1") {
      recv_action = 1;
      k10.canvas->canvasText("Action_1", 0, 0, 0x0000FF, k10.canvas->eCNAndENFont24, 50, true);
      #ifdef blackHAT
      if(status = 0)
      {
        digitalWrite(P0, HIGH);
        status = 1;
      }
      else if(status = 1)
      {
        digitalWrite(P0, LOW);
        delay(1000);
        digitalWrite(P0, HIGH);
        status = 1;
      }
      #endif
  } else if (String(recvData.data) == "Action_2") {
      recv_action = 2;
      k10.canvas->canvasText("Action_2", 0, 0, 0x0000FF, k10.canvas->eCNAndENFont24, 50, true);
      digitalWrite(P0, LOW);
      status = 0;
  } else if (String(recvData.data) == "Action_3") {
      recv_action = 3;
      k10.canvas->canvasText("Action_3", 0, 0, 0x0000FF, k10.canvas->eCNAndENFont24, 50, true);
      #ifdef orangeHAT
      if(status = 0)
      {
        digitalWrite(P0, HIGH);
        status = 1;
      }
      else if(status = 1)
      {
        digitalWrite(P0, LOW);
        delay(1000);
        digitalWrite(P0, HIGH);
      }
      status = 0;
      #endif
  }
  Serial.println(recv_action);
  k10.canvas->updateCanvas();
  Serial.println("---------");
}

void setup() {
  Serial.begin(9600);
  k10.begin();
  pinMode(P0, OUTPUT);
  k10.initScreen(screen_dir);
  k10.creatCanvas();
  k10.setScreenBackground(0xFFFFFF);
  k10.rgb->write(-1, 0xFF0000);
  WiFi.mode(WIFI_STA);
  //Init ESP-NOW
  if (esp_now_init() != ESP_OK) {
    Serial.println("Error initializing");
    return;
  }


  esp_now_register_send_cb(OnDataSent);

  peerInfo.channel = 0;
  peerInfo.encrypt = false;
  memcpy(peerInfo.peer_addr, MAC1, 6);
  if (esp_now_add_peer(&peerInfo) != ESP_OK){
    Serial.println("Failed to add peer0");
    return;
  }

  //注册接收回调函数
  esp_now_register_recv_cb(OnDataRecv);
  k10.rgb->write(-1, 0x000000);

  delay(3000);
  digitalWrite(P0, HIGH);
  delay(1000);
  digitalWrite(P0, LOW);
}

void loop() {
  if(digitalRead(P0) == HIGH)
  {
    endTime = millis();
    if(endTime - startTime >= 15000)
    {
      startTime = endTime;
      delay(500);
      digitalWrite(P0, LOW);
      delay(1000);
      digitalWrite(P0, HIGH);
    }
  }
  else if(digitalRead(P0) == LOW)
  {
    startTime = millis();
  }
  Serial.print("Start Time: ");
  Serial.println(startTime);
  Serial.print("End Time: ");
  Serial.println(endTime);
}
Connect the K10 to your relay module and use COM/NA to power on and off your HAT motor.
STEP 7 Designing a magic wand to install K10
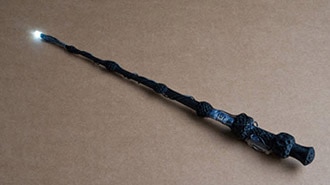
3D print a magic wand device to mount the K10, there is a cover on the back of the magic wand device that can be used to mount a CR123A battery holder. The cover can be fitted with magnets to magnetize the battery compartment.
WandCase.rar
STEP 8 Power up hats and wand, then wave the wand


