Mfr Part # MIKROE-1530
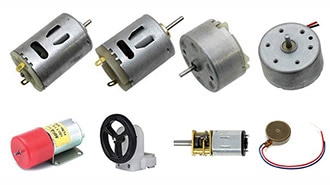
STEPPER MOTOR PM GEARED UNI 5V
MikroElektronika
License: General Public License Drivers / Controllers Motors PWM Stepper Arduino
The first example demonstrates how to ramp up the motor's speed smoothly.
The second example adds a ramp-down phase, creating a complete speed control cycle.
Watch the demonstration video to see both examples in action!
Arduino UNO (or any other board)
Visuino program: Download Visuino

Connect Arduino pin [5V] to Driver Board1 pin [VCC]
Connect Arduino pin [GND] to Driver Board1 pin [GND]
Connect Arduino digital pin [2] to Driver Board1 pin [IN1]
Connect Arduino digital pin [3] to Driver Board1 pin [IN2]
Connect Arduino digital pin [4] to Driver Board1 pin [IN3]
Connect Arduino digital pin [5] to Driver Board1 pin [IN4]


Start Visuino as shown in the first picture. Click on the "Tools" button in the Arduino component (Picture 1) in Visuino. When the dialog appears, select "Arduino UNO" as shown in Picture 2
The first example demonstrates how to ramp up the motor's speed smoothly.
The second example adds a ramp-down phase, creating a complete speed control cycle.
Watch the demonstration video to see both examples in action!
Arduino UNO (or any other board)
Visuino program: Download Visuino
Connect Arduino pin [5V] to Driver Board1 pin [VCC]
Connect Arduino pin [GND] to Driver Board1 pin [GND]
Connect Arduino digital pin [2] to Driver Board1 pin [IN1]
Connect Arduino digital pin [3] to Driver Board1 pin [IN2]
Connect Arduino digital pin [4] to Driver Board1 pin [IN3]
Connect Arduino digital pin [5] to Driver Board1 pin [IN4]
Start Visuino as shown in the first picture. Click on the "Tools" button on the Arduino component (Picture 1) in Visuino. When the dialog appears, select "Arduino UNO" as shown in Picture 2
Connect "AnalogValue1" pin [Out] to "RampToValue1" pin [In]
Connect "RampToValue1" pin [Out] to "ClockGenerator1" pin [Frequency]
Connect "ClockGenerator1" pin [Out] to "Stepper1" pin [Step]
Connect "Stepper1" pin [0] to Arduino digital pin [2]
Connect "Stepper1" pin [1] to Arduino digital pin [3]
Connect "Stepper1" pin [2] to Arduino digital pin [4]
Connect "Stepper1" pin [3] to Arduino digital pin [5]

In Visuino, at the bottom, click on the "Build" Tab. Make sure the correct port is selected, then click the "Compile/Build and Upload" button.
If you power the Arduino module, the Stepper Motor will start to rotate and ramp up its speed.
Congratulations! You have completed your project with Visuino. Also attached is the Visuino project that I created for this project. You can download it here and open it in Visuino: https://www.visuino.eu
Download Visuino file: Stepper1
Download Visuino file: Stepper2