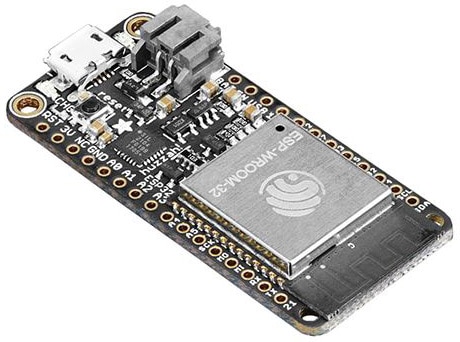
Mfr Part # 5400
ESP32 FEATHER V2 STEMMA QT
Adafruit Industries LLC
License: See Original Project 3D Printing Amplifiers Filament Solder / Desoldering Sound Arduino
Courtesy of Adafruit
Guide by Ruiz Brothers and Liz Clark
Overview
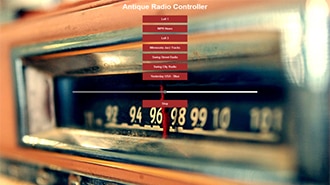
Defiant Speaker
Build a 3D printed Bluetooth speaker, inspired by the TV Show Severance. Powered by the Feather ESP32 V2 and the MAX98357A 3W I2S amplifier.
This project is written in Arduino and uses two libraries by Phil Schatzmann that make using the ESP32 for Bluetooth audio really easy.
Great for playing defiant jazz, watching your favorite TV show, or sync with your mobile device. Just please don't throw it at your coworkers, as it may cause a nasty bump to the head.
DIY Electronics
The speaker, Feather, and I2S amplifier are secured to a 3D printed mounting plate that is affixed to the enclosure. The speaker grill can pop out allowing for any maintenance, if needed.
Mid-Century Modern
The enclosure design is influenced by minimalism and features curved surfaces that embody a mid-century modern look. The parts can be 3D printed without any support material.
Parts
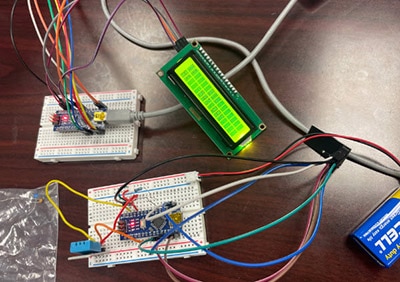
Circuit Diagram
The diagram below provides a general visual reference for wiring of the components once you get to the Assembly page. This diagram was created using the software package Fritzing.
Adafruit Library for Fritzing
Adafruit uses the Adafruit Fritzing parts library to create circuit diagrams for projects. You can download the library or just grab individual parts. Get the library and parts from GitHub - Adafruit Fritzing Parts.
Wired Connections
LRC pin from MAX98357A to RX pin on Feather ESP32
BCLK pin from MAX98357A to TX pin on Feather ESP32
DIN pin from MAX98357A to 14 pin on Feather ESP32
GND pin from MAX98357A to GND pin on Feather ESP32
VIN pin from MAX98357A to USB pin on Feather ESP32
GAIN pin from MAX98357A to GND pin on MAX98357A
– from speaker to – on MAX98357A
+ from speaker to + on MAX98357A
The Feather ESP32 is powered by a 5V 1A power supply.
CAD Files
3D Printed Parts
Individual 3MF files for 3D printing will need to be oriented in slicing software to print on FDM machines without any support material using PLA filament. Original design source may be downloaded using the links below.
Filaments
This project used PLA filament from PolyMaker.
Feel free to use any colors you wish.
Build Volume
The parts require a 3D printer with a minimum build volume of:
88mm (X) x 174mm (Y) x 90mm (Z)
Design Source Files
The project assembly was designed in Fusion 360. Once opened in Fusion 360, It can be exported in different formats like STEP, STL and more.
Electronic components like Adafruit's boards, displays, connectors and more can be downloaded from the Adafruit CAD parts GitHub Repo.
Arduino IDE Setup
You need to install the right USB-to-serial driver for your chip in addition to the Arduino IDE. If you are unsure which is the right one, install both!
Install Arduino IDE
The first thing you will need to do is to download the latest release of the Arduino IDE. You will need to be using version 1.8 or higher for this guide.
Install CP2104 / CP2102N USB Driver
The USB-to-Serial converter that talks to the ESP32 chip itself will need a driver on your computer's operating system. The driver is available for Mac and Windows. It is already built into Linux.
Click here to download the CP2104 USB Driver
Install CH9102 / CH34X USB Driver
Newer ESP32 boards have a different USB-to-serial converter that talks to the chip itself and will need a driver on your computer's operating system. The driver is available for Mac and Windows. It is already built into Linux.
If you would like more detail, check out the guide on installing these drivers.
Click here to download the Windows driver
Click here to download the Mac driver
Install ESP32 Board Support Package
After you have downloaded and installed the latest version of Arduino IDE, you will need to start the IDE and navigate to the Preferences menu. You can access it from the File menu in Windows or Linux, or the Arduino menu on OS X.
A dialog will pop up just like the one shown below.
We will be adding a URL to the new Additional Boards Manager URLs option. The list of URLs is comma separated, and you will only have to add each URL once. New Adafruit boards and updates to existing boards will automatically be picked up by the Board Manager each time it is opened. The URLs point to index files that the Board Manager uses to build the list of available & installed boards.
To find the most up to date list of URLs you can add, you can visit the list of third-party board URLs on the Arduino IDE wiki. We will only need to add one URL to the IDE in this example, but you can add multiple URLS by separating them with commas. Copy and paste the link below into the Additional Boards Manager URLs option in the Arduino IDE preferences.
https://raw.githubusercontent.com/espressif/arduino-esp32/gh-pages/package_esp32_dev_index.json
If you have multiple boards you want to support, say ESP8266 and Adafruit, have both URLs in the text box separated by a comma (,)
Once done click OK to save the new preference settings.
The next step is to actually install the Board Support Package (BSP). Go to the Tools → Board → Board Manager submenu. A dialog should come up with various BSPs. Search for esp32.
Click the Install button and wait for it to finish. Once it is finished, you can close the dialog.
In the Tools → Board submenu you should see ESP32 Arduino and in that dropdown, it should contain the ESP32 boards along with all the latest ESP32 boards.
Make sure you choose the Adafruit Feather ESP32 V2 board in Arduino IDE. It is not the same as the Adafruit Feather ESP32 board, which is the older board.
Look for the Adafruit Feather ESP32 V2.
The upload speed can be changed: faster speed makes uploads take less time but sometimes can cause upload issues. 921600 should work fine, but if you're having issues, you can drop down lower.
Code the Speaker
This project is written in Arduino and uses two libraries by Phil Schatzmann that enable Bluetooth audio output on the ESP32. After you install the libraries, you'll compile and upload the main program file to your board.
Install the Libraries
Both of the libraries that you need for this project are not in the Arduino IDE Library Manager, so you will need to install them manually.
ESP32-A2DP
Navigate to the ESP32-A2DP repository. Click on the green Code button at the top of the page and then click Download ZIP in the dropdown.
In the Arduino IDE, click on the Sketch menu and then Include Library - Add .ZIP Library...
A popup window will open with your system's file manager. Find the ESP32-A2DP .ZIP folder that you downloaded and click Open.
Arduino Audio Tools
Navigate to the Arduino Audio Tools repository. Click on the green Code button at the top of the page and then click Download ZIP in the dropdown.
In the Arduino IDE, click on the Sketch menu and then Include Library - Add .ZIP Library...
A popup window will open with your system's file manager. Find the Arduino Audio Tools .ZIP folder that you downloaded and click Open.
Code
The code is the bt_music_receiver_arduino_i2s_3.ino example from the ESP32-A2DP library with the pins adjusted for the I2S wiring in this project.
// SPDX-FileCopyrightText: 2020 Phil Schatzmann
//
// SPDX-License-Identifier: GPL-3.0-or-later

/*
  Streaming Music from Bluetooth

  Copyright (C) 2020 Phil Schatzmann
  This program is free software: you can redistribute it and/or modify
  it under the terms of the GNU General Public License as published by
  the Free Software Foundation, either version 3 of the License, or
  (at your option) any later version.
  This program is distributed in the hope that it will be useful,
  but WITHOUT ANY WARRANTY; without even the implied warranty of
  MERCHANTABILITY or FITNESS FOR A PARTICULAR PURPOSE.  See the
  GNU General Public License for more details.
  You should have received a copy of the GNU General Public License
  along with this program.  If not, see <http://www.gnu.org/licenses/>.
*/

// ==> Example which shows how to use the built in ESP32 I2S >= 3.0.0

#include "ESP_I2S.h"
#include "BluetoothA2DPSink.h"

const uint8_t I2S_SCK = 8;       /* Audio data bit clock */
const uint8_t I2S_WS = 7;       /* Audio data left and right clock */
const uint8_t I2S_SDOUT = 14;    /* ESP32 audio data output (to speakers) */
I2SClass i2s;

BluetoothA2DPSink a2dp_sink(i2s);

void setup() {
    i2s.setPins(I2S_SCK, I2S_WS, I2S_SDOUT);
    if (!i2s.begin(I2S_MODE_STD, 44100, I2S_DATA_BIT_WIDTH_16BIT, I2S_SLOT_MODE_STEREO, I2S_STD_SLOT_BOTH)) {
      Serial.println("Failed to initialize I2S!");
      while (1); // do nothing
    }

    a2dp_sink.start("Lumon Industries Speaker");
}

void loop() {
}The code initializes the I2S DAC and creates a Bluetooth device called Lumon Industries Speaker that will begin advertising for you to connect to. All of the actual Bluetooth and audio code exists in the two libraries used.
Wiring and Assembly
Connect Amp to Feather
Solder the following wires to connect the I2S amplifier to the Feather ESP32 V2.
LRC pin to RX pin on Feather ESP32
BCLK pin to TX pin on Feather ESP32
DIN pin to 14 pin on Feather ESP32
GND pin to GND pin on Feather ESP32
VIN pin to USB pin on Feather ESP32
GAIN pin to GND pin on MAX98357A
Connect Speaker to Amp
Insert the red wire from the speaker to the positive + terminal on the amplifier screw block. Insert the black wire from the speaker to the negative - terminal on the amplifier screw block.
Tighten the screws to secure the wires. A gentle tug on a wire helps to ensure the wire is held by the terminal block.
Secure Feather
Use two M2.5 x 6mm long machine screws to secure the Feather to the 3D printed PCB mount.
Orient the Feather with the PCB mount and place it over the mounting holes.
Fasten the two machine screws to secure the Feather to the PCB mount.
Secure Amplifier
Use two M2.5 x 6mm long machine screws to secure the amplifier to the PCB mount.
Orient the amplifier with the PCB mount and place it over the mounting holes.
Fasten the screws to secure the amplifier to the PCB mount.
Secure Speaker
Use two M3 x 10mm machine screws and hex nuts to secure the speaker to the PCB mount.
Place the PCB mount over the mounting tabs of the speaker with the mounting holes lined up.
Insert and fasten the M3 screws to secure the speaker to the PCB mount.
Assembled PCB Mount
Take a moment to ensure all of the components have been tightly secured to the PCB mount.
Install PCB mount
Use four M3 x 6mm long machine screws to secure the PCB mount assembly to the speaker enclosure.
Place the PCB mount into the speaker enclosure and line up with standoffs with the mounting holes.
Secure PCB Mount
Hold the PCB mount while fastening the four M3 screws through the bottom of the speaker enclosure.
Installed Components
Take a moment to ensure the PCB mount has been correctly installed into the speaker enclosure.
The USB-C port from the Feather should be accessible on the back side of the speaker enclosure.
Speaker Grill Fabric (Optional)
A piece of black felt can be used to cover the back side of the speaker grill. The fabric can be attached to the speaker grill using fabric tape strips.
Cut Fabric
The felt can be cut using a crafting hobby knife. The speaker grill cover can be used as a template.
Place the speaker grill over the sheet of felt. Carefully cut the piece of felt using the grill as a guide.
Cut Tape Strips
Use scissors to cut thin strips of fabric tape. Six cut pieces of tape is applied to the edges of the speaker grill cover.
Adhere Felt
Carefully peel away the backing from the strips of tape. Place the cut piece of felt over the speaker grill and press down on the edges to adhere the fabric to the speaker grill.
Install Speaker Grill
Orient the speaker grill with the speaker enclosure. The back side of the grill features nubs that will snap into matching notches on the speaker enclosure.
Press the speaker grill into the speaker enclosure.
Final Build
Connect the USB C cable from the power supply to the Feather ESP32 V2.
Congratulations on your build!
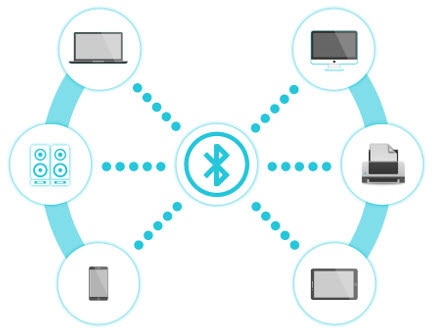
Usage
Connecting with Computer
To connect to the speaker using Mac OS, open the System Settings application and go to the Bluetooth section.
The device "Lumon Industries Speaker" should appear. Click on the "Connect" button to connect to the speaker.
A similar connection method is possible using the Windows OS, Raspberry Pi OS and Linux.
Connecting with iOS
To connect to the speaker using iOS, open the Settings app and go to the Bluetooth section. Locate the Other Devices section near the bottom of the list and click on Lumon Industries Speaker.
Click on Device Type, then select Speaker from the list. Use the AirPlay dialog to play music and system audio through the Speaker.