Mfr Part # 4444
ADAFRUIT PYPORTAL TITANO
Adafruit Industries LLC
License: See Original Project 3D Printing STEMMA
Courtesy of Adafruit
Guide by Ruiz Brothers and Liz Clark
Overview
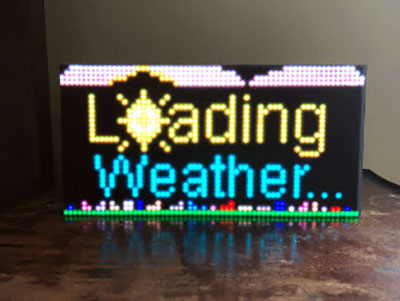
8Bit Retro Weather
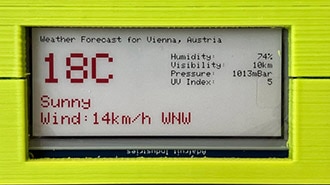
Build a weather station with retro inspired 8bit graphics! Use CircuitPython to display data from the Open Weather Maps API. Get temperature, weather conditions, location, time and date! All rendered in chunky fonts and blocky icons.
PyPortal Titano
Go bigger with 480 x 320 pixels of crispy text and graphics. The easy-to-use Python device that allows you to create all the things IoT in minutes. The Titano uses an Atmel (Microchip) ATSAMD51J20 and an Espressif ESP32 Wi-Fi coprocessor, with TLS/SSL secure communications support built in.
Python on Hardware
Make custom touch screen interfaces, open-source, and Python-powered, using tinyJSON / APIs – all over WiFi with the latest technologies. Create little pocket universes of joy that connect to something good.
Parts
Parts used to build this project.
M3 Screws
8 x M3 Machine Screws
Circuit Diagram
The diagram below provides a visual reference for wiring of the components. This diagram was created using the software package Fritzing.
Adafruit Library for Fritzing
Use Adafruit's Fritzing parts library to create circuit diagrams for your projects. Download the library or just grab individual parts. Get the library and parts from GitHub - Adafruit Fritzing Parts.
Connections
The two STEMMA buttons are connected to D4 and D3 STEMMA ports. The mini oval speaker plugs into the SPEAKER port. These components are plug and play so no soldering is required, yay!
Software
Setting Up PyPortal Titano with Circuit Python
The PyPortal Titano ships with a current version of CircuitPython and includes the quotes demo code along with a few libraries. It's a good practice to update your PyPortal with the latest version of CircuitPython and update your libraries using the corresponding software library bundle. Let's walk through the setup – continue onto the next pages!
CircuitPython
CircuitPython is a derivative of MicroPython designed to simplify experimentation and education on low-cost microcontrollers. It makes it easier than ever to get prototyping by requiring no upfront desktop software downloads. Simply copy and edit files on the CIRCUITPY "flash" drive to iterate.
The following instructions will show you how to install CircuitPython. If you've already installed CircuitPython but are looking to update it or reinstall it, the same steps work for that as well!
Set up CircuitPython Quick Start!
Follow this quick step-by-step for super-fast Python power :)
Download the latest version of CircuitPython for this board via CircuitPython.org
Click the link above to download the latest version of CircuitPython for the PyPortal Titano.
Download and save it to your desktop (or wherever is handy).
Plug your PyPortal into your computer using a known-good USB cable.
A lot of people end up using charge-only USB cables and it is very frustrating! So make sure you have a USB cable you know is good for data sync.
Double-click the Reset button on the top in the middle (magenta arrow) on your board, and you will see the NeoPixel RGB LED (green arrow) turn green. If it turns red, check the USB cable, try another USB port, etc. Note: The little red LED next to the USB connector will pulse red. That's ok!
If double-clicking doesn't work the first time, try again. Sometimes it can take a few tries to get the rhythm right!
You will see a new disk drive appear called PORTALBOOT.
Drag the adafruit-circuitpython-pyportal-etc.uf2 file to PORTALBOOT.
The LED will flash. Then, the PORTALBOOT drive will disappear, and a new disk drive called CIRCUITPY will appear.
If you haven't added any code to your board, the only file that will be present is boot_out.txt. This is absolutely normal! It's time for you to add your code.py and get started!
That's it, you're done! :)
PyPortal Titano Default Files
Click below to download a zip of the files that shipped on the PyPortal Titano.
PyPortal CircuitPython Setup
To use all the amazing features of your PyPortal with CircuitPython, you must first install a number of libraries. This page covers that process.
Adafruit CircuitPython Bundle
Download the Adafruit CircuitPython Library Bundle. You can find the latest release here:
Latest Adafruit CircuitPython Library Bundle
Download the adafruit-circuitpython-bundle-*.x-mpy-*.zip bundle zip file where *.x MATCHES THE VERSION OF CIRCUITPYTHON YOU INSTALLED and unzip a folder of the same name. Inside you'll find a lib folder. You have two options:
You can add the lib folder to your CIRCUITPY drive. This will ensure you have all the drivers. But it will take a bunch of space on the 8 MB disk
Add each library as you need it, this will reduce the space usage, but you'll need to put in a little more effort.
At a minimum we recommend the following libraries, in fact we more than recommend. They're basically required. So grab them and install them into CIRCUITPY/lib now!
adafruit_esp32spi - This is the library that gives you internet access via the ESP32 using (you guessed it!) SPI transport. You need this for anything Internet.
adafruit_requests - This library allows us to perform HTTP requests and get responses back from servers. GET/POST/PUT/PATCH - they're all in here!
adafruit_connection_manager - used by adafruit_requests.
adafruit_pyportal - This is our friendly wrapper library that does a lot of our projects, displays graphics and text, fetches data from the internet. Nearly all of our projects depend on it!
adafruit_portalbase - This library is the base library that adafruit_pyportal library is built on top of.
adafruit_touchscreen - A library for reading touches from the resistive touchscreen. Handles all the analog noodling, rotation, and calibration for you.
adafruit_io - This library helps connect the PyPortal to our free datalogging and viewing service.
adafruit_imageload - An image display helper, required for any graphics!
adafruit_display_text - Not surprisingly, it displays text on the screen.
adafruit_bitmap_font - We have fancy font support, and it’s easy to make new fonts. This library reads and parses font files.
adafruit_slideshow - For making image slideshows - handy for quick display of graphics and sound.
neopixel - For controlling the onboard neopixel.
adafruit_adt7410 - Library to read the temperature from the on-board Analog Devices ADT7410 precision temperature sensor (not necessary for Titano or Pynt).
adafruit_bus_device - Low level support for I2C/SPI.
adafruit_fakerequests - This library allows you to create fake HTTP requests by using local files.
Download Project Files from GitHub
As of CircuitPython 9, a mount point (folder) named /sd is required on the CIRCUITPY drive. Make sure to create that directory after upgrading CircuitPython.
Follow these steps to create the /sd directory
All of the files required for this project (the code, graphics, fonts and audio files) are available for download on GitHub. There are four code files for this project, our regular code.py along with secrets.py, calendar.py and openweather_graphics.py.
You'll need to edit secrets.py with your applicable information. You can find more info on all of the code files in the next four pages of this guide.
All of the files will live on your CIRCUITPY drive, with the exception of the icons folder. The icons folder needs to be stored on a micro-SD card and then inserted into the PyPortal Titano. This is to avoid any storage issues with the size of the graphics.
Don't forget your SD card for the icons folder!
In the code window below, click Download Project Bundle to get all the files needed for this project.
# SPDX-FileCopyrightText: 2020 Liz Clark for Adafruit Industries
#
# SPDX-License-Identifier: MIT

from os import getenv
import time
from calendar import alarms
from calendar import timers
import board
import displayio
from digitalio import DigitalInOut, Direction, Pull
from adafruit_button import Button
from adafruit_pyportal import PyPortal
import openweather_graphics  # pylint: disable=wrong-import-position

# Get WiFi details, ensure these are setup in settings.toml
ssid = getenv("CIRCUITPY_WIFI_SSID")
password = getenv("CIRCUITPY_WIFI_PASSWORD")

if None in [ssid, password]:
    raise RuntimeError(
        "WiFi settings are kept in settings.toml, "
        "please add them there. The settings file must contain "
        "'CIRCUITPY_WIFI_SSID', 'CIRCUITPY_WIFI_PASSWORD', "
        "at a minimum."
    )

# Use cityname, country code where countrycode is ISO3166 format.
# E.g. "New York, US" or "London, GB"
LOCATION = getenv('location')

# Set up where we'll be fetching data from
DATA_SOURCE = "http://api.openweathermap.org/data/2.5/weather?q=" + LOCATION
DATA_SOURCE += "&appid=" + getenv('openweather_token')
# You'll need to get a token from openweather.org, looks like 'b6907d289e10d714a6e88b30761fae22'
DATA_LOCATION = []

# Initialize the pyportal object and let us know what data to fetch and where
# to display it
pyportal = PyPortal(url=DATA_SOURCE,
                    json_path=DATA_LOCATION,
                    status_neopixel=board.NEOPIXEL,
                    default_bg=0x000000)

display = board.DISPLAY

#  the alarm sound file locations
alarm_sound_trash = "/sounds/trash.wav"
alarm_sound_bed = "/sounds/sleep.wav"
alarm_sound_eat = "/sounds/eat.wav"

#  the alarm sounds in an array that matches the order of the gfx & alarm check-ins
alarm_sounds = [alarm_sound_trash, alarm_sound_bed,
                alarm_sound_eat, alarm_sound_eat, alarm_sound_eat]

#  setting up the bitmaps for the alarms

#  sleep alarm
sleep_bitmap = displayio.OnDiskBitmap(open("/sleepBMP.bmp", "rb"))
sleep_tilegrid = displayio.TileGrid(sleep_bitmap, pixel_shader=getattr(sleep_bitmap, 'pixel_shader', displayio.ColorConverter()))
group_bed = displayio.Group()
group_bed.append(sleep_tilegrid)

#  trash alarm
trash_bitmap = displayio.OnDiskBitmap(open("/trashBMP.bmp", "rb"))
trash_tilegrid = displayio.TileGrid(trash_bitmap, pixel_shader=getattr(trash_bitmap, 'pixel_shader', displayio.ColorConverter()))
group_trash = displayio.Group()
group_trash.append(trash_tilegrid)

#  meal alarm
eat_bitmap = displayio.OnDiskBitmap(open("/eatBMP.bmp", "rb"))
eat_tilegrid = displayio.TileGrid(eat_bitmap, pixel_shader=getattr(eat_bitmap, 'pixel_shader', displayio.ColorConverter()))
group_eat = displayio.Group()
group_eat.append(eat_tilegrid)

#  snooze touch screen buttons
#  one for each alarm bitmap
snooze_controls = [
    {'label': "snooze_trash", 'pos': (4, 222), 'size': (236, 90), 'color': None},
    {'label': "snooze_bed", 'pos': (4, 222), 'size': (236, 90), 'color': None},
    {'label': "snooze_eat", 'pos': (4, 222), 'size': (236, 90), 'color': None},
    ]

#  setting up the snooze buttons as buttons
snooze_buttons = []
for s in snooze_controls:
    snooze_button = Button(x=s['pos'][0], y=s['pos'][1],
                           width=s['size'][0], height=s['size'][1],
                           style=Button.RECT,
                           fill_color=s['color'], outline_color=None,
                           name=s['label'])
    snooze_buttons.append(snooze_button)

#  dismiss touch screen buttons
#  one for each alarm bitmap
dismiss_controls = [
    {'label': "dismiss_trash", 'pos': (245, 222), 'size': (230, 90), 'color': None},
    {'label': "dismiss_bed", 'pos': (245, 222), 'size': (230, 90), 'color': None},
    {'label': "dismiss_eat", 'pos': (245, 222), 'size': (230, 90), 'color': None},
    ]

#  setting up the dismiss buttons as buttons
dismiss_buttons = []
for d in dismiss_controls:
    dismiss_button = Button(x=d['pos'][0], y=d['pos'][1],
                            width=d['size'][0], height=d['size'][1],
                            style=Button.RECT,
                            fill_color=d['color'], outline_color=None,
                            name=d['label'])
    dismiss_buttons.append(dismiss_button)

#  adding the touch screen buttons to the different alarm gfx groups
group_trash.append(snooze_buttons[0].group)
group_trash.append(dismiss_buttons[0].group)
group_bed.append(snooze_buttons[1].group)
group_bed.append(dismiss_buttons[1].group)
group_eat.append(snooze_buttons[2].group)
group_eat.append(dismiss_buttons[2].group)

#  setting up the hardware snooze/dismiss buttons
switch_snooze = DigitalInOut(board.D3)
switch_snooze.direction = Direction.INPUT
switch_snooze.pull = Pull.UP

switch_dismiss = DigitalInOut(board.D4)
switch_dismiss.direction = Direction.INPUT
switch_dismiss.pull = Pull.UP

#  grabbing the alarm times from the calendar file
#  'None' is the placeholder for trash, which is weekly rather than daily
alarm_checks = [None, alarms['bed'],alarms['breakfast'],alarms['lunch'],alarms['dinner']]
#  all of the alarm graphics
alarm_gfx = [group_trash, group_bed, group_eat, group_eat, group_eat]

#  allows for the openweather_graphics to show
gfx = openweather_graphics.OpenWeather_Graphics(pyportal.splash, am_pm=True, celsius=False)

#  state machines
localtile_refresh = None
weather_refresh = None
dismissed = None
touched = None
start = None
alarm = None
snoozed = None
touch_button_snooze = None
touch_button_dismiss = None
phys_dismiss = None
phys_snooze = None
mode = 0
button_mode = 0

#  weekday array
weekday = ["Mon.", "Tues.", "Wed.", "Thurs.", "Fri.", "Sat.", "Sun."]

#  weekly alarm setup. checks for weekday and time
weekly_alarms = [alarms['trash']]
weekly_day = [alarms['trash'][0]]
weekly_time = [alarms['trash'][1]]

while True:
    # while esp.is_connected:
    # only query the online time once per hour (and on first run)
    if (not localtile_refresh) or (time.monotonic() - localtile_refresh) > 3600:
        try:
            print("Getting time from internet!")
            pyportal.get_local_time()
            localtile_refresh = time.monotonic()
        except RuntimeError as e:
            print("Some error occured, retrying! -", e)
            continue

    if not alarm:
    # only query the weather every 10 minutes (and on first run)
    #  only updates if an alarm is not active
        if (not weather_refresh) or (time.monotonic() - weather_refresh) > 600:
            try:
                value = pyportal.fetch()
                print("Response is", value)
                gfx.display_weather(value)
                weather_refresh = time.monotonic()
            except RuntimeError as e:
                print("Some error occured, retrying! -", e)
                continue
    #  updates time to check alarms
    #  checks every 30 seconds
    #  identical to def(update_time) in openweather_graphics.py
    if (not start) or (time.monotonic() - start) > 30:
        #  grabs all the time data
        clock = time.localtime()
        date = clock[2]
        hour = clock[3]
        minute = clock[4]
        day = clock[6]
        today = weekday[day]
        format_str = "%d:%02d"
        date_format_str = " %d, %d"
        if hour >= 12:
            hour -= 12
            format_str = format_str+" PM"
        else:
            format_str = format_str+" AM"
        if hour == 0:
            hour = 12
        #  formats date display
        today_str = today
        time_str = format_str % (hour, minute)
        #  checks for weekly alarms
        for i in weekly_alarms:
            w = weekly_alarms.index(i)
            if time_str == weekly_time[w] and today == weekly_day[w]:
                print("trash time")
                alarm = True
                if alarm and not dismissed and not snoozed:
                    display.root_group = alarm_gfx[w]
                    pyportal.play_file(alarm_sounds[w])
                mode = w
                print("mode is:", mode)
        #  checks for daily alarms
        for i in alarm_checks:
            a = alarm_checks.index(i)
            if time_str == alarm_checks[a]:
                alarm = True
                if alarm and not dismissed and not snoozed:
                    display.root_group = alarm_gfx[a]
                    pyportal.play_file(alarm_sounds[a])
                mode = a
                print(mode)
        #  calls update_time() from openweather_graphics to update
        #  clock display
        gfx.update_time()
        gfx.update_date()
        #  resets time counter
        start = time.monotonic()

    #  allows for the touchscreen buttons to work
    if mode > 1:
        button_mode = 2
    else:
        button_mode = mode
        #  print("button mode is", button_mode)

    #  hardware snooze/dismiss button setup
    if switch_dismiss.value and phys_dismiss:
        phys_dismiss = False
    if switch_snooze.value and phys_snooze:
        phys_snooze = False
    if not switch_dismiss.value and not phys_dismiss:
        phys_dismiss = True
        print("pressed dismiss button")
        dismissed = True
        alarm = False
        display.root_group = pyportal.splash
        touched = time.monotonic()
        mode = mode
    if not switch_snooze.value and not phys_snooze:
        phys_snooze = True
        print("pressed snooze button")
        display.root_group = pyportal.splash
        snoozed = True
        alarm = False
        touched = time.monotonic()
        mode = mode

    #  touchscreen button setup
    touch = pyportal.touchscreen.touch_point
    if not touch and touch_button_snooze:
        touch_button_snooze = False
    if not touch and touch_button_dismiss:
        touch_button_dismiss = False
    if touch:
        if snooze_buttons[button_mode].contains(touch) and not touch_button_snooze:
            print("Touched snooze")
            display.root_group = pyportal.splash
            touch_button_snooze = True
            snoozed = True
            alarm = False
            touched = time.monotonic()
            mode = mode
        if dismiss_buttons[button_mode].contains(touch) and not touch_button_dismiss:
            print("Touched dismiss")
            dismissed = True
            alarm = False
            display.root_group = pyportal.splash
            touch_button_dismiss = True
            touched = time.monotonic()
            mode = mode

    #  this is a little delay so that the dismissed state
    #  doesn't collide with the alarm if it's dismissed
    #  during the same time that the alarm activates
    if (not touched) or (time.monotonic() - touched) > 70:
        dismissed = False
    #  snooze portion
    #  pulls snooze_time from calendar and then when it's up
    #  splashes the snoozed alarm's graphic, plays the alarm sound and goes back into
    #  alarm state
    if (snoozed) and (time.monotonic() - touched) > timers['snooze_time']:
        print("snooze over")
        snoozed = False
        alarm = True
        mode = mode
        display.root_group = alarm_gfx[mode]
        pyportal.play_file(alarm_sounds[mode])
        print(mode)
The download will include several Python files, bitmap graphics files, font files, and wav files for sound.
Copy the files to your Titano's CIRCUITPY drive with the fonts in a fonts directory, the wav files in a sounds directory and the rest of the files in the main (root) directory.
Required Libraries
adafruit_bitmap_font
adafruit_bus_device
adafruit_button.mpy
adafruit_display_shapes
adafruit_display_text
adafruit_esp32spi
adafruit_imageload
adafruit_io
adafruit_pyportal.mpy
adafruit_requests.mpy
adafruit_touchscreen.mpy
neopixel.mpy
Per the CircuitPython Libraries page previously, download the library bundle appropriate for your version of CircuitPython. Copy the above library files/folders to a directory named lib on your CIRCUITPY drive.
SD Card Files
Place the icons folder in the root of the micro-SD card.
Once you've done all this, your CIRCUITPY drive should look something like this:
Double Check
See the directory listing above and double check that you have all the files listed to make this project function. If any are missing or in an incorrect directory, move them so they're in the right places. The project will not work correctly unless the files are in the right locations.
Code Walkthrough - settings.toml
Intro
There are a total of four code files that make this project happen: settings.toml, calendar.py, openweather_graphics.py and code.py. Most similar are the settings.toml and calendar.py files. Their function is to hold user data that is then pulled into both openweather_graphics.py and code.py to allow everything to run smoothly.
settings.toml
If you've ever done a PyPortal project or other IoT project with CircuitPython, then the settings.toml file will be familiar to you. It allows you to store your WiFi network's SSID and password, along with other sensitive information, separately from your main program, so that you don't accidentally share your info when sharing your code.
In the case of this project, you will need your network information, as well as your OpenWeatherMaps token, Adafruit AIO information and your location, all formatted to be able to pass it to OpenWeatherMaps. By keeping your location in settings.toml, you can easily edit it without diving too deep into the main program or risk breaking anything.
# This file is where you keep secret settings, passwords, and tokens!
# If you put them in the code you risk committing that info or sharing it


CIRCUITPY_WIFI_SSID="your-wifi-ssid"
CIRCUITPY_WIFI_PASSWORD="your-wifi-password"
ADAFRUIT_AIO_USERNAME="my_username"
ADAFRUIT_AIO_KEY="my_key"
timezone="America/New_York"  # http://worldtimeapi.org/timezones
openweather_token="my_openweather_token"
location="New York, US"
For more information on city ID in OpenWeatherMaps, check out this documentation.
Code Walkthrough - calendar.py
calendar.py
calendar.py is new for this project. It allows you to store your alarms, snooze interval and holidays that you want to track. You can either edit the ones that are present in this file or add even more and edit the code.py and openweather_graphics.py files as needed to make sure all of your alarms sound properly.
alarms = {
    'bed' : '10:00 PM',
    'breakfast' : '8:00 AM',
    'lunch' : '12:00 PM',
    'dinner' : '6:30 PM',
    'trash' : ('Fri.', '1:00 PM')
    }

timers = {
    'snooze_time' : 300
    }

holidays = {
    'new years' : ('Jan. 1', 'Happy New Year!'),
    'valentines' : ('Feb. 14', "Happy Valentine's Day! <3"),
    'halloween' : ('Oct. 31', 'Happy Halloween!'),
    'xmas' : ('Dec. 25', 'Merry Christmas!')
    }
Code Walkthrough - openweather_graphics.py
openweather_graphics.py
This brings up to the openweather_graphics.py file. This code remains largely unchanged from its original state from the original PyPortal Weather display project. There have just been some minor edits to the layout and some of the data that is being pulled.
Check out the original PyPortal Weather Station code
First off, the purpose of openweather_graphics.py is to take care of all the display setup for the weather data, aka the default display for this project. If you had no alarms setup, then this is the only thing that you would see. It's written a lot like a Python library, since it contains a class with functions inside of it that can then be called elsewhere; in this case in code.py. With this setup, it means that a lot of complex graphical things can be called upon with just a couple of lines of code in code.py, keeping everything nice and neat.
First, just like with other CircuitPython code you're familiar with, libraries are imported. You'll notice that the calendar.py file is being imported, specifically the holidays portion, in order to reference them later.
import time
import json
from calendar import holidays
import displayio
from adafruit_display_text.label import Label
from adafruit_bitmap_font import bitmap_font
This is followed by some setup to allow for our fonts to be imported. We're using four different bitmap fonts. The font family is the same for all of them, but the size varies. They all live in the fonts folder, which you'll be able to download in the zipped file from GitHub.
cwd = ("/"+__file__).rsplit('/', 1)[0] # the current working directory (where this file is)

small_font = cwd+"/fonts/EffectsEighty-24.bdf"
medium_font = cwd+"/fonts/EffectsEighty-32.bdf"
weather_font = cwd+"/fonts/EffectsEighty-48.bdf"
large_font = cwd+"/fonts/EffectsEightyBold-68.bdf"
For more info on bitmap fonts, check out this Learn Guide
Then we have some arrays that we'll be referencing later in the functions. Basically, the month_name and weekday arrays allow for string formatting for the month and days of the week to display on the PyPortal. holiday_checks allows us to bring in the dates of the holidays setup in the calendar.py file and the holiday_greetings are strings that are setup in the calendar.py file and will display on the screen if openweather_graphics.py detects that it is indeed a holiday. We'll go over the function that allows for this to happen, update_date(), in a bit.
month_name = ["Jan.", "Feb.", "Mar.", "Apr.", "May", "June", "July", "Aug.",
              "Sept.", "Oct.", "Nov.", "Dec."]
weekday = ["Mon.", "Tues.", "Wed.", "Thurs.", "Fri.", "Sat.", "Sun."]
holiday_checks = [holidays['new years'][0],holidays['valentines'][0],
                  holidays['halloween'][0],holidays['xmas'][0]]
holiday_greetings = [holidays['new years'][1],holidays['valentines'][1],
                     holidays['halloween'][1],holidays['xmas'][1]]
This brings us to our class definition. The __init__ section basically sets up all of the display components that will be used for our weather graphic. The bitmap fonts are loaded in, and the text groups are created for each component along with their location on the screen and color. The default bitmap is also defined here as being weather_background.bmp. That's the fun Retro Weather graphic you see when you boot-up the PyPortal with this code.
The weather_background.bmp file.
class OpenWeather_Graphics(displayio.Group):

    def __init__(self, root_group, *, am_pm=True, celsius=True):
        super().__init__()
        self.am_pm = am_pm
        self.celsius = celsius

        root_group.append(self)
        self._icon_group = displayio.Group()
        self.append(self._icon_group)
        self._text_group = displayio.Group()
        self.append(self._text_group)

        self._icon_sprite = None
        self._icon_file = None
        self.set_icon(cwd+"/weather_background.bmp")

        self.small_font = bitmap_font.load_font(small_font)
        self.medium_font = bitmap_font.load_font(medium_font)
        self.weather_font = bitmap_font.load_font(weather_font)
        self.large_font = bitmap_font.load_font(large_font)
        glyphs = b'0123456789abcdefghijklmnopqrstuvwxyzABCDEFGHIJKLMNOPQRSTUVWXYZ-,.: '
        self.small_font.load_glyphs(glyphs)
        self.medium_font.load_glyphs(glyphs)
        self.weather_font.load_glyphs(glyphs)
        self.large_font.load_glyphs(glyphs)
        self.large_font.load_glyphs(('°',))  # a non-ascii character we need for sure
        self.city_text = None
        self.holiday_text = None

        self.time_text = Label(self.medium_font)
        self.time_text.x = 365
        self.time_text.y = 15
        self.time_text.color = 0x5AF78E
        self._text_group.append(self.time_text)

        self.date_text = Label(self.medium_font)
        self.date_text.x = 10
        self.date_text.y = 15
        self.date_text.color = 0x57C6FE
        self._text_group.append(self.date_text)

        self.temp_text = Label(self.large_font)
        self.temp_text.x = 316
        self.temp_text.y = 165
        self.temp_text.color = 0xFF6AC1
        self._text_group.append(self.temp_text)

        self.main_text = Label(self.weather_font)
        self.main_text.x = 10
        self.main_text.y = 258
        self.main_text.color = 0x99ECFD
        self._text_group.append(self.main_text)

        self.description_text = Label(self.small_font)
        self.description_text.x = 10
        self.description_text.y = 296
        self.description_text.color = 0x9FA0A2
        self._text_group.append(self.description_text)
This brings us to our first function, display_weather(). It basically takes the JSON data that the PyPortal will parse (this is taken care of with code.py) and puts the different bits into the different graphical parameters that we just defined in __init__. For example, the weather description in the JSON data from OpenWeatherMaps is loaded as a string into the main_text object. display_weather() will be called in code.py to update the weather data displayed on screen.
Two other important things are happening here related to JSON data. The city.name variable will take our location parameter from code.py, which will have been imported from secrets.py. The location will be printed as a string onto our weather graphic, but it's also related to the JSON data being parsed in general, since OpenWeatherMap is location dependent.
Second, you'll notice a self.set_icon function (which is setup last in this file). This controls what 8-bit weather icon is displayed depending on the weather. These images are stored on an SD card that you'll insert into the PyPortal inside a folder called icons. Why an SD card? Because of the higher resolution of the PyPortal Titano and the number of icons, there simply isn't enough room for them to live onboard along with all of the other graphics, fonts, sounds and code files needed for this project.
Don't forget your SD card with the icons folder saved on it to display your weather icons.
def display_weather(self, weather):
        weather = json.loads(weather)

        # set the icon/background
        weather_icon = weather['weather'][0]['icon']
        self.set_icon("/sd/icons/"+weather_icon+".bmp")

        city_name =  weather['name'] + ", " + weather['sys']['country']
        print(city_name)
        if not self.city_text:
            self.city_text = Label(self.medium_font, text=city_name)
            self.city_text.x = 300
            self.city_text.y = 296
            self.city_text.color = 0xCF5349
            self._text_group.append(self.city_text)

        self.update_time()

        main_text = weather['weather'][0]['main']
        print(main_text)
        self.main_text.text = main_text

        temperature = weather['main']['temp'] - 273.15 # its...in kelvin
        print(temperature)
        if self.celsius:
            self.temp_text.text = "%d °C" % temperature
        else:
            self.temp_text.text = "%d °F" % ((temperature * 9 / 5) + 32)

        description = weather['weather'][0]['description']
        description = description[0].upper() + description[1:]
        print(description)
        self.description_text.text = description
        # "thunderstorm with heavy drizzle"
Next are two very similar functions: update_time() and update_date(). update_time() essentially updates the clock displayed on the weather graphic. It will be called in code.py so that the clock stays current on the display. This data is being pulled down using time.localtime(), a Python time function.
def update_time(self):
        """Fetch the time.localtime(), parse it out and update the display text"""
        now = time.localtime()
        hour = now[3]
        minute = now[4]
        format_str = "%d:%02d"
        if self.am_pm:
            if hour >= 12:
                hour -= 12
                format_str = format_str+" PM"
            else:
                format_str = format_str+" AM"
            if hour == 0:
                hour = 12
        time_str = format_str % (hour, minute)
        print(time_str)
        self.time_text.text = time_str
update_date() is similar to update_time(), with the only difference being that instead of the clock, it is updating the date displayed on the weather display. It will also be called in code.py. It's pulling in our month_name and weekday arrays to format the strings that will be displayed. Additionally, though, this function is checking to see if the current date being pulled in with time.localtime() matches with any of the dates that we defined in calendar.py for the holidays that we setup. It checks based on the holiday_checks array and then if it is a holiday, the string from calendar.py pulled in with the holiday_greetings array will be displayed right below the date on the weather graphic. We'll go into how these checks are working in a little more detail for code.py, because the same principal concept is being used to check for alarms.
def update_date(self):
        date_now = time.localtime()
        year = date_now[0]
        mon = date_now[1]
        date = date_now[2]
        day = date_now[6]
        today = weekday[day]
        month = month_name[mon - 1]
        date_format_str = " %d, %d"
        shortened_date_format_str = " %d"
        date_str = today+", "+month+date_format_str % (date, year)
        holiday_date_str = month+shortened_date_format_str % (date)
        print(date_str)
        self.date_text.text = date_str
        for i in holiday_checks:
            h = holiday_checks.index(i)
            if holiday_date_str == holiday_checks[h]:
                if not self.holiday_text:
                    self.holiday_text = Label(self.medium_font, max_glyphs=60)
                    self.holiday_text.x = 10
                    self.holiday_text.y = 45
                    self.holiday_text.color = 0xf2f89d
                    self._text_group.append(self.holiday_text)
                self.holiday_text.text = holiday_greetings[h]
Finally, the last function, which we saw called in the display_weather() function, is setup. set_icon() basically allows for our changing weather icon bitmaps to be added to the graphics group that is running for the weather graphics display. You'll see some familiar OnDiskBitmap() setup happening if you have experience with the displayio library.
def set_icon(self, filename):
        """The background image to a bitmap file.
        :param filename: The filename of the chosen icon
        """
        print("Set icon to ", filename)
        if self._icon_group:
            self._icon_group.pop()

        if not filename:
            return  # we're done, no icon desired
        if self._icon_file:
            self._icon_file.close()

        # CircuitPython 6 & 7 compatible
        self._icon_file = open(filename, "rb")
        icon = displayio.OnDiskBitmap(self._icon_file)
        self._icon_sprite = displayio.TileGrid(icon,
                                               pixel_shader=getattr(icon, 'pixel_shader', displayio.ColorConverter()))

        # # CircuitPython 7+ compatible
        # icon = displayio.OnDiskBitmap(filename)
        # self._icon_sprite = displayio.TileGrid(icon, pixel_shader=icon.pixel_shader)

        self._icon_group.append(self._icon_sprite)
Code Walkthrough - code.py
code.py
This brings us to code.py, our feature presentation. Much like openweather_graphics.py, this code was originally written for the original PyPortal Weather Station and has been modified for this project's scope.
First, we'll import all of the libraries that we'll need:
from os import getenv
import time
from calendar import alarms
from calendar import timers
import board
import displayio
from digitalio import DigitalInOut, Direction, Pull
from adafruit_button import Button
from adafruit_pyportal import PyPortal
import openweather_graphics
You'll see that we're importing the openweather_graphics and calendar files like they're libraries. The values from settings.toml are accessed using the os.getenv() function. This is how all four of the files are working together to allow everything to run smoothly. As we just discussed, each of these files provide their own set of puzzle pieces to complete this project. It's best to think of code.py as the main program and the other three as helpers.
Next, we connect to Wi-Fi with the ESP32, which is pulling SSID information from the settings.toml file.
# Get WiFi details, ensure these are setup in settings.toml
ssid = getenv("CIRCUITPY_WIFI_SSID")
password = getenv("CIRCUITPY_WIFI_PASSWORD")

if None in [ssid, password]:
    raise RuntimeError(
        "WiFi settings are kept in settings.toml, "
        "please add them there. The settings file must contain "
        "'CIRCUITPY_WIFI_SSID', 'CIRCUITPY_WIFI_PASSWORD', "
        "at a minimum."
    )
Then we grab the location, also stored in the settings.toml file. This will be used to grab data from OpenWeatherMap.
# Use cityname, country code where countrycode is ISO3166 format.
# E.g. "New York, US" or "London, GB"
LOCATION = getenv('location')
And speaking of, here we are preparing to pull that data. We're creating a variable (DATA_SOURCE) to hold the URL for OpenWeatherMap along with your OpenWeatherMap token from the settings.toml file. DATA_LOCATION is an empty array at the moment, but shortly it will hold the JSON path for the PyPortal to access all of the weather data to display.
# Set up where we'll be fetching data from
DATA_SOURCE = "http://api.openweathermap.org/data/2.5/weather?q=" + LOCATION
DATA_SOURCE += "&appid=" + getenv('openweather_token')
# You'll need to get a token from openweather.org, looks like 'b6907d289e10d714a6e88b30761fae22'
DATA_LOCATION = []
Here, we define our pyportal object and you can see the DATA_SOURCE and DATA_LOCATION variables in use. By defining a pyportal object you also setup a lot of other items by default, such as audio playback and mounting an SD card file system (if applicable, which for this project it is). This is really handy and saves a lot of lines of code for code.py.
# Initialize the pyportal object and let us know what data to fetch and where
# to display it
pyportal = PyPortal(url=DATA_SOURCE,
                    json_path=DATA_LOCATION,
                    status_neopixel=board.NEOPIXEL,
                    default_bg=0x000000)
Next, we create our display object, which will eventually show our alarm graphics.
display = board.DISPLAY
This project is not only visual- it has audio components too. Every time an alarm goes off, a sound will accompany it; in this case, a friendly robot's voice reminding you to take care of your basic needs.
First, we define the file locations for each sound, of which there are three.
#  the alarm sound file locations
alarm_sound_trash = "/sounds/trash.wav"
alarm_sound_bed = "/sounds/sleep.wav"
alarm_sound_eat = "/sounds/eat.wav"
And then we create an array to hold the sounds called alarm_sounds. The order of the audio files in the array matches the alarm data and alarm graphics arrays that we talked about previously with the calendar.py file. This way we'll be able to use states to initiate all of the alarm components together (audio, visual and control) by calling the same index in the different arrays.
#  the alarm sounds in an array that matches the order of the gfx & alarm check-ins
alarm_sounds = [alarm_sound_trash, alarm_sound_bed, alarm_sound_eat, alarm_sound_eat, alarm_sound_eat]
Before we can make arrays of graphics though, we need to setup the bitmaps. The graphics for the alarms are actually full pre-made bitmaps with text and images baked in, so we can use OnDiskBitmap() to directly load them up. We have a bitmap for sleep, trash, and meals. We'll use the same meal alarm for all three meals: breakfast, lunch, and dinner. After each bitmap is setup, it's added to its own graphics group.
#  setting up the bitmaps for the alarms

#  sleep alarm
sleep_bitmap = displayio.OnDiskBitmap(open("/sleepBMP.bmp", "rb"))
sleep_tilegrid = displayio.TileGrid(sleep_bitmap, pixel_shader=getattr(sleep_bitmap, 'pixel_shader', displayio.ColorConverter()))
group_bed = displayio.Group()
group_bed.append(sleep_tilegrid)

#  trash alarm
trash_bitmap = displayio.OnDiskBitmap(open("/trashBMP.bmp", "rb"))
trash_tilegrid = displayio.TileGrid(trash_bitmap, pixel_shader=getattr(trash_bitmap, 'pixel_shader', displayio.ColorConverter()))
group_trash = displayio.Group()
group_trash.append(trash_tilegrid)

#  meal alarm
eat_bitmap = displayio.OnDiskBitmap(open("/eatBMP.bmp", "rb"))
eat_tilegrid = displayio.TileGrid(eat_bitmap, pixel_shader=getattr(eat_bitmap, 'pixel_shader', displayio.ColorConverter()))
group_eat = displayio.Group()
group_eat.append(eat_tilegrid)
We're about to get into the controls for the alarms. Once an alarm sounds, we need to have a way to make it stop. In this project we can snooze the alarm to have it come back on later or completely dismiss it. We'll be able to do this with buttons on the PyPortal's touchscreen and physical buttons that are mounted on the top of the retro computer case. First, let's take care of the touchscreen buttons.
In order for the buttons to work across graphics, we're going to set things up a bit uniquely. First, we'll create button objects for the snooze buttons that will be included in each alarm's graphics group. That's three snooze buttons, one to be superimposed over each of our three alarm bitmaps. Notice that the 'color' of each is set to None, that allows the button to be transparent.
#  snooze touch screen buttons
#  one for each alarm bitmap
snooze_controls = [
    {'label': "snooze_trash", 'pos': (4, 222), 'size': (236, 90), 'color': None},
    {'label': "snooze_bed", 'pos': (4, 222), 'size': (236, 90), 'color': None},
    {'label': "snooze_eat", 'pos': (4, 222), 'size': (236, 90), 'color': None},
    ]
These buttons will live in an array called snooze_buttons. We need them to live in this array later once we're in the loop.
#  setting up the snooze buttons as buttons
snooze_buttons = []
for s in snooze_controls:
    snooze_button = Button(x=s['pos'][0], y=s['pos'][1],
                    width=s['size'][0], height=s['size'][1],
                    style=Button.RECT,
                    fill_color=s['color'], outline_color=None,
                    name=s['label'])
    snooze_buttons.append(snooze_button)
Next, we'll do the same for the dismiss buttons. Three dismiss buttons, one for each of our three alarm graphics groups. They'll also live in an array called dismiss_buttons.
#  dismiss touch screen buttons
#  one for each alarm bitmap
dismiss_controls = [
    {'label': "dismiss_trash", 'pos': (245, 222), 'size': (230, 90), 'color': None},
    {'label': "dismiss_bed", 'pos': (245, 222), 'size': (230, 90), 'color': None},
    {'label': "dismiss_eat", 'pos': (245, 222), 'size': (230, 90), 'color': None},
    ]

#  setting up the dismiss buttons as buttons
dismiss_buttons = []
for d in dismiss_controls:
    dismiss_button = Button(x=d['pos'][0], y=d['pos'][1],
                    width=d['size'][0], height=d['size'][1],
                    style=Button.RECT,
                    fill_color=d['color'], outline_color=None,
                    name=d['label'])
    dismiss_buttons.append(dismiss_button)
After our buttons are made, we can add them to the graphics group for each alarm. We do this by calling on the array for the respective button type along with the index that corresponds with the alarm. For example, for the trash alarm, the trash buttons are indexed at 0 in both button arrays, so we're adding the trash buttons to the trash graphics group with snooze_buttons[0].group and dismiss_buttons[0].group.
#  adding the touch screen buttons to the different alarm gfx groups
group_trash.append(snooze_buttons[0].group)
group_trash.append(dismiss_buttons[0].group)
group_bed.append(snooze_buttons[1].group)
group_bed.append(dismiss_buttons[1].group)
group_eat.append(snooze_buttons[2].group)
group_eat.append(dismiss_buttons[2].group)
After the touch controls, we can setup the hardware buttons. We're using the STEMMA connectors on the back of the PyPortal to attach two STEMMA buttons via a STEMMA cable. This keeps everything solderless, which is pretty convenient. The pin numbers for each of the connectors are D3 and D4 and are also marked on the back of the PyPortal.
#  setting up the hardware snooze/dismiss buttons
switch_snooze = DigitalInOut(board.D3)
switch_snooze.direction = Direction.INPUT
switch_snooze.pull = Pull.UP

switch_dismiss = DigitalInOut(board.D4)
switch_dismiss.direction = Direction.INPUT
switch_dismiss.pull = Pull.UP
Our buttons, both physical and virtual, are all setup, along with our graphics groups, so we can get into our arrays and state machines. These will be running the show in the loop.
We're going to create an array that is pulling data from our calendar.py file; specifically, all of our daily alarms that we have setup. This array is called alarm_checks and begins with None, which probably seems a little odd. This is to basically hold an index space of 0 for our weekly trash alarm. We still want trash to hold the index of 0 for graphics and audio, but we don't want to check for it everyday. This allows for the rest of the alarms to remain in their respective indexes without having to have a bunch of different arrays floating around.
#  grabbing the alarm times from the calendar file
#  'None' is the placeholder for trash, which is weekly rather than daily
alarm_checks = [None, alarms['bed'],alarms['breakfast'],alarms['lunch'],alarms['dinner']]
You can see this playing out with our next array, alarm_gfx. This has our alarm graphics that will match-up with our alarm_checks array. By keeping group_trash in the same array, it means that we can reference a single array for all graphics and integrate the trash alarm parameters with the other daily alarms. This keeps the code a bit neater. Notice that group_eat is called three times to coordinate with the three-meal alarm check-ins.
#  all of the alarm graphics
alarm_gfx = [group_trash, group_bed, group_eat, group_eat, group_eat]
This line of code is probably one of the most important lines in the entire code.py file. By defining gfx here, we are bringing in the OpenWeather_Graphics class from the openweather_graphics.py file. By bringing this into code.py, we are able to display all of the weather data being pulled. We'll go over the openweather_graphics.py file in a bit, but for now just know that all of the graphics that you see displayed by default in this project are basically running from there because of a series of functions. Later when we call gfx.display_weather(value), gfx.update_time(), and gfx.update_date() in the loop we're updating the weather and date, and time data live to display on the PyPortal.
#  allows for the openweather_graphics to show
gfx = openweather_graphics.OpenWeather_Graphics(pyportal.splash, am_pm=True, celsius=False)
Oh, the fun stuff: state machines. We've got quite a few here, so let's do a quick roll call with some comments in the code:
#  state machines
localtile_refresh = None #  a time_monotonic() device used to grab the time from the internet

weather_refresh = None #  a time_monotonic() device used to update the weather data

dismissed = None #  checks whether or not an alarm has been dismissed by either a physical or virtual button

touched = None #  a time_monotonic() device used to track whether a button, physical or virtual, has been pressed

start = None #  a time_monotonic() device used to update the time, which as a result check if any alarms should be activated

alarm = None #  checks whether an alarm is active or not

snoozed = None #  checks whether an alarm has been snoozed or not

touch_button_snooze = None #  a debounce device for the virtual snooze button

touch_button_dismiss = None #  a debounce device for the virtual dismiss button

phys_dismiss = None #  a debounce device for the physical dismiss button

phys_snooze = None #  a debounce device for the physical snooze button

mode = 0 #  a counter to see which alarm state is active. This will correspond with our alarm arrays

button_mode = 0 #  a counter to correspond with our button arrays. Remember that our button arrays only have three indexes so we'll do some math to make them match up with our various alarm arrays
This array is a bit stringy. The weekday array is holding, well, the days of the week. We'll use this when checking for our weekly alarm to compare it to the current day of the week being pulled in by the time.localtime() function. This is how all of the code knows the date and time.
#  weekday array
weekday = ["Mon.", "Tues.", "Wed.", "Thurs.", "Fri.", "Sat.", "Sun."]
We can't forget about our weekly alarm, especially in this case since it will remind us to take out the trash. Here we're making single index arrays. First in weekly_alarms we're pulling in the name of the trash alarm from the calendar.py file. This is why we kept all of the other trash-related stuff in index 0 in the other arrays - here in its own array. It lives by itself at index 0 and as a result will match up properly when we call up the other data. Then in weekly_day we pull in the weekday parameter and in weekly_time we pull in the time parameter that are both being stored as indexes in the trash array.
#  weekly alarm setup. checks for weekday and time
weekly_alarms = [alarms['trash']]
weekly_day = [alarms['trash'][0]]
weekly_time = [alarms['trash'][1]]
And we've done it: after all that setup and planning we can finally dive into the loop.
This first if statement grabs the time from the internet and is the first thing that runs when you power up this code on your PyPortal. Nothing else can happen until it knows what time it is. get_local_time() is a function from the PyPortal library and is essentially running time_struct(). It's pretty powerful function and there's a lot of information on it out there since it's native to full Python.
See this read the docs guide on the time module.
You'll notice that our first state machine is in use here: localtile_refresh. This allows the time check to only occur once every hour without it causing any delays in the code, which is the beauty of time.monotonic() and why it's used heavily throughout this project.
For more info on time_monotonic, check out this state machine Learn Guide.
while True:
  	# while esp.is_connected:
    # only query the online time once per hour (and on first run)
    if (not localtile_refresh) or (time.monotonic() - localtile_refresh) > 3600:
        try:
            print("Getting time from internet!")
            pyportal.get_local_time()
            localtile_refresh = time.monotonic()
        except RuntimeError as e:
            print("Some error occured, retrying! -", e)
            continue
Once we have the time we can try displaying some data. We begin with the if statement if not alarm, meaning that as long as an alarm is not active, we can proceed.
This is followed by an if statement that relies on time.monotonic(), this time running every ten minutes, to update the weather data, including the temperature, weather description, weather icon, etc. This is done by refreshing the JSON feed and then pulling in the display_weather() function from the openweather_graphics.py file, which takes the JSON data and slots it into the display. At the end, time.monotonic() is refreshed and stored in weather_refresh to start the count again. There is an exception for this function in case JSON data can't be accessed.
if not alarm:
    # only query the weather every 10 minutes (and on first run)
    #  only updates if an alarm is not active
        if (not weather_refresh) or (time.monotonic() - weather_refresh) > 600:
            try:
                value = pyportal.fetch()
                print("Response is", value)
                gfx.display_weather(value)
                weather_refresh = time.monotonic()
            except RuntimeError as e:
                print("Some error occured, retrying! -", e)
                continue
Again, we're greeted with an if statement that is dependent on time_monotonic(), but a different time interval again, this time every 30 seconds. This portion of the code updates the time for the purposes of checking the alarms. An almost identical version of this is in the openweather_graphics.py file in the update_time() and update_date() functions, however their function is to update the date and time shown on the weather display.
We start by calling on time.localtime(), a Python function that pulls down time data in an array that can then be accessed. We're storing this array in the variable clock and then creating other variables to hold the different indexes in the accessed array; as seen with date, hour, minute, etc.
#  updates time to check alarms
    #  checks every 30 seconds
    #  identical to def(update_time) in openweather_graphics.py
    if (not start) or (time.monotonic() - start) > 30:
        #  grabs all the time data
        clock = time.localtime()
        date = clock[2]
        hour = clock[3]
        minute = clock[4]
        day = clock[6]
We then setup another variable called today, which is accessing the weekday array index that we setup before the loop. That array was formatted to match how the days of the week are indexed in time.localtime() so we can use the day variable to access the correct index in weekday. This is followed by some string formatting that we'll be using shortly, along with formatting to access the time in 12-hour time.
today = weekday[day]
        format_str = "%d:%02d"
        date_format_str = " %d, %d"
        if hour >= 12:
            hour -= 12
            format_str = format_str+" PM"
        else:
            format_str = format_str+" AM"
        if hour == 0:
            hour = 12
        #  formats date display
        today_str = today
        time_str = format_str % (hour, minute)
Next, we get into the actual alarm checking, beginning first with our weekly alarms. We begin with a for statement so that we can iterate through the weekly_alarms array (which only has one index). This is followed by a nested if statement that checks to see if our formatted strings for the weekday and time both match-up with the information being pulled into the weekly_time and weekly_day arrays from the calendar.py file. If they do, then our alarm state is set to True.
This is followed by another if statement that depends on a few of our state machines from earlier. If alarm is True and dismissed and snoozed are both False, meaning that if the alarm is still active and you haven't pressed snooze or dismiss, then the display will show the alarm graphic that matches up with our index in the alarm_gfx array. The .wav file that matches the index in alarm_sounds will also play.
We then set the mode state to equal the variable w, which was holding our alarm index. This way we can refer to mode later in the loop to still refer to the current active alarm.
#  checks for weekly alarms
        for i in weekly_alarms:
            w = weekly_alarms.index(i)
            if time_str == weekly_time[w] and today == weekly_day[w]:
                print("trash time")
                alarm = True
                if alarm and not dismissed and not snoozed:
                    display.show(alarm_gfx[w])
                    pyportal.play_file(alarm_sounds[w])
                mode = w
                print("mode is:", mode)
Up next are the daily alarms, the alarms that are only dependent on the time of day rather than both the time of day and day of the week. It follows the same formatting that we saw in the if statement for weekly_alarms. We iterate through the alarm_checks index and then check to see if our time_str matches with any of the times in alarm_checks, which are being pulled in from calendar.py, then the alarm state is set to True and again, if our alarm state is True and it has not been dismissed nor snoozed, then the corresponding alarm graphic will show along with the matching alarm sound. Our mode state is also set to hold the alarm index value that had been stored in a.
#  checks for daily alarms
        for i in alarm_checks:
            a = alarm_checks.index(i)
            if time_str == alarm_checks[a]:
                alarm = True
                if alarm and not dismissed and not snoozed:
                    display.show(alarm_gfx[a])
                    pyportal.play_file(alarm_sounds[a])
                mode = a
                print(mode)
Once our alarms have been checked, then we can update our default weather display to show the correct date and time. This is done by called update_time() and update_date() from the openweather_graphics.py file. By doing this, the entire weather display doesn't have to be completely refreshed just to show that the clock has progressed one minute.
Now this doesn't make for a 100% accurate clock since we're only checking every 30 seconds, but it's fairly close for basic timekeeping.
We also reset time.monotonic() to be held in start to begin the whole process all over again 30 seconds from now.
#  calls update_time() and update_date() from openweather_graphics to update
        #  clock display
        gfx.update_time()
        gfx.update_date()
        #  resets time counter
        start = time.monotonic()
We're almost at the control section of the loop, but first we have a slight workaround so that everything will play well together. If you remember back to our array of touchscreen buttons, we only have three indexes in each touchscreen button array (snooze_buttons and dismiss_buttons) since we only have three alarm graphics. However, there are five total alarms with the meal alarms are all utilizing the same graphics and sounds. This means that the mode state, which holds our alarm position, could be equal to anything in the range of 0-4. Since we're using mode to access the alarm index outside of our alarm check portion of the code, this would throw an error if we tried to access our smaller array of touchscreen buttons.
To work around this, we create an if statement that if mode is greater than 1, then a new state, button_mode, will equal 2, aka if any of the meal alarms are going off, then the meal alarm touchscreen buttons will be active. Otherwise button_mode will be the same as mode (0 or 1) aka the trash alarm or sleep alarm.
#  allows for the touchscreen buttons to work
    if mode > 1:
        button_mode = 2
    else:
        button_mode = mode
        #  print("button mode is", button_mode)
Before we take care of our touchscreen buttons though, we have our two physical buttons to take care of. First, we have some quick debouncing with each physical button's state (phys_dismiss and phys_snooze) and then we get into what each button controls when it's pressed.
#  hardware snooze/dismiss button setup
    if switch_dismiss.value and phys_dismiss:
        phys_dismiss = False
    if switch_snooze.value and phys_snooze:
        phys_snooze = False
For the dismiss button, it sets the dismissed state to True, the alarm state to False and takes away the alarm graphic to bring back the default weather graphic with all of our weather data. It also logs a time.monotonic() device (touched) and sets mode to equal mode as a back-up to our alarm index tracking.
if not switch_dismiss.value and not phys_dismiss:
        phys_dismiss = True
        print("pressed dismiss button")
        dismissed = True
        alarm = False
        display.show(pyportal.splash)
        touched = time.monotonic()
        mode = mode
Similar to dismiss, the snooze button sets the snoozed state to True, the alarm state to False and shows our default weather display. It also logs a time.monotonic() device (touched) and sets mode to equal itself.
if not switch_snooze.value and not phys_snooze:
        phys_snooze = True
        print("pressed snooze button")
        display.show(pyportal.splash)
        snoozed = True
        alarm = False
        touched = time.monotonic()
        mode = mode
Now we've reached the touchscreen buttons. First, we setup a touch object from the PyPortal library and then just like with our physical buttons we setup some debouncing. This is followed by an if statement to see if a touch point is detected on the PyPortal's screen. There are then two if statements for each of our touchscreen buttons called out with the arrays' index that corresponds with our button_mode state.
Essentially with touchscreen buttons, the button acts as this boundary setup by the coordinates of its location and size. If a touch point lands inside those coordinates, then an action can be triggered. In this case, the actions are identical to the touchscreen buttons' physical counterparts.
#  touchscreen button setup
    touch = pyportal.touchscreen.touch_point
    if not touch and touch_button_snooze:
        touch_button_snooze = False
    if not touch and touch_button_dismiss:
        touch_button_dismiss = False
    if touch:
        if snooze_buttons[button_mode].contains(touch) and not touch_button_snooze:
            print("Touched snooze")
            display.show(pyportal.splash)
            touch_button_snooze = True
            snoozed = True
            alarm = False
            touched = time.monotonic()
            mode = mode
        if dismiss_buttons[button_mode].contains(touch) and not touch_button_dismiss:
            print("Touched dismiss")
            dismissed = True
            alarm = False
            display.show(pyportal.splash)
            touch_button_dismiss = True
            touched = time.monotonic()
            mode = mode
The next if statement is a little bit of a workaround. Since the time, and as a result alarms, are checked every 30 seconds there is a chance that you could dismiss or snooze the alarm before the next 30 second check-in. This means that the time would be the same and the alarm could trigger again, despite you having already dismissed or snoozed it. This is why there's that caveat of if alarm and not dismissed and not snoozed: in order to display the alarm graphic and play the alarm sound earlier in the loop. However, we don't want our dismissed and snoozed states to stay active forever, they need to reset themselves for the next alarm.
For the dismissed state, we can use the touched time.monotonic() counter that begins counting when a button is pressed and waiting until over a minute has passed (70 seconds) to reset the dismissed state to False. This avoids any issues with alarms becoming active again and resets everything for the next alarm.
#  this is a little delay so that the dismissed state
    #  doesn't collide with the alarm if it's dismissed
    #  during the same time that the alarm activates
    if (not touched) or (time.monotonic() - touched) > 70:
        dismissed = False
The snooze portion is handled in a similar way. This if statement checks that the snoozed state is active and takes our touched time.monotonic() device to count up to the snooze_time that we've set in our calendar.py file. When the snooze_time has passed, the snoozed state becomes False, alarm becomes True, mode still equals mode and the PyPortal displays the alarm graphic and plays the alarm sound, basically reenacting the original alarm event. This brings us back to a place where an action needs to be received by one of the buttons to either snooze again or dismiss the alarm.
#  snooze portion
    #  pulls snooze_time from calendar and then when it's up
    #  splashes the snoozed alarm's graphic, plays the alarm sound and goes back into
    #  alarm state
    if (snoozed) and (time.monotonic() - touched) > timers['snooze_time']:
        print("snooze over")
        snoozed = False
        alarm = True
        mode = mode
        display.show(alarm_gfx[mode])
        pyportal.play_file(alarm_sounds[mode])
        print(mode)
3D Printing
3D Printed Parts
STL files for 3D printing are oriented to print "as-is" on FDM style machines. Original design source may be downloaded using the links below.
pytitano-ws-shell.stl
pytitano-ws-cover.stl
pytitano-ws-button-plate.stl
pytitano-ws-face-plate.stl
pytitano-ws-screen-plate.stl
Exploded View
The CAD animation shows how the parts fit together. The PyPortal Titano is secured to the screen plate with machine screws. The screen plate is secured to the face plate with screws. The face plate snap fits onto the shell. The cover snap fits onto the back of the shell. The two STEMMA buttons are secured to the button plate with M2.5 nylon standoffs and screws. The button plate is secured to the shell with M2.5 nylon screws.
Design Source Files
The project assembly was designed in Fusion 360. This can be downloaded in different formats like STEP, SAT and more. Electronic components like Adafruit's board, displays, connectors and more can be downloaded from the Adafruit CAD parts GitHub Repo.
Download CAD files from Prusa Printers
Download CAD files from Cults3D
Download CAD Files from Thingiverse
Slicing Parts
No supports are required. Slice with setting for PLA material.
The parts were sliced using CURA using the slice settings below.
PLA filament 220c extruder
0.2-layer height
10% gyroid infill
60mm/s print speed
60c heated bed
Buttons Assembly
M2.5 Hardware
Use the following hardware for securing the buttons to the button plate.
4x M2.5 - 6mm f/f standoff
4x M2.5 - 4mm screws
8x M2.5 - 6mm screws
4x M2.5 - hex nuts
Install Standoffs
The button plate needs standoffs in order to be secured to the case. Grab 4x M2.5 female-female standoffs. Use 4x M2.5 x 6mm long screws to secure the standoffs to the four mounting holes on the button plate.
Install Button Screws
Place the STEMMA button over the two mounting holes on the button plate. Insert 2x M2.5 4mm long screws through the top of the mounting holes on the button PCB.
Fasten Button Screws
While holding the button PCB in place, install and fasten 2x M2.5 hex nuts to secure the button PCB. Repeat for the second button.
STEMMA Cables
Plug in the two 3-pin STEMMA cables into the ports on the button PCBs.
Install Button Plate
Fit the button assembly into the case and line up the mounting holes. While holding the button plate in place, insert and fasten 4x M2.5 4mm long screws to secure it to the cast.
Titano Assembly
Install Titano
Grab the PyPortal Titano and the screen cover. Place the PyPortal onto the screen cover so the mounting tabs line up with the standoffs. Flip the PCB and check the screen cutout is properly lined up with the display.
Secure PCB to Screen Cover
Use 4x M3 x 4mm long machine screws to secure the PyPortal PCB to the standoffs on the screen cover.
Secure Screen Cover
Place the screen cover over the face plate and line up the mounting tabs. The mount holes are asymmetrical so there's only one correct orientation. Insert and fasten 4x M3 x 4mm long screws to secure the screen cover to the face plate.
Connect STEMMA Buttons
Grab the two 3-pin STEMMA cables from the two buttons and plug them into the D3 and D4 ports on the PyPortal. The button on the left will be used for Snooze and should connect to D3. The button the right will be used for Dismiss and should connect to D4.
Connect Speaker
Grab the mini oval speaker and connect it to the speaker port on the back of the PyPortal.
Install Face to Shell
Fit the face plate onto the case. Line up the USB-C port with the cutout on the case. Make sure all of the wiring and components are fitted inside the case. Press the two parts together to snap fit them shut.
Install Speaker
Grab the speaker and press fit it onto the holder on the side of the case.
Install Back Cover
Grab the back cover and snap fit it onto the back of the case.