Mfr Part # 5650
EVAL BOARD FOR NEOPIXEL RP2040
Adafruit Industries LLC
License: See Original Project LED Strips Adafruit Feather
Courtesy of Adafruit
Guide by Phillip Burgess
Overview
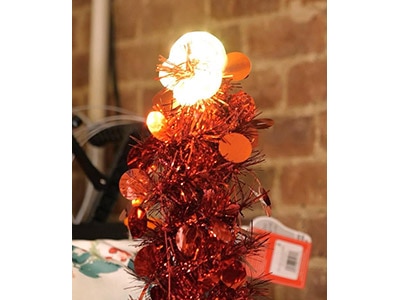
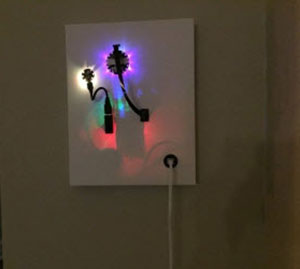
This project lets you dress up a window, Halloween prop or wall decoration with eye-catching LEDs that simulate dripping liquid but leave no mess behind…it’s a completely dry effect!
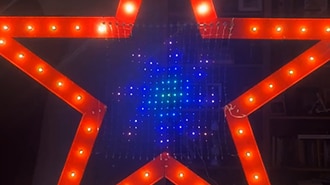
Also, just changing the color and the prop, this is perfectly usable for Christmas decor as well. This is one of those “sandbox projects” that can fit wherever your imagination takes it…I’m just really partial to Halloween, so that’s what’s demonstrated here. Raawr!
The idea for this stemmed from three things…
First: the arrival of some incredibly skinny NeoPixel strips…just 4mm wide! From any reasonable viewing distance, they almost disappear. As explained on the next page, bigger projects may do just fine with regular-size NeoPixel strip, easier to work with.
Second: our NeoPXL8 FeatherWing and NeoPXL8 Friend boards are designed to run up to 8 NeoPixel strips concurrently. Most folks focus on the speed of this, but I’d been looking for a project to showcase the topological benefit…that each strand doesn’t need a return line to the next. We use this to make “drips” that end in mid-air.
Third: I’m a sucker for any project using age-old theatrical tricks with new technology…the simplest thing is suddenly indistinguishable from magic…
Each of our “drips” briefly makes a “splat” where it lands…but there’s an air gap there, not a contiguous strip of NeoPixels from top to ground. It’s like a one-pixel version of a film editor’s cutting on action: hero throws knife, cut to villain with knife in his chest. Timed just right, we see a continuous motion out of two separate shots. Similarly, our dot jumps from A to B just when you’d expect, and the brain fills in the story. Brains are hilarious.
Things You’ll Need
Read through the whole guide before making any purchases…it’s full of tips and alternatives, and your build will probably end up slightly different. Additionally, skim the NeoPXL8 guide for the latest on compatible hardware…several M0, M4, RP2040 and ESP32-S3 Feather boards can now work with this, though each may require some tweaks. But in general, you’ll need these items:
A NeoPXL8-compatible development board such as the Feather M0 Basic Proto, Feather M4 Express, Feather RP2040 or Feather ESP32-S3, and some headers. Some non-Feather boards can work as well, but connections are usually simpler with this form-factor. Please see the NeoPXL8 guide mentioned above.
NeoPXL8 FeatherWing or NeoPXL8 Friend. There are two distinct versions of the FeatherWing: one intended for M0 Feathers, one for M4. The two are generally not interchangeable, with an exception for the easy-going Feather ESP32-S3 that can use either. The “Friend” is a breakout version for non-Feather boards.
Or…the Feather RP2040 SCORPIO combines microcontroller and NeoPXL8 into a single board!
NeoPixel strips and pixels (explained further in guide)
Lots of wire
Soldering iron and related paraphernalia
Sundry craft supplies and tools; this will vary with how you decide to implement the project. There will almost certainly be hot glue involved…but I also found myself using masking tape, a permanent marker, hobby knife, foam core board and acrylic paint.
Planning
I picked up this plastic dragon skull candy dish among the seasonal merchandise at a local big-box store. Mostly because I like dragons. But also…tell you a secret…I wasn’t certain this idea would work. The dragon skull was a good size for a Monster M4sk eyes project as a Plan B!
In hindsight, I’d recommend aiming bigger. Lots of stores have hanging ghouls, werewolf skeletons, elaborate foam tombstones and so forth, any of which would look fantastic with some ooze!
Reason I suggest this is because big props are more to-scale with classic NeoPixel strip, which is easier to work with. The ultra-skinny strip is amazing but requires patience and top-level soldering skill.
I already had the dragon skull though, so that’s what I’ll walk through here…
Photo credit: Target
Oozes and Dribbles and Drips, Oh My!
The ooze (or blood, or water) animation along each NeoPixel strip follows a certain sequence…
An initial “oozing” from a single point…like a tear will well up in your eye before falling.
A slow “dribbling” part way down the strip…think of the tear now trickling down your face to your chin.
“Dripping,” falling from chin to ground.
A “splat” where it hits the ground.
These distances are all configurable in the software on a per-strip basis. The way that everything oozes, dribbles and drips along different lengths gives it a more natural (or supernatural?) appearance.
The dribble portion requires a contiguous length of NeoPixel strip. The drip only needs to cover about half the distance to the splat…it just ends in empty air, and the single ground splat NeoPixel completes the illusion.
Measure and Plan
Look over your Halloween prop and decide where your dribbles and drips will go, and measure distances to figure how many NeoPixels you’ll need. Remember that you’ll need to span the full distance of a dribble, and about half the distance of a drip.
NeoPixel strips come in specific densities and lengths. If your total works out to just a few pixels over such a threshold, it’s OK to shorten some drips by a pixel or two…the illusion still works.
I found that this dragon had a slight underbite, and drips from the nose would have landed on the lower teeth. While that’s possible and would look cool, I wanted to keep it simple with all the drips on the table. Scrounging in the garage for any piece of junk, I found this spray can cap and hot-glued it at the rear base of the skull to tip it forward a bit, problem solved.
Splat positions and numbers (0 to 6, corresponding to each drip) are marked on the base…these distances are needed later.
Base was a piece of foam core board, but just about anything the right size would work…a piece of wood, cardboard box flap, or a plastic serving tray.
NeoPXL8 Topology
The code and hardware for the OOZE MASTER 3000 can animate up to 7 “drips,” with an 8th wire driving the “splats” on the ground. Here’s a schematic view showing the NeoPXL8 FeatherWing and NeoPixel strips:
THINGS TO KNOW:
This is a schematic diagram, not a literal wiring diagram. Look closely at your NeoPixel strips, they often have input pads in a different order.
You can have fewer than 7 drips if you want but always start from NeoPXL8 output #0. The splats are always on NeoPXL8 output #7.
Your drips will probably a mix of lengths!
The Feather RP2040 SCORPIO board came along later, but the principle is exactly the same…connections are simply at one end of the board rather than down the middle.
Q: What if I want more than 7 drips?
A: Some options…
You can drive 8 drips from one board, but you won’t get ground splats in that case.
You can just build multiple units. There’s nothing that needs to be synchronized between them.
It’s possible to split the output signals if you’re OK with duplicate identical drips in places…this is discussed on the last page.
Ground “Splat” NeoPixels
For the “splat” NeoPixels, where each drip hits the ground, I used several of these “Mini Button PCB NeoPixels,” one per drip — but there are lots of other options, depending on soldering skill and available resources…
Flora RGB Smart Pixels and Breadboard-friendly RGB Smart NeoPixels can also be individually soldered into a chain. Or, if the pixel spacing works for your project, this NeoPixel LED Strand might avoid a lot of intricate soldering.
If you’ve done projects with NeoPixel strip previously, or if that’s what you’re using for your “drips,” odds are you have a few strip end-trimmings that you’ve held onto. These can be cut to individual pixel strandlets and then solder wires between them.
Power
I decided to power my dragon from the Feather board’s USB port, plugged into either a USB charger or power bank. This just made everything a lot easier…using a bare LiPo battery would require a couple extra components and expense, but everyone has a spare charger and USB cable.
To distribute power to all the LED strands, I sawed some of the power rails off a Perma Proto PCB and soldered this to the NeoPXL8 FeatherWing’s USB (5V) and GND pins with 22-gauge wire.
There are other ways this could be done, but being able to “home run” all of the power to this one spot made things easier to keep track of.
Wire
You are going to need SO. MUCH. WIRE. Even just this little dragon centerpiece, about 13 inches long, used about 30 feet of wire, divided evenly between red, black, and green (to better keep track of 5V, ground and data wires).
For the dragon, I used 26-gauge stranded wire throughout (except for the two thicker wires to the power distribution rails). Even 28 gauge would suffice, as it’s a tiny project. For something bigger…more pixels or longer distances…consider using heavier gauge wire for power and ground but keep the data wires thin.
If your project is something like the hanging ghoul (or simply dressing up a window frame), with some distance between the “drips” above and “splats” below, it should be fine running wires a few feet to the splat NeoPixels. There’s no defined hard limit I can provide, sometimes you just have to build and adapt…I’d feel confident running wires 4 or 5 feet, but 10 feet or more just seems iffy for the signal to get through reliably.
Base
You’ll want each “splat” aligned with the “drips” from above…meaning they’ll need to be glued, taped or zip-tied in place.
For the dragon centerpiece, I used a piece of foam-core board and hot-glued each pixel in place (after all the wiring was done…more of that is explained on the next page).
Build Part 1
Here I’ll show some of the steps that went into my dragon. You’re probably building something different, so don’t consider any of this to be canon law, just some helpful tips and observations along the way…
I was super lucky with this dragon. Opening it up to see where electronics would fit inside, I found that all the drips would come through this one skull piece.
You don’t have to conceal the electronics deep inside your project. Maybe they’ll fit behind. Or if you’re decorating something like a skeleton, pick wire colors that conceal well (like black or white) or can be passed off as part of the gag (e.g., red and blue wires as arteries and veins).
Cutting NeoPixel strands.
LABEL EVERYTHING AS YOU GO. The drips are different lengths, so it’s important to keep track of which drip is #0, #1 and so forth…
Soldering to these Ultra Skinny NeoPixel strands is quite challenging. This is why I recommend most folks make a bigger prop using “normal” NeoPixels.
The solder pads on these strips are really tiny (just a couple of millimeters after cutting) and not clearly labeled (I cut the strips from the bottom and kept the original “head end” around for reference). You can scrape away a little extra contact area with a hobby knife. Tin the pads and the stripped wire ends with solder…
Even a “third hand” tool wasn’t much help with these connections. I just taped the strip down right on my grungy workbench and held down each wire against the bench while soldering, one-by-one.
Oh! Also worth mentioning: these strips have double-stick tape on the back, which is not helpful for our drips. Working slowly, it’s possible to carefully peel this tape off the strip. There might be a bit of lingering stickiness, but you can just paint over this later.
The splats are a lot more straightforward…tin the pads, tin the wires, solder them together. It’s just a whole lot of wire.
Keep careful track of the order and distances between splats…#0 to #1 will be different than #1 to #2, and so forth…it all depends on your drip placement.
Give yourself a little extra length between your splat pixels, so you can fine-tune their exact placement later.
All the drips and splats. So many pixels! So much wire!
This isn’t really part of the assembly instructions, I just worked really hard on this and wanted to be sure everyone saw.
MANDATORY TESTING
I cannot emphasize this enough: after soldering, you must test every single strand before proceeding. This helps weed out any weak or wrong connections, bridged solder joints…or occasionally the first pixel in a strand can be killed by heavy-handed soldering (if this happens, clip it off and re-solder starting at the second pixel, it’ll look fine).
Load up the NeoPixel strandtest example…either on the Feather M0 board you’re using for this project, or any other board you have around…change the code’s pin number and strand length to match your longest strand.
NeoPixels should not be connected to a live circuit. Make the connections, then power up the board.
Yes, this is tedious. But it is 1000% necessary. If you build the whole project and then find something wrong buried deep inside and unreachable, you will cry.
Build Part 2
Have you tested all of your NeoPixel strips at this point? Because I swear, I will turn this car around.
Start placing your drips, securing them in place with hot glue, Krazy Glue®, zip ties or whatever your install calls for. Some wires here simply fit through the eye or nose openings, while others I drilled small holes through the skull.
The number labels were moved to the data wire for each strip. Must keep track of those!
Don’t worry if the strips hang outward at weird angles…just get them attached and straighten them out afterward.
Also: DON’T BE LIKE ME. I glued down all the “splats” before the drips, based on my earlier estimates of their positions. Much better to install the drips first, see where things actually hang at that point, and then glue down the splats, fine-tuning their positions as needed! Mine are a bit off.
You’ve been grappling and rough handling these NeoPixel strips…so, I’m sorry, but it’s a really good idea to test them all again and fix any problems now, when they’re still accessible.
Did you test everything again? Okay good…
Down the middle of the NeoPXL8 board is an 8x2 header. One row of this is the NeoPixel data outputs, the others are grounds. For this project we’ll be soldering only to the NeoPixel outputs (with the numbers just above them), not the ground points (with “–” below). Plus of course the USB and GND wires mention earlier, to the power bus.
Starting to make connections from the first two NeoPixel strips to the NeoPXL8 FeatherWing and my makeshift power bus.
As a sanity-preserving measure, I had simply soldered identical foot-long wires onto every strip rather than measuring out each one ahead of time. Now at this stage I clip off a couple inches, whatever’s actually needed to reach from point to point, with a little slack so I can still move things around while working on this. Wastes a little wire but saves a lot of time.
Keen-eyed readers might spot there’s two data wires going to NeoPXL8 outputs #0 and #1. Yours might not need that…it’s something covered on the Extra Drips page.
Soldering wires directly from the top skull to the base was just asking for trouble…I knew there would be a lot of wrestling parts into place here.
I added a 3-pin JST SH plug and receptacle so the two parts could be separated while working on them. This turned out to be really helpful during assembly (I could plug that in later as a next-to-last step), but also just in case I needed to go back inside for maintenance. Strongly recommend this for your splat pixels!
All power and data wires connected, including the JST plug for the splat pixels.
An important step…not shown here…was to load up the NeoPXL8 strandtest example and sort out the correct pinout for the board we’re using as explained in the NeoPXL8 guide…sometimes the FeatherWing needs some traces cut and jumpered, and this is the last time you’ll have easy access to the board.
With the basic NeoPXL8 test sorted out, oad up this project’s OozeMaster3000 Arduino sketch, copy over the pin array you worked out for strandtest, and test it all again. Even if not using the final settings, just making sure there’s no shorts or bad pixels. The code is explained on the next page. Later we’ll make further tweaks for the actual strand lengths.
After it all checked out, I glopped up these wires with hot glue to provide some strain relief when this gets stuffed into the skull and similarly covered the back side of the power bus to prevent it shorting on other parts.
Since the Feather board will be buried inside this skull, I connected a micro-USB cable and hot-glued it in place, so it won’t fall out, then fed the other end out an opening at the back of the skull.
If you do this, make absolutely certain it’s a USB charge and sync cable, not a charge-only cable! Please test this first. A charge-only cable can provide power but won’t let you update the software on the board.
Wiring’s done, sealing up the skull. You can just make out the hot-glued USB cable here.
And yes, test it all again.
The NeoPixel strips running along the skull are pretty conspicuous, so I camouflaged them with some cheap craft store acrylic paint.
Don’t sweat it if your painting is sloppy or colors don’t match. Five feet away, nobody will notice.
If you get paint over any of the NeoPixels, it can be scraped away with a toothpick, or a Q-Tip® dipped in rubbing alcohol.
To conceal the wires inside the skull, I stuffed some wads of black chiffon that I found in my crafting hoard.
As a last step, I cut a circular skirt from thin fabric and placed this over the base. It hides the “splat” electronics while still letting enough light through to complete the illusion…you can see this in the project’s title image.
Arduino Code
The software for this project uses the Arduino development environment. If this is your first time using this with Adafruit boards, please see the Feather M0 Setup guide here:
Adafruit Feather M0 Basic Proto: Arduino IDE Setup
Aside from installing the Arduino software, you’ll need to add the Adafruit boards package as mentioned in the guide above.
Other boards…M4, RP2040, ESP32-S3…will have corresponding starter guides to get these going with the Arduino IDE. If it’s your first time using them, use the search field to locate those guides.
Additionally, you’ll need a few prerequisite libraries, which can be installed with the Arduino Library Manager (Sketch→Include Library→Manage Libraries…). Search for and install:
Adafruit_NeoPixel
Adafruit_NeoPXL8
Adafruit_ZeroDMA
Then fetch the code for this project, downloadable here:
Download OozeMaster3000 source code for Arduino
Select “Feather M0” (or whatever board you’re using) from the Tools→Board menu, compile and verify that you can upload to the board. If so, great! Now we need to fine-tune some settings to match your project…
If using a Feather M4 (with M4 version of the NeoPXL8 FeatherWing), look for this line early in the code:
int8_t pins[8] = { PIN_SERIAL1_RX, PIN_SERIAL1_TX, MISO, 13, 5, SDA, A4, A3 };Change the list of pins to the following:
int8_t pins[8] = { 13, 12, 11, 10, SCK, 5, 9, 6 };The above change is only needed for Feather M4; if using Feather M0, you can leave the defaults.
Other boards will use different pins. If you’ve worked through the NeoPXL8 guide and puzzled through the strandtest example, this should all be sorted out by now. If using a Feather RP2040 SCORPIO, the sketch takes care of this part.
Now we can configure some visual things…
Near the top of the code is this line:
#define PIXEL_PITCH (1.0 / 150.0) // 150 pixels/m
This tells the code the “density” of your NeoPixel strip, in LEDs-per-meter. The default, 150.0, corresponds to the density of the ultra-skinny NeoPixel strip. If using different pixels, change this to match…60.0 and 144.0 are both pretty common strip densities. The code needs to know this figure, so the drippings fall at a physically plausible speed.
Q: Can I mix and match strip densities?
A: Electronically there’s nothing preventing this, but the code as written works with a single density throughout.
Speaking of physically plausible speed, look for this a few lines further down:
#define G_CONST 9.806 // Standard acceleration due to gravity
Combined with the strip density figure, this makes the drips fall convincingly. 9.806 is the force of gravity on Earth, in m/s2. A little math ties this all together to make the drips and the splats play well together and fool your brain.
The value there…9.086…is convincing enough for a thin liquid like water or blood. If you want something really viscous looking…rather than working viscosity calculations into the code, you can be like Q from Star Trek and just change the gravitational constant of the universe. Try values between 2 and 3 for a nice gravy-like feel.
Then, a short way down, look for this section:
uint8_t palette[][3] = {
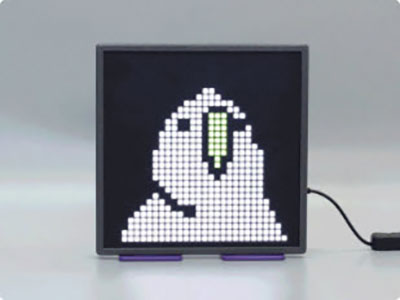
{ 0, 255, 0 }, // Bright green ectoplasm
};This defines the color of the drippings, as an RGB value. The default, {0,255,0}, is a pure green…good for ectoplasm. But you might want red instead, {255,0,0} for blood, or blue {0,0,255} or white {255,255,255} for something more Christmasy. Later we’ll explain how to use multiple colors.
One more piece to this recipe…a little further along in the code, look for this table of numbers:
// THIS TABLE CONTAINS INFO FOR UP TO 8 NEOPIXEL DRIPS
  { 16,  7, 0.157, 0, 0 }, // NeoPXL8 output 0: 16 pixels long, drip pauses at index 7, 0.157 meters above ground, use palette colors 0-0
  { 19,  6, 0.174, 0, 0 }, // NeoPXL8 output 1: 19 pixels long, pause at index 6, 0.174 meters up
  { 18,  5, 0.195, 0, 0 }, // NeoPXL8 output 2: etc.
  { 17,  6, 0.16 , 0, 0 }, // NeoPXL8 output 3
  { 16,  1, 0.21 , 0, 0 }, // NeoPXL8 output 4
  { 16,  1, 0.21 , 0, 0 }, // NeoPXL8 output 5
  { 21, 10, 0.143, 0, 0 }, // NeoPXL8 output 6
The table holds information about our NeoPixel strips and real-world distances, to make the physics “actual size.” Each line, one for each drip (up to 7) contains three numbers:
The length of the NeoPixel strip, in pixels.
The pixel index (starting at 0, up to length-1) where the dribble pauses before falling. This can be 0 if you want no dribble.
The distance from the dribble pixel (the one you just provided the index # for) to the splat pixel below, in meters.
A range of color indices to use from the palette[] array. With just one color defined for the default example case, both of these values are 0.
You can have an 8th drip but won’t get splats in that case. Given a choice, I think the splats are way cooler.
Here I’m measuring drip-to-splat length for drip #6. It’s about 143 millimeters, or 0.143 meters as you can see in the table. Not the topmost pixel, not the end of the drip, but the dribble pixel at the tip of the horn.
If measuring in inches, multiply by 0.0254 to convert to meters.
Get all your numbers and measurements in there, save the code (or a copy) and upload to your Halloween prop. If all goes well, the motion should physically correspond to the thing you’ve built! If it’s close but not quite, tweak your table numbers…move the dribble pixel up or down a bit, change distances (or G_CONST) to get the timing right.
Colors and Effects
To avoid being too overwhelming, the default code has everything a single color by default. We can amp this up, but it’s going to involve more numbers.
First, look again at the palette[] section of the code:
uint8_t palette[][3] = {
  { 0, 255, 0 }, // Bright green ectoplasm
};
This can be expanded to a list of colors. Each {in curly braces} is three numbers — red, green and blue components, each in the range 0 to 255. Mind your commas and formatting!
For a Fourth of July aesthetic, one might choose a palette like this:
uint8_t palette[][3] = {
  { 255,   0,   0 }, // Color 0 = Red
  { 255, 255, 255 }, // Color 1 = White
  {   0,   0, 255 }, // Color 2 = Blue
};
Next, we tell the drips[] table what colors to use, using indices into the palette[] array. Because of the way C arrays work, this numbering starts at 0.
The last two numbers for each drip are the lowest and highest color palette indices to use. A color within this range will be randomly picked each time a new drip starts there:
} drip[] = {
  { 16,  7, 0.157, 0, 2 }, // Randomly pick from palette 0-2
  { 19,  6, 0.174, 0, 2 },
  { 18,  5, 0.195, 0, 2 },
  { 17,  6, 0.16 , 0, 2 },
  { 16,  1, 0.21 , 0, 2 },
  { 16,  1, 0.21 , 0, 2 },
  { 21, 10, 0.143, 0, 2 },
};Perhaps you just want each drip a distinct color, not randomized. NeoPixel rainbows are popular…maybe a bit overdone, but some occasions do call for it. One sets up a color palette:
uint8_t palette[][3] = {
  { 255,   0,   0 }, // 0 = Red
  { 255, 160,   0 }, // 1 = Orange
  { 255, 255,   0 }, // 2 = Yellow
  {   0, 255,   0 }, // 3 = Green
  {   0, 255, 255 }, // 4 = Cyan
  {   0,   0, 255 }, // 5 = Blue
  { 192,   0, 255 }, // 6 = Purple
};…and then, in the drip[] array, both numbers at the end of each drip are set to the same palette index:
} drip[] = {
  { 16,  7, 0.157, 0, 0 }, // Always use palette[0] for this drip
  { 19,  6, 0.174, 1, 1 }, // and palette[1] for this drip
  { 18,  5, 0.195, 2, 2 }, // and so forth...
  { 17,  6, 0.16 , 3, 3 },
  { 16,  1, 0.21 , 4, 4 },
  { 16,  1, 0.21 , 5, 5 },
  { 21, 10, 0.143, 6, 6 },
};
It’s possible and valid to mix and match these rules, so drips can operate in a combination of fixed colors, random selections, or groups of each. It’s all in how those last two numbers are set.
Icicle Effect
The upper “dribbling” section of each strip can be partially lit to give a sort of icicle effect, with each drop pausing there before dropping. This can be seen in the Holiday Icicle Lights with Flair guide (but looks great with icky ectoplasm too!)
Near the top of the code, look for:
#define ICE_BRIGHTNESS 0 // Icycle effect Brightness (0 to <100%)
Bump that number up a little…10 to 25 works well, probably don’t want more than that.
This effect does not pair well with the color randomization explained earlier (but is fine with multiple fixed-color drips). The code works, it just looks bad when the icicles switch hue.
Carrie Mode
Firepixie was incorporating this code into a gorgeous LED-festooned dress and had a twisted idea: could there be a switch to turn the normally beautiful lights into blood? This required only minimal changes, so yes, it’s in there, but disabled by default.
This requires adding either a SPST toggle switch or a momentary pushbutton (held down for as long as the effect is active) connected between ground and any unused I/O pin, or between two I/O pins.
To use this effect, add one extra color at the end of the palette[] array. For example, one might have three pretty winter colors, and then suddenly, BLOOD:
uint8_t palette[][3] = {
  {   0,   0, 255 }, // Color 0 = Blue
  { 127, 255, 255 }, // Color 1 = Teal
  { 255, 255, 255 }, // Color 2 = White
  { 255,   0,   0 }, // Color 3 = Red
};
The drips only reference the first three colors (0–2). The fourth color (#3) is not mentioned in the drip[] table. It’s a secret extra thing.
} drip[] = {
  { 16,  7, 0.157, 0, 2 }, // Randomly pick from palette 0-2
  { 19,  6, 0.174, 0, 2 },
  { 18,  5, 0.195, 0, 2 },
  { 17,  6, 0.16 , 0, 2 },
  { 16,  1, 0.21 , 0, 2 },
  { 16,  1, 0.21 , 0, 2 },
  { 21, 10, 0.143, 0, 2 },
};
There are two lines in the code, both commented out by default, which enable this feature. Remember that you must have a switch or button to use this.
//#define CARRIE_PIN    A2
//#define CARRIE_GROUND A3
Un-comment the first line, change the pin number if you like, and then connect a switch or button between this pin and any ground pin:
#define CARRIE_PIN A2
Sometimes a project is already using every ground pin on the board. That’s okay…if another GPIO pin is available, you can use this as a makeshift ground for the other side of your switch or button to connect to:
#define CARRIE_GROUND A3
This second pin, if enabled, is strictly a signal ground. It’s working off a GPIO pin and should not be used for carrying any substantial load like additional NeoPixels.
Enabling Carrie mode is not an instantaneous poof switchover. Each drip currently in motion will continue in its current color and only switches over at the start of its next “ooze.” This gives a nice effect as the NeoPixel strips gradually change over one by one. As with the random color option, this doesn’t pair well with the icicle effect; probably want one or the other.
Extra Drips
As explained on the Planning page, there are a couple of easy options if you want more than seven drips…
You can drive 8 drips from one board, but you won’t get ground splats in that case.
You can just build multiple units. There’s nothing that needs to be synchronized between them.
A third option is to split some of the output signals to multiple strips. This is a thing you can do with NeoPixels…feed the same data output to two or more strips and they’ll all show the same thing. I used this on the dragon to provide nine drips total…the first two drips, plus the splats, are “recycled.”
There are some gotchas doing it this way…
These drips are an exact copy. The ooze, dribble, drip, and splat all occur in perfect sync, so it really only makes sense visually if there are two points at similar heights on your prop.
You’ll want to put some distance between them, or on opposite sides of the prop. This makes the duplicate drips less obvious.
This is why I only added two extra drips on the dragon…there weren’t many positions where the dribble would look right on another part of the skull, and I didn’t want an exact left/right copy of everything.
If you add duplicates this way, start from NeoPXL8 output #0 and work up from there. That’s so the duplicate splats sync up. Looking at the diagram above, you can see only two splat pixels are needed on the extra strand, corresponding to the two extra drips. You don’t want or need an entire duplicate splat strand.