Mfr Part # A000066
ARDUINO UNO R3 ATMEGA328P BOARD
Arduino
License: None
The COVID-19 pandemic has radically affected life for almost everyone around the globe, and makers are no exception. With everyone being more careful of their interactions with humans and objects, personal hygiene has taken serious precedence over all other factors in public space. A lot of public places have hand sanitizers for visitors, but they need to be manually pressed.
To avoid any contact at all, some no-touch hand sanitizer dispensers are commercially available, but they are expensive and most off-the-shelf commercial sanitizers cannot be automated. In this project, we create a contactless hand sanitizer dispenser that can be used for any press-to-release hand sanitizer available in the market.
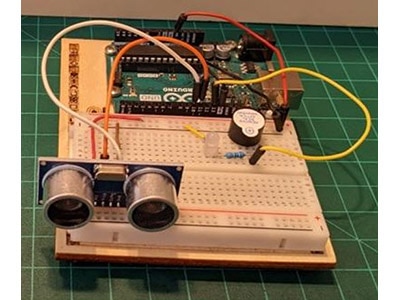
The project uses an Arduino Uno, an HCSR04 Ultrasonic sensor, and a servo motor. The system is adjustable to accommodate most sanitizer bottles. We’ll cover the basics of how these sensors work before detailing how to make one of these on your own!
BOM
What is an Ultrasonic Sensor?
An ultrasonic sensor measures the distance between its transmitter and an obstacle in front using ultrasonic sound waves (operational at 40 KHz) beyond the human audible sound wave range. The transmitter element sends out the ultrasonic wave which is reflected from the target and is picked up by the receiver module. Using the time-of-flight principle and the known speed of sound (~340 m/s), the distance between the sensor and the target is calculated.
Ultrasonic Sensor working principle (Image Source - Original)
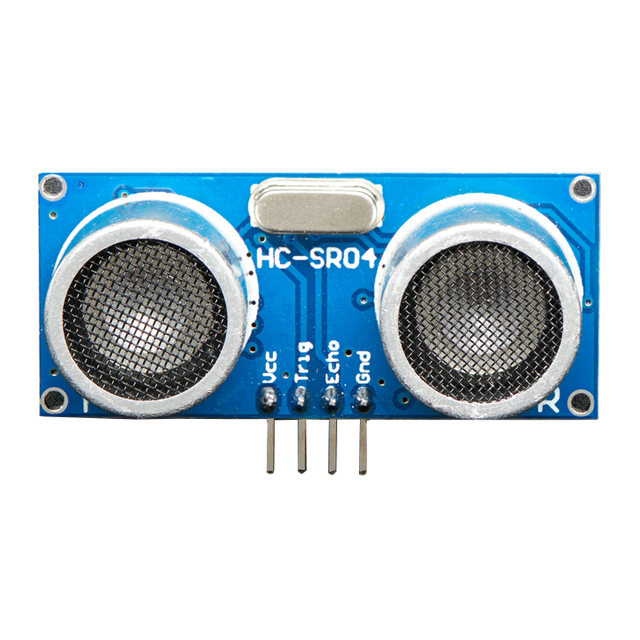
The HC-SR04 is a popular sensor among the maker community. Its operational field of view is essentially a straight line along the sensor’s line-of-sight. The sensor needs a 5 V power supply and has a Trigger and an Echo pin. The Trigger pin sends out a high ultrasonic pulse that is reflected and received by the Echo pin, which records the difference in time between the two events. The crystal visible on the module is responsible for the clock pulse. Sound waves can reflect off any air-other media boundary; thus, an ultrasonic sensor can also measure the distance from a water surface or glass.
HC-SR04 Ultrasonic Sensor (Image Source - DigiKey Product website)
The HC-SR04 module Trigger pin when set HIGH does not immediately set off an ultrasonic wave. Instead, a burst of 8 ultrasonic waves are sent out from the transmitter, invoked on the falling edge of the Trigger pin (after set HIGH). The minimum length of the Trigger pin HIGH pulse needed to invoke the ultrasonic pulse burst is 10 microseconds.
Timeline of events for the HC-SR04 Ultrasonic sensor (Image Source - Original)
Servo Motor
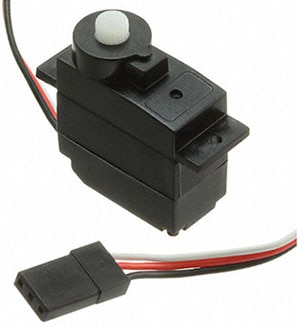
Let’s get into some more technical bits for a moment: a servo motor is the most common position-controlled actuator. It works on the conventional servo-mechanism principle, where a rotary potentiometer measures the position of the shaft based on the varying resistance and feeds it to a comparator. The comparator computes the difference between the reference position value from the controller against the actual position and sends the amplified error signal to the motor. The error amplification is usually a PID loop.
Servo Mechanism (Image Source - Original)
The control signal for a servo is a Pulse Width Modulation (PWM) signal. PWM is a form of pulsating DC current that varies the average amount of voltage delivered per time period. The switching frequency of the power supply is very high and thus not observed by the load. The duty cycle of a PWM signal is the ratio of the time the voltage input is ON (cumulatively over the complete time period) against the complete time period. Servo motors usually expect new PWM signals at intervals of 20 milliseconds.
The SG05NF is an 18 cm metal-geared servo motor. It provides a 2.8 kg-cm torque at 4.8 V and 3.2 kg-cm torque at 6 V power supply. The maximum speed of rotation is 0.18 seconds per 60° angle. The servo has three wires, brown, red, and orange for the connections to ground, 6 V power, and PWM signal respectively.
PWM Signal (Image Source - Original)
Automatic Dispenser
The working principle of the automatic sanitizer dispenser is to actuate the servo to press the sanitizer tap whenever the sensor observes a low distance reading due to an obstruction in its line-of-sight. When a person’s hand comes below the sanitizer and obstructs the sensor line-of-sight, the Arduino board receives a low distance reading and instructs the servo motor to actuate and dispense the sanitizer.
Sanitizer
Code & Schematic
#include <Servo.h>

// HC-SR04 Echo Pin & Trigger Pin connect to the Arduino Uno Digital Pins
#define echo_pin 2
#define trigger_pin 3

// Servo PWM
#define servo_pin 5

Servo servo_motor;

void setup() {
  pinMode(trigger_pin, OUTPUT);
  pinMode(echo_pin, INPUT);

  Serial.begin(9600);

  servo_motor.attach(servo_pin);
}

void loop() {

  digitalWrite(trigger_pin, LOW);
  delayMicroseconds(2);

  digitalWrite(trigger_pin, HIGH);
  delayMicroseconds(10);
  digitalWrite(trigger_pin, LOW);

  long duration = pulseIn(echo_pin, HIGH);
  double distance = duration * 0.034 / 2;

  Serial.print(distance);


  // If the distance read by the sensor is less than 10 cm and more than the minimum 3 cm, then it is assumed that there is a hand under the sanitizer
  if ((distance > 3) && (distance < 10)) {
    servo_motor.write(90);
    delay(100);
  }
  servo_motor.write(0);
}
In the code above, the Trigger pin is set HIGH for 10 milliseconds to send an ultrasonic pulse. The Echo pin is then set HIGH by the pulseIn() method and when the reflected ultrasonic wave is received, the sensor sets the Echo pin LOW. The pulseIn() method is a blocking function and only returns when the Echo pin goes low and the time duration is measured.
Speed of sound = 340 m/s
The time between the wave sent out and the reflected wave received = T (in milliseconds from the Echo pin).
Distance = Speed of sound * T / 2 (Since the wave travels twice the distance between the reflecting object and the sensor)
Distance = T * 0.034 / 2
Circuit Schematic (Image Source - Digikey Scheme-it)
The HC-SR04 sensor operates at 15 mA current and the servo motor operates at a few hundred milliamps; thus, if the circuit is powered by connecting the Arduino board only to the computer USB port, the motor, as well as the ultrasonic sensor, will have spurious readings and unexpected behavior. Also, the computer USB port provides 5 VDC, while the servo motor has the highest torque at 6 V.
Also, the servo motor horn should be fixed to the shaft of the motor appropriately to ensure that the motor presses the sanitizer bottle head with full effort and without slipping off it, to dispense the liquid.
Functional Circuit (Image Source - Original)
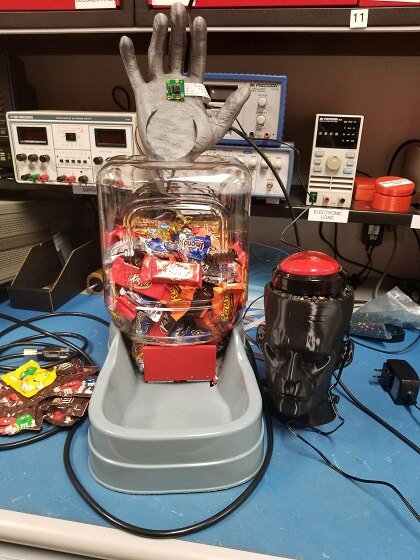
Contactless Hand Sanitizer Functional Model (Image Source - Original)
Conclusion
This is a one-day build that you can try at home and works equally well in any commercial setting, but it also has obvious real-world implications for people looking to combine their passion for Maker work with more at-home sanitization during a pandemic! If you adjust the height of the servo mounting appropriately, any off-the-shelf sanitizer bottle can be put into use.
While this project runs on a battery right now, ideally using a 6 V/1 A AC-DC power source is the most sustainable and cost-effective solution. Let us know what other at-home projects you’re considering during the pandemic, and we might bring it to life in an upcoming article!
Recommend Watching
The Basics of Ultrasonic Sensors