Mfr Part # SC1153
27W USB-C PSU UL(US), WHITE
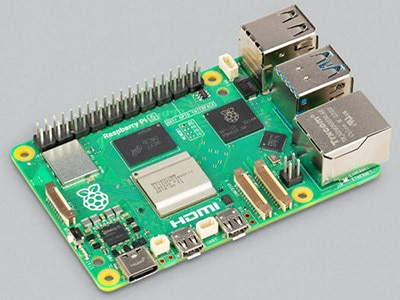
Raspberry Pi
License: See Original Project Raspberry Pi SBC
Courtesy of Pimoroni
Guide by Pimoroni
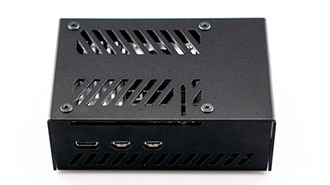
About NVMe Base
The new PCIe interface on Raspberry Pi 5 gives us an exciting new option for adding fast, high-capacity storage. PCIe (that's peripheral component interconnect express) is an interface standard for connecting up high-speed components - not only external storage devices, but also graphics cards, USB hubs and so on.
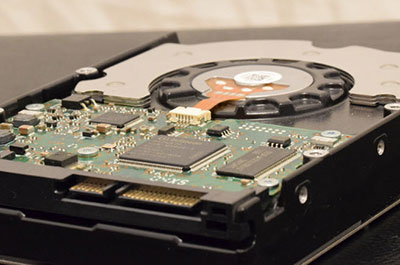
Pimoroni's NVMe Base lets you to connect up a large NVMe solid state drive (SSD) to Pi 5's ribbon style PCIe connector and turn it into a responsive desktop machine, a capable media player or file server for all your photos, music and documents, or a backup server for your PC.
Read on for how to get started!
What You'll Need
A microSD card to get everything set up
An Active Cooler (not essential, but highly recommended)
A NVMe Base (Pimoroni sell them on their own, or bundled with a compatible 250GB or 500GB drive)
If you're planning on sourcing your own NVMe SSD, then bear in mind the following:
The SSD needs to be NVMe M.2. Don't get this confused with the SATA M.2, which may look similar but are not compatible. NVMe and SATA refer to the interface communications standards, and M.2 to the form factor.
The NVMe Base can take SSDs of physical sizes between 2230 and 2280. This refers to the size of the board - i.e., 22mm wide by 30mm to 80mm long.
The capacity is up to you. NVMe capacity ranges from 128GB to 2TB and more. Smaller ones are cheaper but will limit how much you can store. Very large drives are still very expensive. At the time of writing the sweet spot appears to be between 256GB and 500GB.
The NVMe Base can run at PCIe Gen 2 x1 speeds (the maximum officially supported) but with careful drive selection and a well-seated ribbon-cable you can enable (experimental) Gen 3 x1 speeds for almost double the bandwidth. Almost all available drives at the time of writing are Gen 3 x4 or Gen 4. All SSDs supplied by Pimoroni will be specced for at least Gen 3 but will only use x1 (1 lane.)
There is a list of compatible SSDs (and ones that have been found to be problematic) on the NVMe Base shop page.
Putting it Together
When you unpack your NVMe Base you will find the following items:
A NVMe Base PCB
A flexible ribbon cable with writing on one side
Four sticks on rubber feet
A standoff set
If you purchased a bundle that includes an SSD then you will also have:
A 250GB or 500GB NVMe drive
PREPARING THE BASE
Open the standoff set bag and empty the contents into a small pot or tray so they don't roll away. In it you will find these:
Going clockwise from top left you should have:
Four long screws, for if you plan to use a HAT on your Raspberry Pi 5.
Eight short screws, for if you do not plan to attach a HAT.
A thin screw and two nuts, used for securing your SSD to the base.
Four standoffs, which are used to space the NVMe Base board from your Raspberry Pi 5.
(You may also have a few spares!)
IF YOU ARE NOT USING A HAT
Start by posting one of the short screws through the larger holes in the Base from the bottom (the side without components) and screw on the standoffs.
Repeat with three of the other short bolts and standoffs.
A little later you will be placing your Raspberry Pi 5 on the standoffs and use the remaining four short bolts to secure it in place.
IF YOU ARE USING A HAT
Start by posting one of the long screws through the larger holes in the Base from the bottom (the side without components) and screw the standoffs all the way down.
Repeat with the other three long bolts and standoffs.
A little later you will be placing your Pi on the bolts and using the HATs own standoffs to fix the Raspberry Pi 5 in place.
SECURING THE SSD
Take the thin (2mm) bolt and post it through the board from the bottom in one of the small holes running down the middle of the board. Use the hole which corresponds to the length of your SSD (2280 in the case of the SSD supplied by Pimoroni). Secure it in place with one of the nuts.
Unpack your SSD, being careful to avoid touching any of the gold connectors on the end.
You will notice a notch breaking up the connectors on one end of the SSD. This corresponds to the M.2 socket on the Base board.
There is a round semicircular cutout in the middle of the other end. This is where that thin bolt will be used to secure the SSD to the Base.
Now carefully push the SSD into the socket. It will only go in one direction and doesn't need much effort.
Gently push the SSD down at the other end and secure it in place by putting the second nut on the screw you fixed in place earlier.
CONNECTING THE RIBBON CABLE
NOTE: You may want to use a pair of tweezers for this part.
It is now time to secure the ribbon cable, firstly onto the Base board, and then onto the Raspberry Pi PCIe socket. This can be fiddly, however following these simple steps should ensure success.
The two ribbon cable sockets hold the ribbon in place using small plastic clips which you have to 'open' to put the ribbon in, and close again to secure it in place. These clips are quite fragile and require very little pressure to move. The clips on sockets of the Base board and the Raspberry Pi work slightly differently from each other, so be careful to read these instructions before proceeding.
Let's first take a look at the ribbon cable. One end is wider than the other. This is the end which goes into the NVMe Base connector and is labelled on the ribbon as 'ADDON'. The other end labelled 'RPI 5' will go into the Raspberry Pi 5's PCIe connector.
When in place, the writing and Pirate logo will face outwards.
SECURING THE RIBBON TO THE BASE BOARD
Using tweezers or a fingernail, flip the grey clip of the socket on the NVMe Base upwards. It will swivel into an upright position.
Now gently push the ADDON end of the ribbon cable into the socket, ensuring the side with the writing is pointing downwards. You should see the cable go under the silver 'connectors'; these are in fact what provides the pressure to hold the ribbon down onto the real connectors.
Gently rotate the clip back down into its original position. You should be able to see about 1mm of the brown surface of the ribbon protruding from the socket.
SECURING THE RIBBON TO THE RASPBERRY PI 5
NOTE: Ensure your Raspberry Pi 5 is not powered on.
Now locate the Raspberry Pi 5 PCIe connector. It is the one on the opposite end from the network and USB ports and is located next to the on/off switch. This has a brown clip which slides up and down, at right angles to the Raspberry Pi board.
Carefully, and preferably with tweezers or fingernails, lift the clip up by about 1mm.
With the Raspberry Pi on your desk, hold your NVMe Base directly above the Pi's PCIe connector with the SSD pointing away from the Pi.
Gently lower the Base, posting the ribbon into the PCIe connector until you feel that it has gone as far as it can. With your thumb nail or tweezers, push the brown clip down and back in place.
FINAL ASSEMBLY
Now that the two boards are connected by the ribbon cable, gently wrap the NVMe Base down until it is under the Raspberry Pi as though the ribbon cable is a hinge. Make sure you don't put the ribbon under any strain.
With the Raspberry Pi sitting on top of the NVMe Base board you now need to secure them together.
If you are not using a HAT, use the four remaining short screws to secure the Raspberry Pi 5 on top of the NVMe Base's spacers.
If you are using a HAT, post the long bolts through the four fixing holes of the Raspberry Pi, and then screw the HAT's spacers onto the long screws.
Optionally, stick the four rubber feet onto the bottom of the NVMe Base, one near each corner.
Installing your OS onto the NVMe SSD
There are a few ways you can install your chosen OS onto the NVMe SSD and experience the speed boost, depending on whether you want to install from scratch or if you already have your OS installed and set up how you want.
For all options you need to start from the latest Raspberry Pi OS (Bookworm or later). If you don't already have a microSD card with the OS written to it, create one now using the Raspberry Pi Imager software (it's available for Windows, macOS and Linux), or using your usual method.
Alternatively, you can use an existing card, as long as it has the latest OS (Bookworm or later) on it.
Before doing anything else, boot your Pi from the SD card and ensure the OS is up to date (otherwise it may not have the required updates for the NVMe to be properly recognised).
Open a terminal (Ctrl-Alt-T, or find it in the Pi OS menus) and type:
sudo apt update && sudo apt upgrade -y
The Raspberry Pi 5 uses an EEPROM to store some boot settings. This needs to be updated to a version dated newer than December 2023. The command above should have done that for you, but to double check, type the following into a terminal to check:
sudo rpi-eeprom-update
If it is not post-December 2023 type the following into a terminal to start the configuration tool:
sudo raspi-config
Scroll down to 'Advanced Options' and press Enter:
Scroll down to 'Bootloader Version' and press Enter:
And finally choose 'Latest', and press Enter:
Confirm by pressing Enter:
And exit from the tool by selecting 'Finish':
If asked to reboot, select 'Yes'.
Checking NVMe Base Installation
Before installing an OS, you should first check that the ribbon cable has been connected correctly and the SSD installed properly.
Boot your Raspberry Pi from a microSD card.
Open a Terminal window and type:
ls /dev/nvme0
If the file exists (i.e. /dev/nvme0 is repeated back in the terminal) then all is good and you are ready to proceed.
If that file cannot be found, the terminal will report:
ls: cannot access \'/dev/nvme0\': No such file or directory
In which case, turn off your Raspberry Pi and recheck the ribbon cable connections and the SSD installation. Remember that the clips on both the NVMe Base and Raspberry Pi 5 need to be folded/pressed back in place for the connections to work.
OS Installation Options
Once the NVMe Base has been properly connected, you have the following options for installing an OS:
Install a new OS using Raspberry Pi OS Desktop
Install a new OS using using Network Install
Clone a current microSD card with Raspberry Pi OS Desktop
Clone a current microSD card with Raspberry Pi OS Lite
Boot your Raspberry Pi 5 from microSD card and follow your chosen option.
INSTALL A NEW OS USING RASPBERRY PI OS DESKTOP
In this scenario you will need a microSD card with the Desktop version of the Raspberry Pi OS installed. Boot your Raspberry Pi from this card, then open 'Imager' from the Accessories menu.
First choose the device - in this case the Raspberry Pi 5:
Then choose the OS:
And finally, the storage:
Once it is complete, go to the Setting the Raspberry Pi to boot from the NVMe SSD section below.
INSTALL A NEW OS USING NETWORK INSTALL
Raspberry Pi OS Lite is missing a number of useful tools which require the Desktop. However, there is an alternative - Network Boot can be used to install an OS onto any attached storage on the Raspberry Pi. You will need to plug your Raspberry Pi into an ethernet network for this to run.
Type the following into a terminal to start the configuration tool:
sudo raspi-config
Scroll down to 'Advanced Options' and press Enter:
Scroll down to 'Boot Order' and press Enter:
Choose 'Network Boot' and press Enter:
Configuration will be confirmed. Press Enter:
Return to the first screen by selecting 'Back' or pressing the Esc key. Then navigate to Finish using the right cursor key.
You will be asked whether you want to reboot now. Click 'No':
You now need to shut down your Raspberry Pi 5, remove the microSD card, remove power, and then reboot.
Your Raspberry Pi will reboot and show a red/white screen asking you to hold the Shift key to boot from the network. Hold the shift key until the network installer starts to load. Leave it to do so, and when the familiar Raspberry Pi Installer loads, choose your required OS, and choose the SSD as storage.
The OS will be downloaded and installed onto your SSD. Once complete, the Raspberry Pi will be restarted, and your chosen OS booted from your SSD. Remember, first boot may take a little longer than usual as the OS may be configuring itself. Don't worry, the next boot will be much faster!
CLONE A CURRENT MICROSD CARD WITH RASPBERRY PI OS DESKTOP
If you have been using your Raspberry Pi 5 for a while and have it set up how you want, with the applications you want installed, then you can 'clone' the current microSD card onto the SSD.
The desktop version of Raspberry Pi OS has a tool pre-installed for this task. Under the Accessories menu start 'SD Card Copier'. Choose the current microSD (/dev/mmcblk0) card in the Copy From Device dropdown and the NVMe SSD (/dev/nvme0n1) from the Copy To Device dropdown:
Click on start to start copying your microSD card over to the SSD.
Once it is complete, go to the Setting the Raspberry Pi to Boot from the NVMe SSD section below.
CLONE A CURRENT MICROSD CARD WITH RASPBERRY PI OS LITE
The SD Card Copier application is not available in Raspberry Pi OS Lite, so instead you will have to use the 'dd' ('disk duplicator') command. Various devices in Linux are identified by 'device files' located in the /dev folder. The microSD card's device file is /dev/mmcblk0, and the NVMe SSD device file is /dev/nvme0n1.
From the terminal, type the following:
sudo dd if=/dev/mmcblk0 of=/dev/nvme0n1 status=progress
The microSD data will be copied over to the SSD. Once it is complete, go to the Setting the Raspberry Pi to Boot from the NVMe SSD section below.
Setting the Raspberry Pi to Boot from the NVMe SSD
There is one vital step left to do, and that's to set the Raspberry Pi to boot from the SSD.
Reboot your Raspberry Pi once again from the microSD card, open a terminal window and start the Raspberry Pi configuration tool with:
sudo raspi-config
Scroll down to 'Advanced Options' and press Enter:
Scroll down to 'Boot Order' and press Enter:
Choose NVMe/USB Boot' and press Enter:
Configuration will be confirmed. Press Enter:
Return to the first screen by selecting 'Back' or pressing the Esc key. Then navigate to Finish using the right cursor key.
You will be asked whether you want to reboot now. Click 'Yes':
Your Raspberry Pi should now boot from the NVMe SSD.
Optional and Unsupported Speed Increase
What? There is more speed?
As mentioned at the start, the Raspberry Pi 5 PCIe port uses the PCIe 1.0 specification. However, it can run faster, although this is not officially supported and is a little experimental. This only works on Raspberry Pi OS.
To enable 'PCIe 3' mode, open a terminal window and type:
sudo nano /boot/firmware/config.txt
Add the follow line to the [all] section at the end of the file:
dtparam=pciex1_gen=3
Save the file (using Ctrl+X, y and Enter). Reboot again and you may see a speed increase!
Next steps
You should now have a Raspberry Pi 5 which is no longer limited by the speed of the microSD card, with extra capacity to store all your music, photos and videos!
That's all folks!