Mfr Part # A000005
ARDUINO NANO ATMEGA328 EVAL BRD
Arduino
License: Attribution Non-commercial Wireless Arduino
Background
As you may have seen, I have been working on the train project for quite a while now, and there are a lot of features that I need to add in order to make it work properly. In total, I need what would be the equivalent of over 8 digital channels and 2 analog channels. That is quite an expensive controller, and I have everything to make one much cheaper exactly how I want on Digikey.com! I went ahead and used Scheme-it to plan out how I wanted the design to work. Here is the basic idea of the system:
It's not that complicated of a system, but trying to find one that was inexpensive would have been next to impossible. The whole project for the controller is based on the NRF24L01, which is a 2.4GHz antenna module capable of transmitting and receiving. Luckily for me, the code in the example library was all I needed to get started, and I was able to get the whole system working using only the provided code. This is one of the surprising aspects of the project; the fact that the hardest part was reading the signals from the hardware not sending the signals over the radio!
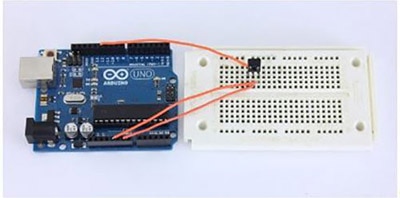
The Hardware:
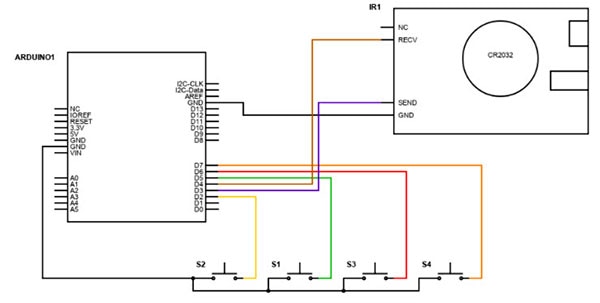
This brings me to the challenging part of the project which is the reason it took me 3 weeks to figure out; the finite number of pins that are available on the Arduino nano and having more digital signals than I have digital pins. I tried a variety of solutions, but in the end, I decided on using a version of a button matrix circuit that uses a single analog input pin to read all 8 buttons. This may seem like magic, but it's actually just electrical engineering. The way it works (shown below in scheme-it) is by using the buttons to add the second resistor in a voltage divider, and based on the value of the resistor, the voltage on the wire changes. If we measure the wire's voltage, then we can determine what button was pushed based on the voltage on the wire! Just like that, we have solved our problem!
I also had the joysticks on 2 separate analog input pins and 4 more auxiliary buttons on 4 of the last 5 digital pins available. For simplicity I didn't add the NRF24L01 to the schematic, I just used the standard pinouts and connections that I found in the example code.
From there, it was as easy as reading the values and sending each piece of data as its own byte in the radio transmission. Fortunately for me, the code was basically already written in the example, and all I had to do was add the code to read the buttons and joysticks!
I hope you were able to learn something from this post. There is more information on the technical details of the circuit covered in the video linked in this blog. Until next time, my name is Will Siffer, and I am the Digi-Key ambassador for Purdue University. I hope you have something to be curious about today.