Mfr Part # 2488
METRO ATMEGA328 W/HDR EVAL BRD
Adafruit Industries LLC
License: See Original Project
Courtesy of Adafruit
Guide by Anne Barela
Overview
Have you ever wanted to create your own content? Well, now you can with Adafruit Playground! The Adafruit Playground allows any Adafruit account holder to curate their own custom content that is publicly available. Content can be anything from interesting information about yourself, to posts like this author did on a short project:
Playground posts can be short how-to notes to detailed instructions on teaching a NeoTrinkey Morse code, like this note from mrklingon:
Playground posts are excellent for documenting projects, workshops, hacks, mods, and more.
This guide helps you understand the writing tools available and suggestions on content.
The possibilities are endless! Adafruit and the world look forward to seeing what you create.
REMINDER: All content posted is public.
Accessing Your Notes
Click on the Learn tab in the upper left of the Adafruit.com website.
Make sure you are logged in and then click on Playground in the black header bar on the learn.adafruit.com screen. The Adafruit Playground option is not available when in the Adafruit Shop: you need to be in Learn for this option to appear.
This will take you to adafruit-playground.com, where Adafruit Playground posts are available.
The default page has Featured Notes, a list of Playground posts which users have chosen to share with the community.
Sharing your notes
To create your own notes, your page URL is adafruit-playground.com/u/[your-username]. You can click the My Playground button or the link u/your [username] in the upper right to get to your own space.
Posting Guidelines
Personal information is not to be put in notes. The content of Adafruit Playground is governed by Adafruit's Terms of Service, which is subject to change.
Creating a New Note
On the Adafruit.com site, click on the Learn tab to enter the Adafruit Learning System (see above.)
Click on Playground in the black header portion.
If you have any existing notes, they will display. If you do not, you may create a new Note here. Simply enter the title when prompted.
To edit an existing note, click the edit button but the title.
Editing a Note
Clicking new or edit will bring you to the editor where you can start building you note element by element!
If you cannot interact with the toolbar and your Editor Status is labeled as connecting, please refresh the page after a few seconds.
Please use good judgment when posting. No personal information, images of others without their permission, lewd content, etc.
All content is subject to Adafruit's Terms of Service, which is subject to change.
Showing off your notes
Once you have your note somewhere where you want to share it, you can request for it to show up on the Adafruit Playground front page. To do so, navigate to your notes edit page and toggle the show-off toggle.
Once approved your note will appear on the front page of the Adafruit Playground!
Understanding the Editor
Elements are what makes the Adafruit Learning System editor so unique and easy to use. You can rapidly build pages by adding one element after another until each page is completed.
This is what the elements bar looks like. You can add any of the above elements to your guide. We will go over each element and explain how and when to use each.
After you add an element a button bar like this will appear above and below the element so that you can insert new elements anywhere. Click on the arrows for the button bar to appear.
You can also reorganize element simply by dragging them around.
Please use good judgment when posting. No personal information, images of others without their permission, lewd content, etc.
All content is subject to Adafruit's Terms of Service, which is subject to change.
Text Element
The text element is pretty straight forward. You can change the size of the text by selecting H1, H2, or Normal text from the dropdown on the far left. Normal text is set by default. The rest of the buttons are, from left to right:
Make sure to click the SAVE button below the text box to continue.
Cancel out of the text box, or open and delete an entire text box with the CANCEL and DELETE buttons.
Media Element
You can add images with the Media element. There are two ways to add an image to your page. You can upload a gif, png, or jpg. Or you can add the image location via a URL.
Guidelines
Images may be used in user pages. Want to show your project, or provide a picture of yourself (or even your pet)? All good. Images should be < 3MB in size each.
Please be judicious in posting images. No personal information, images of others without their permission, lewd content, etc. All images are subject to Adafruit's Terms of Service.
Again, if a picture belongs to someone, is copyrighted, or the licensing belongs to someone else, please do not post it in User Pages.
Code Element
The code element is used when you want to paste in bits of code, like so:
void loop() {
  uint8_t red, blue;
  float temp = mlx.readObjectTempF();

  if (temp < COLDTEMP) temp = COLDTEMP;
  if (temp > HOTTEMP) temp = HOTTEMP;

  // map temperature to red/blue color
  // hotter temp -> more red
  red = map(temp, COLDTEMP, HOTTEMP, 0, 255);
  // hotter temp -> less blue
  blue = map(temp, COLDTEMP, HOTTEMP, 255, 0);

  colorWipe(strip.Color(red, 0, blue), 0);

  delay(50); // can adjust this for faster/slower updates
}

// Fill the dots one after the other with a color
void colorWipe(uint32_t c, uint8_t wait) {
  for(uint16_t i=0; i<strip.numPixels(); i++) {
      strip.setPixelColor(i, c);
      strip.show();
      delay(wait);
  }
The most important thing here is to make sure to select the right type of code you are pasting. In this case, I pasted Arduino code:
By selecting what type of code, you are pasting, it changes how the code is displayed to your readers to make it easier to read. Learn will attempt to detect the language if auto detect is selected.
Embed Element
The Embed Element is how you add YouTube and Vimeo videos, and GitHub Gists to your guide.
Embedding videos or Gists couldn't be easier. All you need to do is get the URL of the page that the video is on and paste it into the Embed Element text box.
Dump the entire URL into the text box like shown below and click SAVE:
While you are in the editor, you will see the embed URL, but your readers will see the full video. This is what you will see in the editor:
This is what your readers will see in the front end:
You can always click the preview link in the right sidebar to view what your readers will see, even if you haven't published your guide.
Alert Element
The Alert Element is an easy-to-use element that is designed to grab your reader's attention. Enter in a short sentence and click SAVE.
This is what an alert looks like. It is sure to grab your reader's attention!
Just remember to use them sparingly, and only for the most important reminders that you need to burn into your reader's brains. The more of these you use, the less impact they will have.
Collapsible Element
The Collapsible Element has a bolded title and indents collapsible content. This element is commonly used to create Frequently Asked Questions (FAQ) segments.
All you need to do is enter in your question in the smaller text box at the top, then enter in the answer to that question below. When done, the element will look like this on the front end:
What is Adafruit's Ask an Engineer?
From the electronics enthusiast to the professional community -- "Ask an Engineer" has a little bit of everything for everyone. If you're a beginner, or a seasoned engineer -- stop in and see what we're up to! We have demos of projects and products we're working on; we answer your engineering and electronics questions, and we have a trivia question + give away each week.
Button Element
The Button Element allows you to create different colored buttons. These are typically used to link to a downloadable media file, or to send someone to another site like GitHub.
First type in what you want the button to say, and then enter a link. You can choose between multiple button colors. Choose wisely! Here is an example of what buttons look like:
GitHub Latest Release Links
The button element has one further feature that allows it to process release links for GitHub releases. If you provide it with a fairly specific URL, and then maintain consistency in naming your releases, it will always link to the latest version in your GitHub repository.
The link structure is as follows:
Example:
https://github.com/adafruit/circuitpython/releases/latest/adafruit-circuitpython-arduino_zero-*.bin
The extension is optional, but the wildcard for the version is required.
Example button:
Product Element
The Product Element is used it highlight a product in the middle of the guide and allow a reader to quickly and easily add that product to their shopping cart.
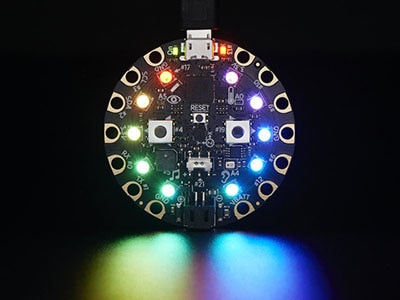
Just search for an Adafruit product by name or with the PID.
If I do a search for Adafruit METRO 328, it will open a list of matches. Click on the correct match and it will load a featured product into your guide like this:
Markdown Element
If you are already familiar with the Markdown language, the Markdown element is self-explanatory. It is simply a blank box that you can either write Markdown, or more often paste in Markdown from a separate editor.
Part Element
The Add Parts Element is also known as the parts list maker. This element is great for making lists of not only Adafruit parts, but also for adding parts that need to be purchased from other vendors.
Start by clicking the Add Parts Element. You will then be asked to give the part a name, enter a part URL, a part description, and how many the reader will need to buy.
The Part Name is the name of the part, and also the clickable link. For the Part URL, you just need to paste in either an Adafruit URL, or a third-party URL like Amazon. If it is an Adafruit URL the system will automatically allow people to instantly add that product to their shopping cart. If it is a third party, they will need to click the buy now button which will open the part URL into a new tab. The part description is a good spot to put how that part will be used in that project. Last, click the quantity dropdown to let the reader know how many of that part they should buy.
For example, if I fill in this:
Click save and it will turn into this:
Just keep choosing the Add Parts Element to add on to the parts list. Add a few parts or a whole bunch of parts to create lists like this:
Guide Element
The guide element allows you to feature an Adafruit-authored guide and an optional page. To feature a guide, select the 'guide' element from the button bar, you will then see a prompt like the image below. Then select the guide and page you wish to feature.
The resulting guide element will look like the below image.
Pinning a Note
You can also pin one Note on your playground. A pinned note is the note you want everyone to see first when they visit your Playground. This is often used to pin your personal information or best tutorial to the top of your list of notes found at "u/[username]" and "u/[username]/pages".
Below is how a pinned note appearing to everyone who views your page.
To pin a note, navigate to the note edit page and click the 'Pin Note' button on the right-hand side of the page.
Reporting a Note
Did a user put something that you wish to report to Adafruit management? There is a link for that. Click the "Report Note" link. And fill out the pop-up box and be specific as to why the user is being reported.
Please do not use the report feature for trying to communicate with a specific person (they are not forwarded to the user.)
Your report will be reviewed. You will not be notified as to the outcome.
An Example Biography Page
Below are the steps to create a typical Note. Feel free to make your own designs of course, but if you want to get started, here is step-by-step.
You can see the finished note here.
Page Name
Whenever a new page is made, you will be prompted for a name. If you want, type your first and last name. Or if you prefer to remain a bit anonymous, type just your first name.
In the example below, I typed the 'About'.
After typing in the name, click Create and you will get a "blank" page similar to below:
First, I'll insert a picture myself. I select a Media Element. If you don't want a picture, skip to adding a text box below.
You can select a picture from a file on your computer or a web address/URL to a picture on the internet. I select a file. NOTE: the file size of either must be < 3MB. If you want a smaller picture, edit it prior to uploading.
The editor will insert the image centered on the screen.
Next is some text about the user. I'll type some information about me as an example. Select the Text element and type the text you want.
You can use different font attributes by selecting them at the top of the text box. Click "..." to see more than can be displayed.
That's a good start. It can always be edited or augmented later. No more Elements are desired.
You can then preview the page by selecting View Note on the right.
Also make sure to check out the preview on "u/[:username]/pages."
Edit the page if the preview doesn't suit you. Click on any element to make changes. You can click on the picture to change it. You can click on the text box to modify the text. Preview after your changes if you wish. Elements can be deleted by selecting the element and clicking Delete.
There is no save - once an element is completed, it's on the page.
Reporting an Issue with the Editor
If you are using the editor and encounter an issue, you can report it in our forums.
Adafruit Playgrounds Notes Forum
When reporting an issue please leave as much detail as possible. Please leave a link the page with the issue and a description of the steps you took to produce the issue.
This forum is only for reporting issues with the editor. Any other content will be directed elsewhere.