My Journey Learning Hardware as a Computer Science Student
2025-08-25 | By Shruti Garg
Introduction
As someone who loves STEM, math, and challenges, I decided to challenge myself and apply to a role that involves hardware projects, something I was scared to work with. I have worked on engineering projects in my classes, but working on projects in a real-life work setting is a different experience.
When I got hired for the Technical Marketing Engineer role, I realized quickly how much I will learn during my job. From the hardware parts, how they work, and being able to apply it to the project. I started using resources to get a better understanding of various parts, from networking in my team, researching, and watching videos.
Start of my internship
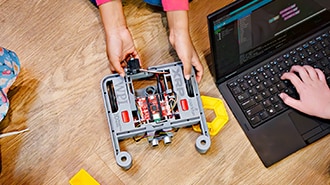
My very first project was having the XRP draw out the Ohio State Logo. Even though I didn’t have a lot of background in robots, being motivated and determined to learn how to use the XRP was crucial in learning something new. I learned how to use the XRP and how to code in MicroPython and got started on the Ohio State logo project.
As I learned MicroPython, I realized how difficult it can be to work with the XRP as there could be errors in your code or with the hardware of the XRP. I worked on making sure that the XRP would drive smoothly and be able to draw the Ohio State Logo on the whiteboard. After trial and error, I completed the project and got the robot to draw the Ohio State logo. A detailed tutorial of this project can be found here: https://www.digikey.com/en/maker/tutorials/2024/ohio-state-logo-made-by-the-xrp.
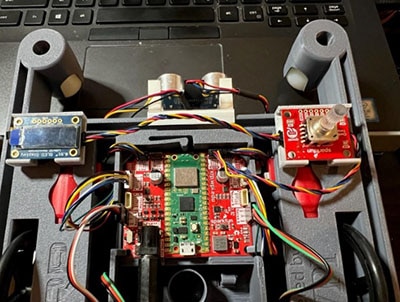
The next project was using the NeoKey for computer shortcuts. This was not as challenging since there was code out there for me to use, and then I could edit the code to perform the shortcuts I wanted. I learned how to assemble a NeoKey and what parts are involved in making the NeoKey. This was a fun, short project, where I could incorporate any shortcuts I wanted, in this case I used shortcuts for Microsoft Teams so that one could end the call, turn the camera on/off, mute/unmute, etc.
 Picture of NeoKey
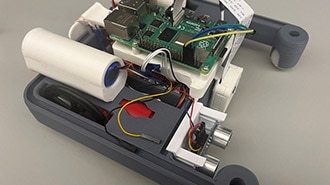
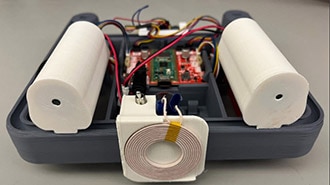
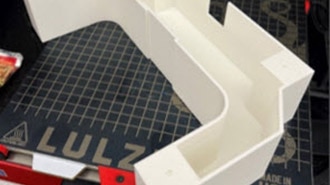
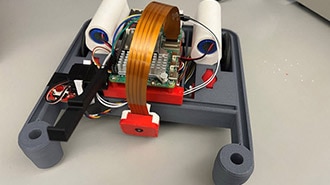
The next big project that we worked on was the wireless charging for the XRP Robot, which was one of the most challenging parts to understand in terms of the hardware components. There was a lot involved in making the wireless charger, from learning how the electricity would flow, what type of coils and batteries to use, and how to put it all together. With the help of online resources and my colleague, I was able to get a decent understanding of the wireless charger, and the circuitry involved.
A little overview about the circuitry:
The wireless charger includes a transmission board, which is what provides the voltage, and a Li-Ion charger that is used on the XRP. A more detailed writing about the works of the wireless charger can be found on maker.io as well.
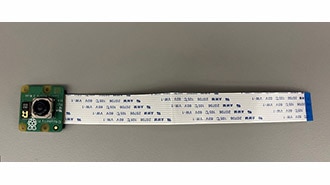
The next part of this project is object detection, but using the Raspberry Pi for object detection. This was a challenge as I had never used a Raspberry Pi before and had to learn on-site. Through research and collaboration with colleagues, I learned to set up and use the Raspberry Pi.
After being able to use the Raspberry Pi and knowing how to use the Pico board from my previous XRP projects, I was able to work with sending data from the Raspberry Pi to the Pico.
Once we got this to work, we worked on object detection for the XRP to detect baskets. This was another big learning curve; learning AI and working with it on the XRP was a challenge. Through trial and error, researching, and experimenting with different boards, we figured out a plan on using object detection to first detect humans, and then detect baskets by training the model. This was a very challenging project, as there were many trials and errors to get the robot to detect the basket. Through this, I learned a lot about how important details and precision are and how to apply these skills to my future career.

Tips on Getting Started
To get started with any of these projects, I recommend starting with the basics. Python is a great way to get into coding, and using the XRP to start basic coding, such as drivetrain.straight() or def rotate() will help you get started with figuring out how to move the XRP. It’s okay not to know everything and to learn as you go. The best way to learn is through trial and error. All of these projects took several trials and would fail at first, but being consistent with testing and fixing errors is the best way to approach any of these projects.
Reflection
This internship has taught me that I don’t need to be an electrical engineer or be a master at circuits to be in this role. Coming into this internship, I had a stronger background in coding than hardware, and when I started my projects, I had to learn a lot about these different boards and what they do. Just putting my mind into the project and asking questions often helped me be successful in my projects.