Using Bluetooth Low Energy to Connect Wearable Wireless Sensors to the Internet of Things
Contributed By DigiKey's European Editors
2017-05-11
The Industrial Internet of Things (IIoT) relies heavily on sensors to collect data from a portable, wearable system to monitor movement, pressure, humidity and many other characteristics that are then fed back to the cloud for processing.
Modules provide a quick and easy way to add sensors to a design, but there are often challenges in connecting these modules up to the rest of the network. There are many different ways to make this connection, but one of the easiest is the latest Bluetooth Low Energy (BLE) technology. BLE transceivers have reduced in size with chip scale packaging, making them small enough to easily fit alongside the various sensors in an IIoT design.

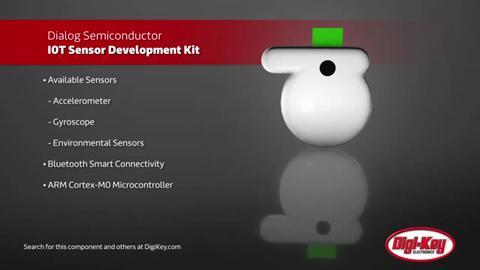
Figure 1: The Dialog IoT sensor dongle.
Wireless transceiver designer Dialog Semiconductor has done just that with its SmartBond IoT Sensor Development Kit to make developing motion and environmental sensing applications easy.
Combining the wireless transceiver with the sensors in a dedicated module has allowed Dialog to produce the world’s lowest power 12 Degrees-of-Freedom (DOF) wireless sensor module. This reduces system size and cost and includes all essential hardware and software to speed up IoT system development. By combining all the elements, Dialog is able to include code to fuse the data from the various sensors together to provide more meaningful outputs rather than just streams of data. This helps to reduce the load on the transceiver and reduce the memory requirements and current consumption, increasing the battery life and reducing the development time.
This system optimization is only possible through the development of the complete module, which combines the BLE transceiver and ARM® Cortex®-M0 processor with an accelerometer, gyroscope, magnetometer and environmental sensors from Bosch Sensortec on a board measuring just 16 x 15 mm.

Figure 2: The IoT module combines three sensors and a Bluetooth transceiver for measurements with 12 Degrees-of-Freedom.
It also includes SmartFusion, Dialog’s unique smart sensor fusion software library for data acquisition, sensor calibration and fusion. This allows the module to use just 4.5 Kbytes of ROM, 500 bytes of RAM, and determines the data rates of the sensors.
The module uses the DA14583 low-power Bluetooth low energy SoC alongside the BMI160 6-axis inertial measurement unit operating at 12.5 Hz, the BMM150 3-axis geomagnetic field sensor at 10 Hz, and the BME280 integrated environmental unit that measures pressure, temperature and humidity at 0.5 Hz.
All this requires a relatively low 0.5 MIPS of performance from the Cortex-M0 for combined magnetometer auto-calibration + 9 DOF sensor fusion with the gyroscope and accelerometer in the IMU operating at 100 Hz and the magnetometer at 10 Hz.
The fused orientation data is streamed via the BLE interface to an IoT sensors app running on Android and iOS that allows visualization of the sensors, orientation data and configuration.
The DA14583 has a fully integrated radio transceiver and baseband processor and is used as a standalone controller in the module. It has 1 Mbit of Flash memory for storing Bluetooth profiles and custom application code, which can be updated over the air (OTA). The qualified BLE protocol stack is stored in a dedicated ROM, and all the software runs on the ARM Cortex-M0 processor via a simple scheduler.
The BLE firmware includes the L2CAP service layer protocols, Security Manager (SM), Attribute Protocol (ATT), the Generic Attribute Profile (GATT) and the Generic Access Profile (GAP).
The transceiver provides a 93 dB RF link budget with a single-ended 50 W matched RFIO interface to a ceramic chip antenna. All the RF blocks are supplied by on-chip low drop-out regulators (LDOs) and all the RF blocks have their own bias control.
The Bosch Sensortec BMM150 is a standalone geomagnetic sensor that measures the magnetic field in three perpendicular axes for cell phones, handhelds, computer peripherals, man-machine interfaces, virtual reality features and game controllers. It includes its own processor that converts the output of the geomagnetic sensor to digital results which can be read over the industry standard digital interfaces (SPI and I2C).

Figure 3: The BMM150 geomagnetic sensor from Bosch Sensortec provides compass and position data.
The wafer level chip scale package (WLCSP) has dimensions of only 1.56 x 1.56 x 0.6 mm, and operates from 1.62 to 3.6 V with a VDDIO voltage range of 1.2 to 3.6 V.
The BME280 is a combined digital humidity, pressure and temperature sensor housed in a metal lid LGA package that measures 2.5 × 2.5 mm with a height of 0.93 mm. The humidity sensor provides a fast response time and overall accuracy over a wide temperature range while the pressure sensor is an absolute barometric pressure sensor with extremely high accuracy and resolution and significantly lower noise than previous versions. The integrated temperature sensor has been optimized for lowest noise and highest resolution and the output is used for temperature compensation of the pressure and humidity sensors and can also be used for estimation of the ambient temperature. The sensor provides both SPI and I²C interfaces, and operates from 1.71 to 3.6 V with a VDDIO voltage range of 1.2 to 3.6 V.
The sensors have to be carefully placed on the module to avoid problems. The magnetic sensor should be 3 mm to 5 mm away from the coin cell battery and 10 mm away from high current tracks, such as those in the vicinity of DC-DC converters and inductors, and ideally 3 mm to 4 mm from power rails. The coin cell itself is placed underneath the PCB to give the maximum possible distance from the sensors to avoid possible interference.
The module alone consumes an average of 11 µA in sleep mode, rising to 110 µA in advertising mode when it is looking for a host to connect to. When connected, with no movement and all sensors active, the average current consumption is 560 µA. The highest power consumption of 1.35 mA (average) is measured when the module is moving.
|
Figure 4: The power figures for the sensors within the IoT module.
Dialog has deliberately made it simple to connect to the module via an Android app on the Play Store or an iOS app on the App Store. These apps connect automatically to the board and display the data from the sensors.
For programming the module with a development environment such as Evothings, the libraries are available on Github. This contains a JavaScript library that is used to communicate with the module via a Cordova app that contains the Bluetooth Low Energy plugin or a new application in the Evothings workbench.
Initialization and connecting
Include the iotsensor.js file
Copy
<script src="libs/evothings/dialog-iotsensor/iotsensor.js"></script>
Create a new iotsensor object by specifying the project type (RAW or SFL) you are using.
Copy
// Device type we are connecting to, can either be RAW or SFL
var type = evothings.iotsensor.SFL;

// Create a new IoT Sensor SFL instance
var iotsensor = evothings.iotsensor.createInstance(type);
The new IoT sensor instance is then connected to the sensor using BLE. The library provides the option to automatically connect to the closest IoT sensor available using the connectToClosestSensor(scanTime, callbackFun, disconnectFun) function.
Copy
// Scan for 3000ms
iotsensor.connectToClosestSensor(
  3000,
  function()
  {
    console.log('We are connected!');
  },
  function(error)
  {
  console.log('Disconnect error: ' + error);
  }
);
It is also possible to connect to a device manually.
Copy
iotsensor.startScanningForDevices(
    function(device)
    {
        console.log('Device found: ' + device.name + ' RSSI: ' + device.rssi);
        if(iotsensor.isIoTSensor(device))
        {
            // We have an IoT Sensor, let's connect!
            iotsensor.connectToDevice(
                device,
                function()
                {
                    // Connected and device is ready
                },
                function(error)
                {
                    console.log('Disconnect error ' + error);
                }
            );
        }
    }
);
Sensor data
The IoT sensor provides a report on which sensors are available and the firmware version of the device connected. It is good practice to use these options to determine the capabilities of the device.
Copy
console.log('IoT Sensor device info:'
              + '\n Device model:  ' + iotsensor.getDeviceModel()
              + '\n Firmware:      ' + iotsensor.getFirmwareString()
              + '\n Accelerometer: ' + iotsensor.isAccelerometerAvailable()
              + '\n Gyroscope:     ' + iotsensor.isGyroscopeAvailable()
              + '\n Magnetometer:  ' + iotsensor.isMagnetometerAvailable()
              + '\n Barometer:     ' + iotsensor.isBarometerAvailable()
              + '\n Temperature:   ' + iotsensor.isTemperatureAvailable()
              + '\n Humidity:      ' + iotsensor.isHumidityAvailable()
              + '\n Sensor Fusion: ' + iotsensor.isSflAvailable());
In order to receive data from one of the sensors, a callback function must be set. This function is called every time new data is available from the sensor. Once the callback is set, the sensor can be enabled.
Copy
// Set the accelerometer callback and turn on the accelerometer
iotsensor.accelerometerCallback(handleReply)
  .accelerometerOn();

function handleReply(data)
{
  console.log('Accelerometer: ' +
              '\n x: ' + data.x +
              '\n y: ' + data.y +
              '\n z: ' + data.z);
}
Settings
The settings of the device can be divided into three categories: basic, sensor fusion and calibration.
The configuration.BASIC object is an array and contains eleven different settings to control the sensors. These objects contain all possible values that can be written to the device.
Copy
// Change accelerometer range to 16g
iotsensor.configuration.BASIC.ACCELEROMETER_RANGE = iotsensor.enums.ACCELEROMETER_RANGE._16g;

// After changing a settings, set the basic configuration in device
iotsensor.setBasicConfiguration();

// Optional - Store basic configuration in flash
iotsensor.storeBasicConfigurationInFlash();

// Optional - Retrieve new settings from device
iotsensor.readBasicConfiguration(
    function(data)
    {
        console.log('Settings: ' + data);
    }
);
Sensor fusion
Changing the sensor fusion coefficients works the same as changing the basic configuration:
Copy
// Change Beta A to 2000
iotsensor.configuration.SFL_COEF.BETA_A = 2000;

// Set basic configuration in device
iotsensor.setSflCoefficients();

// Retrieve sensor fusion coefficients from device
iotsensor.readSflCoefficients(
    function(data)
    {
        console.log('Sfl coefficients: ' + data);
    }
);
Calibration
Changing the calibration coefficients and calibration control flag settings uses the configuration.CAL_COEFandconfiguration.CAL_CONTROLobject.
Copy
// Set Q_FORMAT
iotsensor.configuration.CAL_COEF.Q_FORMAT = 12;

// Set offset vector
iotsensor.configuration.OFFSET_VECTOR = new Int16Array([100, 100, 100]);

// Set matrix
iotsensor.configuration.MATRIX = [new Int16Array([100, 0, 0]), new Int16Array([0, 100, 0]), new Int16Array([0, 0, 100])];

// Set Calibration coefficients in device
iotsensor.setCalibrationCoefficients();

// Retrieve calibration coefficients from device
iotsensor.readCalibrationCoefficients(
    function(data)
    {
    console.log('Calibration coefficients: ' + data);
    }
);
// Set calibration control flag byte 2 (CONTROL_FLAG[0])
iotsensor.configuration.CAL_CONTROL.CONTROL_FLAGS[0] = 28 // 0011100

// Set calibration control flags in device
iotsensor.setCalibrationControl();

// Retrieve calibration control flags from device
iotsensor.readCalibrationControl(
    function(data)
    {
        console.log('Calibration control ' + data);
    }
);
The function storeCalibrationAndControl() then stores all the settings for the sensor fusion and calibration in the flash memory of the Bluetooth transceiver.
Conclusion
Dialog Semiconductor has combined sensors with 12 degrees of measurement into a wireless module for the industrial internet of things and wearable designs. The low power consumption along with the latest Bluetooth Low Energy technology provides an easy way to get started on sensor module developments via Android and iOS apps. Libraries for sensor fusion allow the raw data to be combined to reduce the transmitted data, the power consumption and the memory footprint of the module, reducing cost and complexity. These libraries can also be used in development environments such as Evothings for the development of more sophisticated code for specific applications.
Disclaimer: The opinions, beliefs, and viewpoints expressed by the various authors and/or forum participants on this website do not necessarily reflect the opinions, beliefs, and viewpoints of DigiKey or official policies of DigiKey.