Select and Apply the Right Low-Power Microcontroller for the IoT
Contributed By DigiKey's North American Editors
2017-12-13
Energy consumption is critical for battery-powered, connected devices to maximize the time between battery changes, or even allow devices to be run off ambient energy sources. While many embedded systems developers are well versed in optimizing code, conserving energy for Internet of things (IoT) devices requires a more comprehensive approach.
Such an approach must not only factor in the memory size, MCU performance, and power consumption; it must also consider the radio, analog circuits, power converters, and sensors. While all contribute to the overall energy profile of the system, the major contributor that developers also have the greatest control over is the microcontroller.
This article will describe how to go about selecting a low-power microcontroller for the IoT, and what to look for with regard to on-board peripherals. It will also show how to use power monitoring tools, and provide tips and tricks for optimum power and performance.
Selecting a low-power microcontroller architecture
Selecting a low-power microcontroller starts with identifying the right processor core that the microcontroller should use. There are many proprietary microcontroller cores available in the industry today, but a good place to start is with the ARM® Cortex®-M microcontrollers. These microcontroller cores are supported across the industry by multiple vendors, making for a robust ecosystem for support and resources.
To minimize energy consumption, there are two factors to consider early on: performance and energy efficiency. These can be difficult to quantify for a microcontroller, but there are two benchmarking standards that developers can use: EEMBC’s CoreMark and ULPmark.
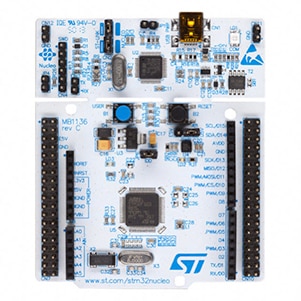
CoreMark measures the processing power that is available on a microcontroller where the higher the value, the more processing power. For example, the STMicroelectronics STM32L053 processor, which can be tested from a STM32L053 Nucleo Board, has a CoreMark value of 75.18. Another STMicroelectronics part, the STM32F417, has a CoreMark value of 501.85. At first glance, a developer might think it’s a good idea to go with the STM32F417 since it appears to have far superior performance. However, there are few more things to think about before making a decision.

Figure 1: The STMicroelectronics STM32L053 Nucleo Board is based on an ARM® Cortex®-M0+ core designed for low-power, resource-constrained applications. (Image source: STMicroelectronics)
First, the CoreMark simply tells a developer how many benchmark iterations it is able to perform in a second. Processors running at different clock rates will yield vastly different values. A better comparison for processing power would be to compare the CoreMark/MHz. In this case, the STM32L053 processor yields a result of 2.35 while the STM32F417 yields a result of 2.98 (source: EEMBC). The two processors are very close in efficiency.
Second, a developer needs to look at the core architecture. The STM32L053 is based on an ARM Cortex-M0+, which is optimized for low power consumption and has a minimal number of debugging modules. In addition, all the bells and whistles that are found on high-performance processors, that also draw the most power, have been removed.
The STM32F417, on the other hand, is based on an ARM Cortex-M4, which is designed to be a high-performance processor and runs at a clock speed of 168 MHz, versus 32 MHz. That’s nearly five times the clock speed for only a 26% increase in CoreMark/MHz.
The ULPmark measures how efficiently the microcontroller is able to perform operations such as calculations and memory operations. The latest releases even include peripheral efficiency, providing a developer with a good overview on how efficient the processor is overall from an energy usage standpoint.
Finding the right peripheral mix
The microcontroller core is only the first consideration that a developer should take into account when selecting a low-power microcontroller. Another consideration should be the on-board peripherals. The peripherals make a major difference in how much energy is being drawn by the CPU. Developers want to make sure that they select parts that have low-energy peripherals that are as automated as possible.
To start, developers should be looking for devices with more than just a single direct memory access (DMA) channel. The DMA allows a developer to move information around the internals of the microcontroller without the CPU. This means that the CPU can either be doing something else like running application code, or it could be turned off and in a deep-sleep mode to conserve energy. Meanwhile, the DMA channel is being used to move data from peripheral to memory, memory to peripheral, and even between different areas in memory.
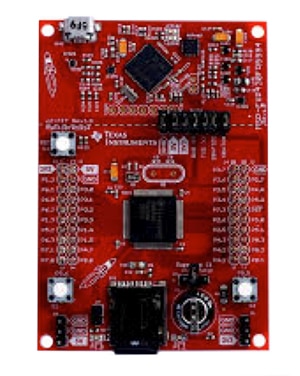
A great example of a part that is designed for low-power operation is Texas Instruments’ MSP430FR5994 which can be found on the MSP430FR5994 Launchpad development kit. The MSP430FR5994 has a built-in DMA controller that has six individual channels that can be working behind the scenes simultaneously.

Figure 2: The Texas Instruments MSP430FR5994 Launchpad development kit contains several low-power peripherals such as a six-channel DMA controller, low-energy accelerator for signal processing, and multiple low-power modes. (Image source: Texas Instruments)
Another example is to look for a plethora of low-power modes. A modern microcontroller will have various power modes that will set the CPU and the peripherals into different states, ranging from a simple sleep state, all the way down to a deep sleep where the microcontroller is nearly powered off. In these deep-sleep modes, the entire microcontroller can draw just a few dozen nanoamps.
When examining a microcontroller’s low-power states, it is useful to also examine the tool chains and ecosystem capabilities. Setting up and configuring low-power modes and the events that wake them up can be challenging and time consuming. Newer microcontrollers, such as the Synergy microcontrollers from Renesas, contain configuration software within their development environment that allows a developer to configure these modes with just a few simple clicks. For a low-power application, a developer would be interested in checking out the S124, 32-bit MCUs with either 64 or 128 Kbytes of flash. To kickstart development with these devices, the Synergy DK-124 development board is available.

Figure 3: The Renesas Synergy DK-124 development board features a low-power analog comparator, multiple sleep modes and low-power operation. (Image source: Renesas)
Measuring and verifying microcontroller energy consumption
Selecting a low-power microcontroller is only the first step in ensuring that a system can reach its lowest energy potential. In order to truly use minimum energy consumption, developers need to carefully monitor their microcontroller’s energy consumption throughout the entire software development process. There are several different methods that a developer can use to monitor the microcontroller’s energy consumption, including current probes and energy-aware debuggers.
Current probes do nothing more than measure the voltage across a shunt resistor and then calculate the current based on the voltage and the resistance of the shunt. This solution works great if you want to measure the entire system’s current draw, but if you really want to correlate what the microcontroller is doing with the energy consumed, an energy-aware debugger is the way to go. This allows a developer to determine which code areas may require further optimizations or rework.
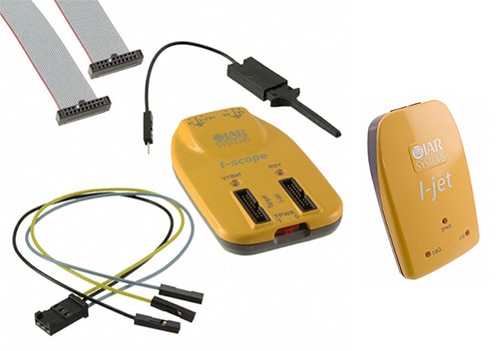
There are several different energy-aware debuggers out on the market that work with ARM Cortex-M™ microcontrollers such as the IAR Systems I-Scope power probe for the I-Jet debugging probe (Figure 4).

Figure 4: When connected to the IAR I-Jet, the I-Scope can be used to measure system voltage, current and microcontroller current, which is then all correlated back to the program counter (PC) to determine which code areas are drawing the most energy. (Image source: IAR Systems Software)
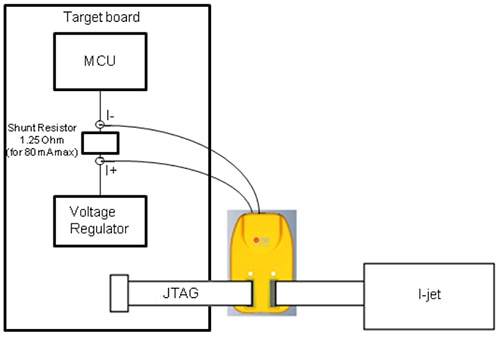
The I-Scope tool has an internal voltage monitor based on a differential amplifier. It measures the voltage drop across a shunt resistor that is in series with the microcontroller power rail. This allows the I-Jet debug probe to measure the voltage while simultaneously sampling the program counter (PC) in the microcontroller’s CPU core (Figure 5).

Figure 5: The I-Scope (highlighted in yellow) works with the I-Jet debug probe to correlate current across the shunt resistor to the code that’s executing at any given moment. (Image source: IAR Systems Software)
The program counter tells the probe exactly where the application is in its execution process. Correlating the PC counter information and the current measurement allows an application energy profile to be generated that a developer can use to optimize and verify their code.
Tips and tricks for designing a low-power device
Finding the right microcontroller and monitoring hardware can get a developer only so far into designing a low power device. The trick at this point is knowing how to get the most from that microcontroller to minimize energy consumption. In order to do this, there are several general tips that a developer can follow. These include:
- Create a battery budget up front with minimum, maximum and average power consumption estimates.
- Use the low-power timer to drive any internal system tick for a scheduler or RTOS.
- Put the CPU into sleep mode as often as possible (don’t forget to take wake and power-down times into account for real-time applications).
- Make the system event driven. Interrupts can be used to wake the system, perform its function, and then go back to sleep immediately.
- Integrate the DMA controller and any automated peripherals into the software architecture to allow “parallel” processing.
- Manage the microcontroller clock frequency as needed to get extra energy savings.
- Monitor software energy consumption and don’t be afraid to experiment with different architectures and configurations. Odds are, the first attempt will not be the lowest possible configuration.
- If available, use the interrupt’s sleep-on-exit feature, which will sleep the processor at the end of an interrupt and save a few dozen clock cycles on each event.
Conclusion
Selecting a low-power microcontroller for an IoT device can be tricky. As we have seen, there are multiple considerations that need to be taken into account, ranging from the microcontrollers architecture through its on-board peripheral capabilities.
Once a low-power microcontroller is selected, there is no guarantee that a developer will reach minimum energy consumption. The next stage is careful software architecture design and monitoring of the software’s performance throughout the development life cycle. Only then will a developer be able to fully capitalize upon the chosen microcontroller’s low-power characteristics and features.

Disclaimer: The opinions, beliefs, and viewpoints expressed by the various authors and/or forum participants on this website do not necessarily reflect the opinions, beliefs, and viewpoints of DigiKey or official policies of DigiKey.


