Rapidly Prototype and Debug a Wireless Sensing Node Using a Single Platform
Contributed By DigiKey's North American Editors
2020-01-29
From HVAC and factory automation to automotive, medical, and consumer electronics, developers of wirelessly connected sensing devices are continually challenged to iterate quickly and cost effectively, while at the same time meeting ever-growing regulatory, interoperability, and performance challenges. While it’s often tempting to design a wireless sensor product from scratch to differentiate it with respect to performance and size, it’s quicker and more cost effective to use off-the-shelf kits that are designed for rapid prototyping and development, and that have established ecosystems for support and scalability.
One such platform is Texas Instruments’ LPSTK-CC1352R LaunchPad SensorTag Kit. The kit combines a wireless microcontroller (CC1352R), sensors, multiple wireless interfaces, relatively high performance, and low power consumption—all in a small, compact form factor with a vast and well-proven ecosystem of software and tools support.
This article describes the evolving nature of wireless sensor product design and prototyping, and introduces the CC1352R SensorTag Kit and how to get started with it.
Why use a wireless sensor prototyping kit?
Wireless sensor devices present a tricky problem for designers. They need to realistically be able to last at least one to 10 years in the field before their batteries need to be replaced in order to minimize maintenance. They also need to be capable of some level of on-board processing and analysis, as doing this as close as possible to the edge of the Internet of Things (IoT) network reduces the amount of data that needs to be exchanged, which in turn reduces power consumption and makes better use of available wireless bandwidth.
Wireless bandwidth presents its own issues, as designers have to choose from among multiple wireless stacks, including Bluetooth, Thread, and Zigbee operating at sub-gigahertz (GHz) frequencies or 2.45 GHz. Each has its own advantages and disadvantages with respect to how it uses available bandwidth, power, and processing resources. Choosing from among them requires careful analysis of the application requirements with respect to data rates, range, number of expected nodes, network topology, latency requirements, duty cycle, power consumption, networking protocol overhead, interoperability, and regulatory requirements.
It’s relatively easy to pick the right interface for a fresh “greenfield” deployment; however, it’s often the case in Industrial IoT (IIoT) applications that there are already wireless networks deployed so the designer needs to decide whether to connect directly to other nodes using the same interface, or use another interface that may be better for the application, and then connect the old to the new through a gateway.
These are all application-related decision trees that designers need to work through; but when it comes to prototyping and developing an idea, it’s rarely worth designing an interface from scratch and then choosing an associated processor and sensors, not to mention the investment in time and resources for software development and integration. It’s true that “roll your own” designs can have benefits for ultra-high production volumes for mass-market designs. However, in many cases engineers designing a node for their own factory production line only need a few nodes in order to get data from some motors, a certain point on a production line, or a thermometer—so high volumes aren’t a design requirement. In such cases, a ready-made kit is perfect.
If higher volumes may be required, off-the-shelf RF modules are available that are pre-certified and regulatory compliant. These can accelerate prototyping and keep development and deployment costs down, as they come with rich firmware and software support. In these cases, designers still have to piece together the required platform processor, sensors, and associated software elements for each sensor and additional block.
This is okay when the designer already knows which wireless interface they have to use. However, when still in the consideration stage for multiple designs across multiple applications, with legacy and often non-interoperable wireless interfaces, a more integrated, flexible approach to wireless sensor prototyping and development is required.
SensorTag: A comprehensive wireless sensor prototyping platform
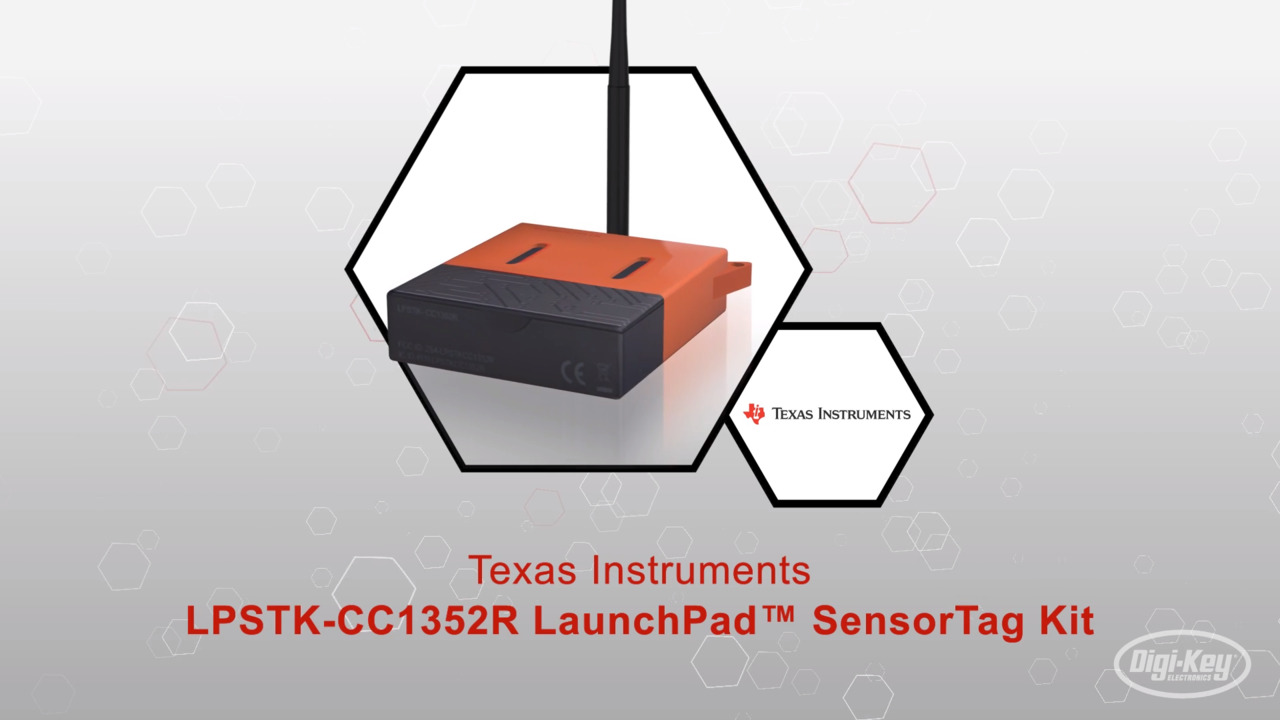
A better approach is to find an off-the-shelf platform that integrates the core elements of a wirelessly enabled sensing and processing node—with the sensors, software, and ecosystem to support a designer—while still allowing for exploration and differentiation at higher layers of the software development stack. This is what Texas Instruments (TI) offers with its LPSTK-CC1352R LaunchPad SensorTag Kit (Figure 1).
 Figure 1: The LPSTK-CC1352R LaunchPad SensorTag Kit has everything a designer needs to prototype and develop a wireless sensor application. (Image source: DigiKey, based on Texas Instruments material)
The kit is based on TI’s CC1352R multi-band wireless microcontroller (MCU), around which it has added environmental and motion sensors and software—all in a removable enclosure with an external sub 1 GHz swivel antenna, two-wire female-to-female cable, a 10-pin flat ribbon cable for a JTAG connection, and a quick-start guide. Not included, but recommended to go with the kit are TI’s LAUNCHXL-CC1352R1 SimpleLink Multi-Band CC1352R Wireless MCU Launchpad Development Kit as well as two AAA batteries, though the SensorTag can also run off a CR2032 coin cell battery using a special battery holder that can be attached to the rear of the board.
The heart of the SensorTag Kit is the CC1352R multi-band wireless MCU (Figure 2). This is part of the TI SimpleLink MCU platform, which is designed to provide all the building blocks for a secure, low-power connected topology.
 Figure 2: TI’s CC1352R multi-band wireless microcontroller meets FCC, CE, and IC certification for dual-band operation at 2.4 GHz and sub 1 GHz and forms the heart of the LPSTK-CC1352R LaunchPad SensorTag Kit. (Image source: Texas Instruments)
The CC1352R microcontroller is FCC, CE, and Industry Canada (IC) certified for dual-band operation at 2.4 GHz and sub 1 GHz, which encompasses Bluetooth Low Energy (BLE), Thread, Zigbee, IPv6-enabled low-power wireless personal area networks of smart objects (6LoWPAN), and other IEEE 802.15.4g physical layer (PHY)-based proprietary protocols, including TI’s SimpleLink TI 15.4-Stack (sub 1 GHz and 2.4 GHz). Using a Dynamic Multiprotocol Manager (DMM), it is able to run multiple protocols concurrently.
The radio’s receiver has a sensitivity of -121 dBm (decibels referenced to 1 milliwatt (mW)) in the SimpleLink long-range mode; -110 dBm at 50 kilobits/s (kbps); and -105 dBm for Bluetooth at 125 kbps (with an LE coded PHY). The maximum transmit power is +14 dBm in the sub-GHz bands, where it draws 24.9 milliamps (mA), and +5 dBm at 2.4 GHz, where it draws 9.6 mA. The device’s standby current is notable at 0.85 microamps (µA)—with full RAM retention. It is also IIoT ready with a standby current of 11 µA at 105˚C. A designer can play with various standby modes and analog-to-digital converter (ADC) sampling rates to optimize for low power. The ADC can, for example, be set to sample at 1 hertz (Hz), at which point the system draws 1 µA.
The processor at the heart of the CC1352R is based on a 48 megahertz (MHz) Arm® Cortex®-M4F core supported by 352 Kbytes of in-system programmable flash, 256 Kbytes of ROM for protocols and library functions, and 8 Kbytes of cache SRAM. It supports over-the-air (OTA) upgrades and has an AES 128 and AES 256 accelerator.
Optimized for low BOM
One of the issues RF front-end designers face is the number of additional discrete passive components that are required for filtering, impedance matching, and other functions. These increase the BOM and complicate layout. To simplify the implementation of the CC1352R, TI worked with Johanson Technology to develop a custom integrated passive component (IPC) package measuring 1 x 1.25 x 2 millimeters (mm) that brought the component count down from 23 to three (Figure 3).
") Figure 3: Working with Johanson Technology, TI developed an IPC to simplify the implementation of the TI CC1352R that brought the passive component requirement down from 23 to three. (Image source: DigiKey, from Johanson Technology material)
Figure 3: Working with Johanson Technology, TI developed an IPC to simplify the implementation of the TI CC1352R that brought the passive component requirement down from 23 to three. (Image source: DigiKey, from Johanson Technology material)
While four sensors come with the SensorTag Kit, if more or different sensors are required, they can be chosen from and quickly added using TI’s BoosterPack LaunchPad plug-in modules. The four sensors that are included with the SensorTag Kit are:
- The TI HDC2080 humidity and temperature sensor
- The TI OPT3001 ambient light sensor
- The TI DRV5032 Hall effect switch
- The Analog Devices ADXL362 accelerometer
The layout and connections to the sensors are shown (Figure 4).
") Figure 4: The SensorTag kit comes with sensors for humidity and temperature, ambient light, acceleration, and Hall effect. (Image source: Texas Instruments)
Figure 4: The SensorTag kit comes with sensors for humidity and temperature, ambient light, acceleration, and Hall effect. (Image source: Texas Instruments)
The connectors are LaunchPad compatible so that along with sensors, BoosterPack peripherals such as LCD displays, or even custom circuits can be easily connected.
Getting started with the LPSTK-CC1352R LaunchPad SensorTag Kit
To get started with the LPSTK-CC1352R LaunchPad SensorTag Kit, download the SimpleLink CC13x2 and CC26x2 software development kit (SDK). This version is validated for Rev. E devices only, so for Rev. C or earlier, use v2.30.00.xx. Once downloaded, go to the SimpleLink Academy where there are step-by-step instructions and examples.
To get sample data quickly, the kit is pre-programmed with a Bluetooth 5 (BLE5) project called Multi-Sensor that connects over a BLE connection to smartphones and tablets that have the SimpleLink Starter app for both iOS and Android. Using this initial connection, designers can start looking at sensor data, toggle LEDs, read button status, and update the firmware using OTA Download (OAD) capabilities (Figure 5). At this point, designers can also push data to the cloud from the mobile device.
 Figure 5: Designers can start experimenting with the LaunchPad SensorTag Kit over a BLE connection to a smartphone or tablet loaded with the SimpleLink Starter app for both iOS and Android platforms. (Image source: Texas Instruments)
Along with BLE, the LPSTK has two more examples: One uses the LPSTK as a Zigbee light switch; the other uses it as a sensor node in an 802.15.4 network. All three example projects are available in the SDK as follows:
- Multi-Sensor:
<simplelink_cc13x2_26x2_sdk install location>\examples\rtos\CC1352R1_LAUNCHXL\ble5stack\multi_sensor
- TI DMM sensor node:
\CC1352R1_LAUNCHXL\dmm\dmm_154sensor_remote_display_oad_lpstk_app
- Zigbee switch:
\CC1352R1_LAUNCHXL\dmm\dmm_zed_switch_remote_display_oad_app
Complementing SimpleLink and the Starter app, TI provides the SysConfig, a unified graphical user interface (GUI) tool for enabling, configuring, and generating initialization code for the various SimpleLink SDK components, including TI drivers and stack configuration for BLE, Zigbee, Thread, and TI-15.4 (Figure 6).
 Figure 6: Complementing SimpleLink, TI’s SysConfig is an easy-to-use collection of graphical utilities for configuring pins, peripherals, radios, subsystems, and other components. (Image source: Texas Instruments)
As with any system design, it’s rare that some degree of debugging is not required. For this stage, the SensorTag is designed to be used with the onboard XDS110 debugger in a LaunchPad development kit (in this case, the LAUNCHXL-CC1352R mentioned earlier), hence the inclusion of an Arm 10-pin JTAG cable and a two-wire UART cable. Once connected, these allow for full debug, programming, and UART communication. To connect the cables follow the steps below:
- Disconnect the isolation jumpers on the LaunchPad
- Connect the Arm 10-pin JTAG cable to the XDS110 OUT header on the LaunchPad SensorTag
- Connect the other end of the Arm 10-pin cable to the JTAG header on the LaunchPad SensorTag
- Connect the two-pin jumper cable to the top pins of RXD and TXD (grey wire to RXD, white wire to TXD)
- Connect the other end of the two-pin jumper to pins 12/RX and 13/TX on the LaunchPad SensorTag (grey to 12/RX, white to 13/TX)
- Connect the LaunchPad to a PC or laptop
The full setup should look something like what is shown in Figure 7.
 Figure 7: For debug, the SensorTag needs to be connected to the LAUNCHXL-CC1352R LaunchPad development kit using the Arm 10-pin JTAG cable and the two-pin UART cable, both supplied in the SensorTag kit. (Image source: Texas Instruments)
It’s worth noting that because a running image can’t update itself, an incoming OAD image needs to be stored in a temporary location while it’s being received. This temporary location can be reserved in internal flash or off chip. In either case, once the image download is completed, a Boot Image Manager (BIM), which is permanently resident on the SensorTag device, is used to determine if a new image is valid and if it should be loaded and run (based on an image header).
The BIM is particularly useful, for example, in that it allows the designer to revert to the original out-of-box image after an OAD. To do this, hold BTN-1 (left button) on power-up or during a reset and the BIM will revert to the out-of-box image (i.e., Multi-Sensor).
Conclusion
While there are many wireless interfaces to choose from when implementing a wireless sensor node, developers don’t have to spend time and resources prototyping for each interface to see which one works best for a given application. Instead, using the LPSTK-CC1352R SensorTag Kit and associated LaunchPad hardware, software, and ecosystem, designers can quickly and easily mix and match interfaces, use one or more simultaneously, and add and swap BoosterPack sensors as needed.
Disclaimer: The opinions, beliefs, and viewpoints expressed by the various authors and/or forum participants on this website do not necessarily reflect the opinions, beliefs, and viewpoints of DigiKey or official policies of DigiKey.