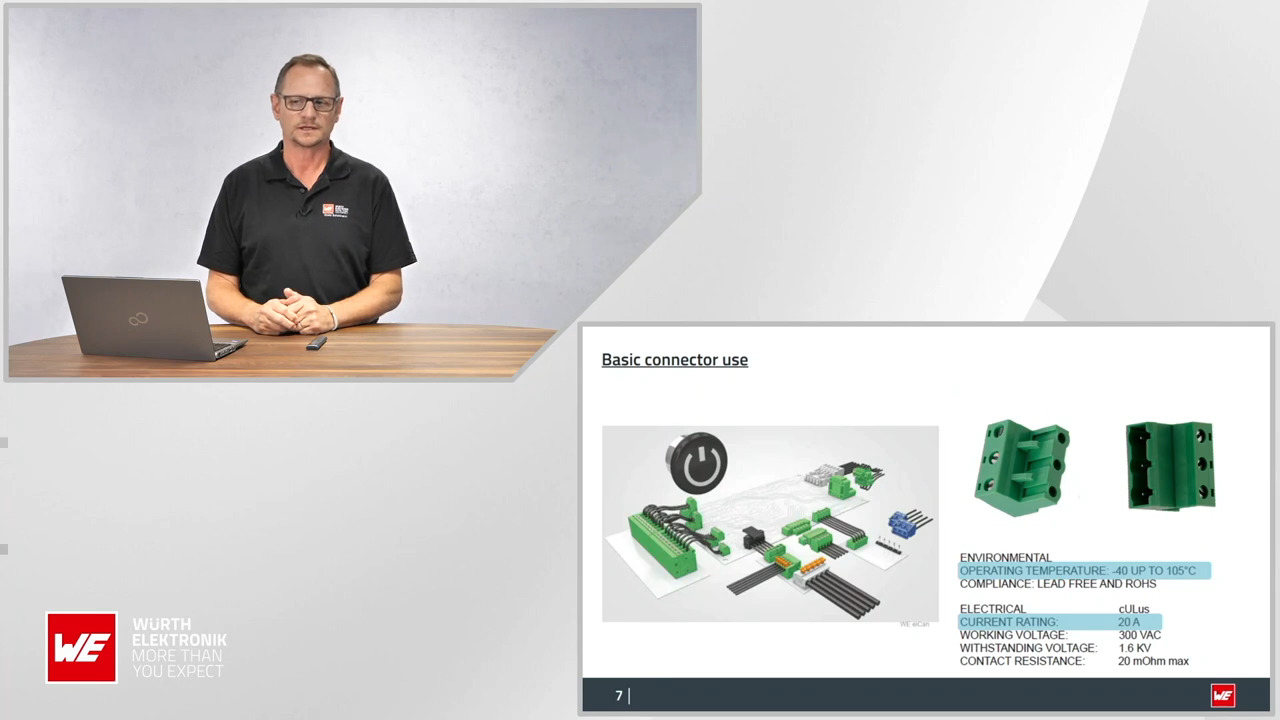
Connectors – The Basics
Contributed By DigiKey
2018-04-12
Connectors are a prevalent part of almost any electronic project. Understanding the available connectors and the specification considerations that one would need to keep in mind is important throughout the design process. You don’t want to get near the end of the project and find that you need to add one and need to adjust the project to accommodate as this can end up being costly in both time and money aspects.
When selecting a connector for your project, there are a few considerations that would need to be made when specifying the requirements for your connector. Some of the more common questions would be:
- What is the number of contacts you need the connector to have?
- How you would like or need each connector to mount?
- How and what does it need to mount to?
- What termination method would you need or want for your application?
- Do the connectors that are being used need to provide ingress protection?
- How much voltage and current would you expect the connection to see?
Number of contacts
In many cases, knowing the number of contacts required by the connector is known. However, sometimes, other needs for the overall application and the availability of the items can end up affecting the resulting selected item’s specifications.
Further consideration would also need to be given to the power that the connector will need to handle as this will affect the option that is selected. As the power handling capacity of a connector continues to increase, one may find that the total number of contacts for any package/shell size will go down. This is caused by needing more room for larger wire gauge and/or higher voltages. Some manufacturers have managed to increase the voltage ratings by adding more isolation between the contacts and the total “distance” that the electrical arc would need to travel from one contact to the next. Also, there are some connectors that have a grounding contact built into the rest of the contacts. They are longer than the others in the connector and are used to reduce/eliminate arcing between the two mating/un-mating connectors.
Also, below are some points that should be kept in mind and considered during the selection process:
- How many connectors and contacts would you need/be willing to have in order to move the power in and out of an enclosure?
- General combination types that a connector could have for the contacts
- Just power contacts
- Just signal contacts
- Power and signal contacts
- Signal + grounding contact
- If for the project only one connector can be used, one may need to use a slightly larger connector in order to incorporate all of the contacts.
- If the signals and power are separate, the amount of space they take up would increase. However, this may be required for the general layout of the application or if the applications function causes them to be separate.
Mounting type
Another consideration for your project would be how you would like or need each connector to mount. Types of mounting can include the below, to name a few, and example links.
- PCB pin through hole - Where the terminating leads of the connector are used to mount/fasten the item to the circuit board through holes placed in the board.
- PCB surface mounting - Where the terminating leads of the connector are used to mount/fasten the item to the circuit board is it placed on to contact pad on the surface of the board.
- Panel mounting - Where a hole has been made in a surface or panel and the connector is placed either through or against the hole. Fastening can vary from a thread and nut to the connector held in place as a result of it being mounted to a board behind the panel.
- Free hanging/cable mounting - The connector mounts/is installed onto the cable it is terminated to.
- Board/card edge/cutout mounting - For card edge the terminations are near an edge of a board, in many cases the connector is modified in order to take advantage of it being on the edge. For board cutout, they are similar as they are near the edge of the board. However, a portion of the board has been cutout in order for the connector to have a lower profile. In both cases the lower overall board profile that can result is what is being utilized. Additionally, it can also be done because no other space is available on the board or because of other design needs.
- Through board - Similar to cutout mounting. However, these are not typically seen next to the edge of the board. They are also similar to panel mounting connectors as they mount through a hole cut in the board. Some terminate through holes in the board and solder on the same side as the connector mates while others surface mount to the side of the board the connectors mount from (opposite from the side the connector mates). The below would be examples of this item type:
Mounting method
The terms mounting and termination have been known to be used interchangeably, however one would need to keep in mind that is not always the case and that there can be a distinction. Mounting indicates how the overall project and the connector as a whole interface/fasten/attach. Termination indicates how the electrical connections are being made. Through-hole mounting and surface mounting in most cases indicate items that would mount and terminate in a particular way (see Termination Method below for more). As an example of a mounting, mating, and termination combination that could happen would be:
- Connector 1 is
- panel mounted
- terminates to the board using right angled surface mounted contacts
- Connector 2 mating to connector 1 is
- a free hanging connector
- screw terminations
Termination method
What termination method is needed on either end or connection? This can be a preference if there is no predefined need to have a specific type. However, some applications may need a particular type of termination.
- Soldering/solder termination - For connectors, this termination method should work fine for a wide range of applications. However, if the application is going in high temperature areas, one may need to consider more mechanical means of termination. Soldering can be for wire termination as well as for board terminated connections. As such, this type of termination includes a variety of ways an item can be soldered. Through hole soldering and surface mount, as indicated above, describes a mounting and termination type.

Figure 1: Typical connector solder terminations.
- Through hole soldering - On the termination side of the connector there are leads designed to go through holes in a board that have been prepared and usually have copper pads on the other surface of the board from the through-hole connector. Once placed they are soldered in place.

Figure 2: This board-to-board/board-to-cable connector is meant to be through-hole soldered to a PCB.
- Surface mount termination - The leads of the item and the mounting pads are on the same side of the PCB. The item is either placed by hand and soldered in place or a re-flow or wave-soldering methods are used to solder it in place. Note that some board/card edge connector types are also surface mount types.

Figure 3: This board-to-board/board-to-cable connector is meant to be surface mount soldered to a PCB.
- Crimping - This type of termination has been known to be quite rugged and reliable and would be used or terminating wires. However, that is predicated on the quality of the crimp itself and correct installation in to the contact housing. To achieve a quality crimp and overall connection, one would need to be sure that the correct contacts for the housing are used as well as the correct crimping tools. For these contacts, tooling is an important step. If the end quality is not a concern, then it may be possible that other tools that you may have already or lower cost options could be utilized. However, if it is or could be, then the tools recommended by the manufacturer would need to be used as well as the appropriate preparation steps for the wire and any quality of crimp data that the manufacturer provides for post crimp inspection (note - not all need to be checked, just a sample for verification). If the tooling and correct procedures are not used and a failure does occur in the connection, most if not all manufacturers of such connectors will not provide support or warranty.

Figure 4: An example contact that is crimped on to stripped wire leads.
- Push-in/poke-in -
- This type can be either a permanent termination or one that can be released. This type also is known to have fairly good reliability and ruggedness. However, if they are being used in a high vibration environment, review of the item’s vibration ratings is recommended.
- Terminating to these types typically only requires the wire to be stripped, then either just pushed into the connector or a lever be actuated to an unlocked state and the wire inserted and the lever moved to a locked state.
- For the variations that would allow the release of the wire, these either would have a mechanism built in or need something like a flat blade screw driver pressed into a slot in the housing.

Figure 5: This board mounting connector has stripped wires terminated to it by pushing it in to the lower opening. A tool can be used in this case to release the wire if needed.

Figure 6: This free hanging item would have stripped wires terminated to it by pushing/poking the wire into one of the ends. For this particular item the wire can be released through a twist and pull action.
- Screw terminals - These are used in a variety of connector types and can be used in a few different ways. The following items are examples of the different types of screw termination terminals:
- 281-2879-ND | 609-4193-ND | 732-2759-ND | 281-3218-ND | 609-3832-ND | WM7477-ND | 732-10091-ND | ED2947-ND | 1776293-3-ND | WM5751-ND | WM5761-ND

Figure 7: These are some examples of connectors that uses screws to terminate the wires.
- Wire wrap
- Examples include CWN-370-50-0000. This type of connector can be used in a wire wrap application.
- The CWN-370-50-0000 is designed to first mount to a PCB, be soldered in place and then wire wrapped
- These connectors are not necessarily used in a product that is going to be put in to large scale production. They are used in High frequency end products and low production count prototypes
- The following link shows information regarding wire wrapping practices.

Figure 8: These are examples of items that use a wire wrapping method in order to terminate wires to them.
- Press fit - Can be a solderless termination type of termination. As a result, this can assist in reducing the overall cost of a project. Note they are mostly designed to not be used with solder. However, if for some reason you need to solder such an item, know that doing so can affect the part and the manufacturer may not be able to support any issues that arise. Discretion and testing is advised when choosing to solder these items. Also for this termination type there is tooling that would be usable in insuring an even insertion and full seating of the item. It is recommended to use the tooling the manufacturer lists. If they don’t list tooling, then contacting them directly may be required as they may need to speak with you regarding your application needs. DigiKey’s Press-Fit Technology brief is a great reference for this technology type.

Figure 9: These are examples of items that would terminate to holes placed in the board they mounted to, both through hole and pressed fit style.
Environmental considerations
If the application is in a fairly sedate environment and it is not expected to see anything extreme, then nearly any connector would work for the specific needs defined. However as one makes projects for more hostile environments - things like vibration, kinetic shock, shielding, environmental ingress, oils, solvents, or any variety of chemicals and corrosion that the connector in question may be exposed to - one would need to be kept these in mind during the selection process.
- Vibration and kinetic shock
- For connections that are inside an enclosure, one can select items that have extra features like mounting boss and additional larger solder pads/pins. Omron’s XH5 product brief shows some options that happen to include both of those types. Starting on page 3 there are drawings of the item and the mounting pattern that would be used for each item in order to take advantage of the mounting features.
- For connections that are passing into/out of the enclosure, there can be a fair number of possible choices that could be selected for any particular type of connector.
- Review the specifications for the connectors that are being considered to see if they were tested and rated for the level of shock and vibration that you would be expecting for the project to experience.
- Shielding
- Shielding is used when ambient magnetic noise is a concern or can periodically cause issues.
- For connectors where shielding is employed, one would need to make considerations on if only a specific part would have the shielding or if the (in the case of cables) whole path would need to have a unified shield. Take Ethernet cables for example. If the environment is fairly tame, then some basic Ethernet cabling and 8 position modular connectors could be used. However, as the ambient magnetic noise increases, the usage of shielded modular connectors and Ethernet cable would need to be considered/implemented.
- Wurth Electronik’s Effective EMI shielding concepts application note is a good reference to consult for information on shielding issues.
- For oils, solvents, or any variety of chemicals and corrosion you may not find options that would fit the other specifications and then also have ratings for environments that include them. In some cases, conversing with the manufacturer on getting a variation of an item that would also be able to handle such an environment may be needed if it is not already rated to do so.
- Below is some information regarding such environmental hazards:
- Does the connector need to have ingress protection?
- Ingress protection ratings indicate how well an item can prevent solids/dust and moisture/water from entering into an area that is being protected. If this is a concern it should be considered throughout the process of selecting a connector. It would be used to filter out all of the other options that don’t match the ingress requirements.
- Ingress protection format IPX1X2YZ
- IP = Ingress protection
- X1
- 0 - No special protection
- 1 - Protected against solid objects over 50 mm, e.g. accidental touch by persons hands
- 2 - Protected against solid objects over 12 mm, e.g. persons fingers
- 3 - Protected against solid objects over 2.5 mm (tools and wires)
- 4 - Protected against solid objects over 1 mm (tools, wires, and small wires)
- 5 - Protected against dust, limited ingress (no harmful deposit)
- 6 - Totally protected against dust
- X2
- 0 - No protection
- 1 - Protection against vertically falling drops of water, e.g. condensation
- 2 - Protection against direct sprays of water up to 15° from the vertical
- 3 - Protected against direct sprays of water up to 60° from the vertical
- 4 - Protection against water sprayed from all directions - limited ingress permitted
- 5 - Protected against low pressure jets of water from all directions - limited ingress
- 6 - Protected against temporary flooding of water, e.g. for use on ship decks - limited ingress permitted
- 7 - Protected against the effect of immersion between 15 cm and 1 m
- 8 - Protects against long periods of immersion under pressure
- Y and Z
- Not always used
- Can be used to call out multiple specifications. The below information was found that can assist in defining Y and Z
- Here is what I received from Switchcraft’s Engineering Team - “The IP code is defined in IEC 60529. I have included a snapshot below of the basic information.” (Figure 10)

Figure 10: The IP code as defined in the IEC 60529. (Image source: Switchcraft)
- There are other specifications that may expand on the optional digits. DIN 40 050 adds a “K” option for the electrical equipment in road vehicles. As an example IP69K represents a dust tight (6) enclosure protected against high pressure/steam jet cleaning (9K).
- Reference the below links for further information regarding the specifications:
- Omron’s Ingress Protection (IP) Rating
- Wikipedia’s IP Code
- The Engineering Toolbox’s IP – Ingress Protection Rating
Current and voltage ratings
- What current rating is needed?
- When selecting a connector, you will need to pick an option that would be able to handle the expected maximum current that could end up being applied to the connector.
- It is recommended to select an option that can handle more current than required, if at all possible, to give head room for any unexpected over currents that may be seen.
- Some connectors don’t list current in the documentation. If that is the case:
- For board mounted items, try to find a cable mounted mate. The wire gauge of that item can be used to find the current rating.
- Refer to the this link to see the AWGàcurrent rating conversion:
http://www.powerstream.com/Wire_Size.htm.
- What voltage rating does it need to handle?
- When selecting a connector, you would need to pick an option that would be able to handle the expected maximum voltage that could end up being applied to the connector.
- It is recommended to select an option that can handle more voltage, if at all possible, to give head room for any unexpected over voltages that may be seen.
- If the specific item you are looking at does not list the voltage -
- You can sometimes review other items with the same or very similar contact pitch and physical builds. Some of these could indicate the voltages that can be handled.
- If no data is available for the voltage ratings, then contact either the manufacturer of the item to see if they can provide that information or DigiKey’s applications engineering team to see if they can assist in locating that information.
Disclaimer: The opinions, beliefs, and viewpoints expressed by the various authors and/or forum participants on this website do not necessarily reflect the opinions, beliefs, and viewpoints of DigiKey or official policies of DigiKey.